Raspberry Jam Recipe for Canning | Sweet Homemade Jam Without Pectin
Meet your new favorite pantry staple: bright, ruby-red raspberry jam with just fruit, sugar, and lemon. No boxed pectin, no weird additives—just classic, old-school jam that sets beautifully and tastes like summer. If you can stir and simmer, you can make this. I’ll walk you through every step so your jars seal safely and your jam turns out luscious every time.
I make a batch whenever raspberries hit their stride, then can it so we can spoon sunshine over toast, swirl it into yogurt, and bake it into thumbprint cookies all year. You’ll get a firm-but-spreadable jam, a clean raspberry flavor, and a reliable set without fuss. Let’s make it happen.
Why This No-Pectin Raspberry Jam Method Works
Raspberries already contain natural pectin, especially when you use a mix of just-ripe and slightly underripe berries. Combine that with the right ratio of sugar and a splash of lemon juice, and you get a proper gel without adding commercial pectin.
- Ripe + slightly underripe berries give you balanced sweetness and natural pectin for setting.
- Sugar does triple duty: it sweetens, helps the jam gel, and preserves color and flavor.
- Lemon juice adds acid that helps pectin form a gel and keeps the flavor bright.
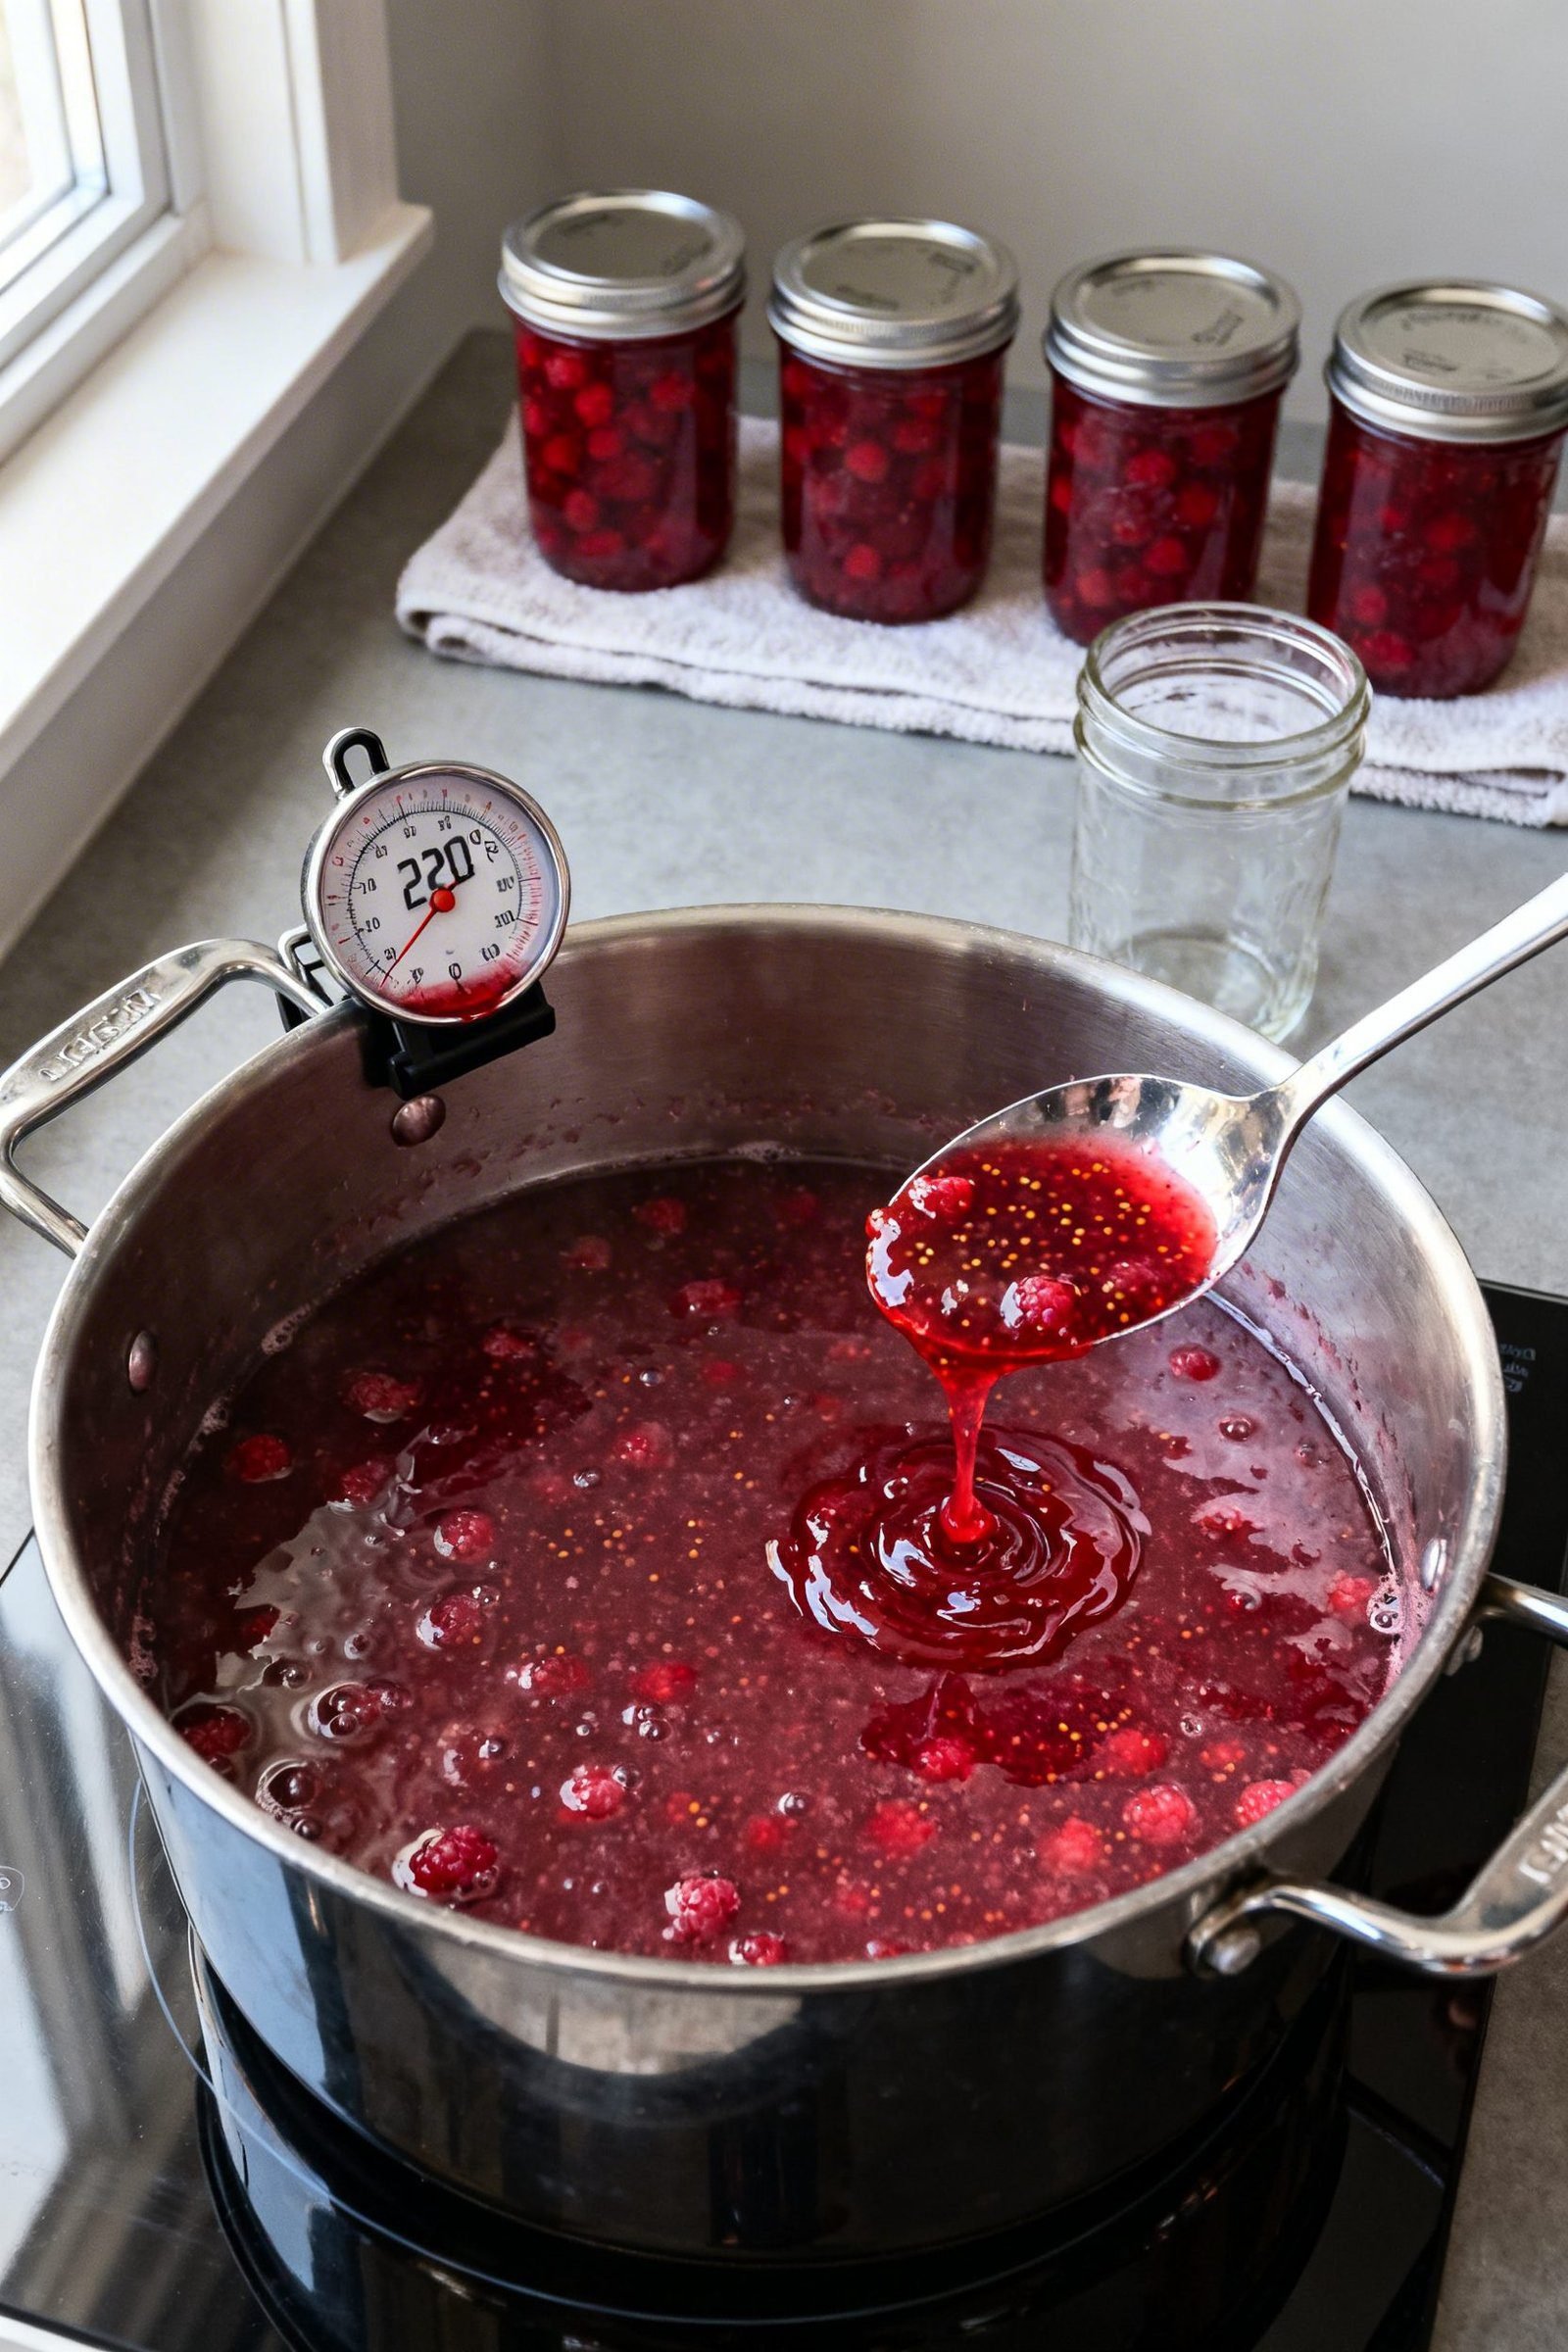
- Boil to 220°F (104°C) at sea level for a consistent set (adjust for altitude). A short, strong boil concentrates flavor without dulling the berry notes.
Ingredients You’ll Need
- 4 pounds (1.8 kg) fresh raspberries, rinsed and drained well
- 4 cups (800 g) granulated sugar (adjust to taste; see notes below)
- 1/4 cup (60 ml) fresh lemon juice (about 2 lemons)
- Optional: 1 teaspoon vanilla extract or 1 split vanilla bean for a mellow finish
Sweetness guide: For a tarter jam, use 3 to 3 1/2 cups sugar. For a classic, glossy set and longer shelf life, stick with 4 cups. Less sugar = softer set and shorter storage time.
How to Make No-Pectin Raspberry Jam for Canning
Before You Start
- Prep jars: Wash 6 to 7 half-pint (8 oz) canning jars, lids, and bands. Keep jars hot in simmering water or a 225°F (107°C) oven. Warm lids in hot water, not boiling.
- Set up a water-bath canner: A deep pot with a rack works. Fill with enough water to cover jars by 1 to 2 inches. Bring to a gentle simmer while you make the jam.
- Tools: Large wide pot, potato masher, long-handled spoon, thermometer, ladle, jar funnel, bubble remover, clean damp towel, and jar lifter.
Cook the Jam
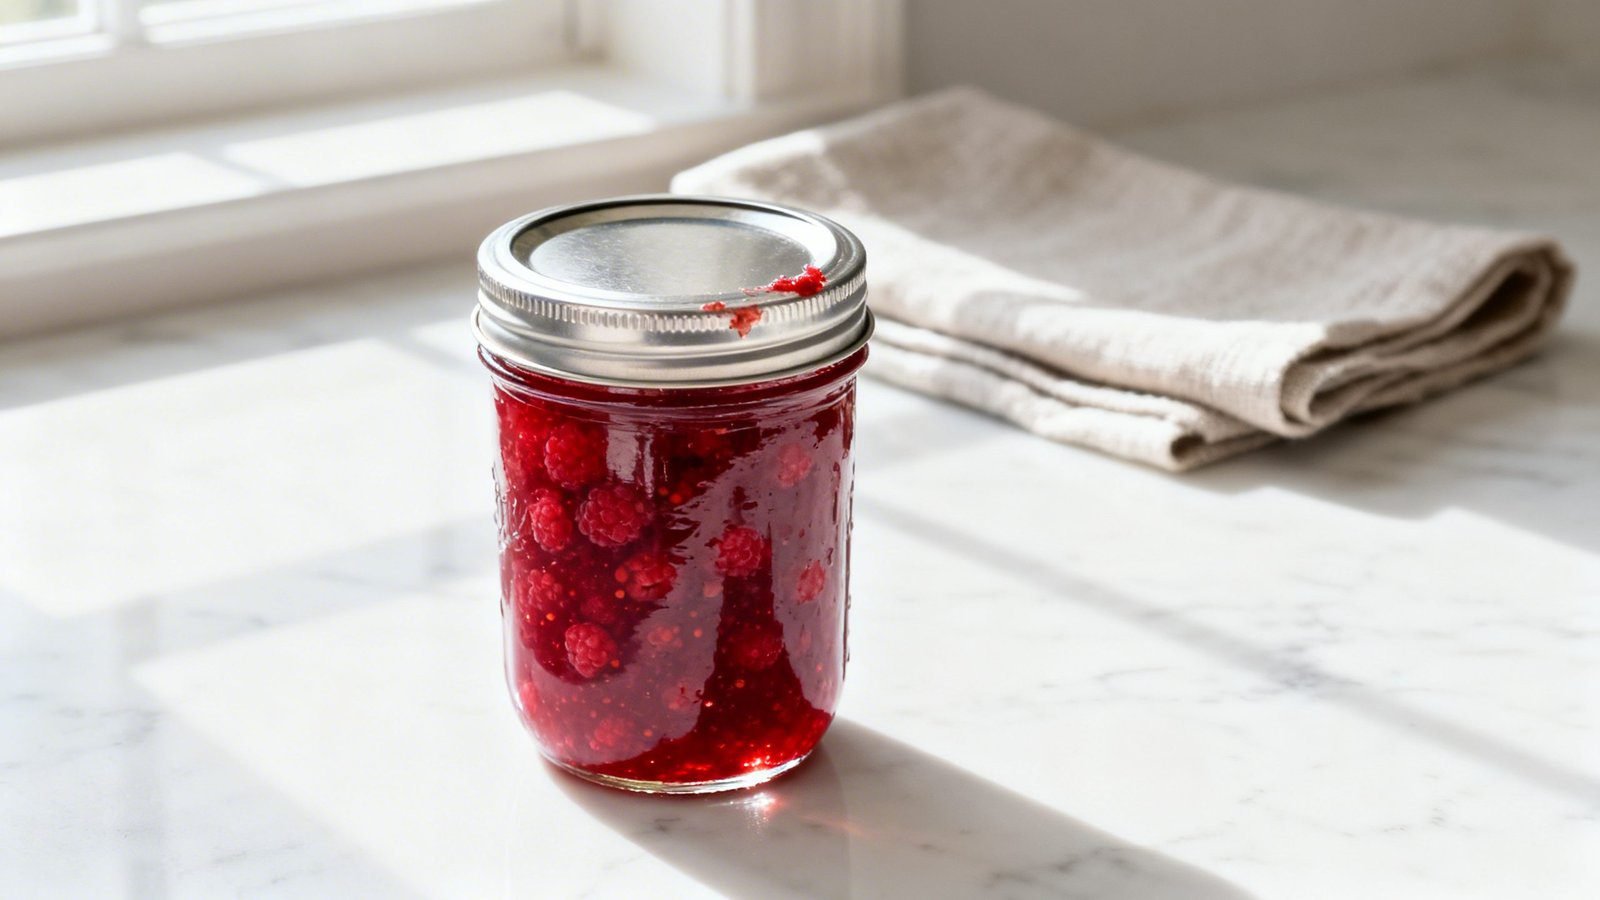
- Mash berries: Add raspberries to a wide, heavy pot. Lightly mash with a masher to release juices. You want a chunky texture, not a puree.
- Warm with sugar: Stir in sugar and lemon juice. Let sit 5 minutes to dissolve some sugar and reduce foaming.
- Bring to a boil: Turn heat to medium-high and stir constantly until a rolling boil that can’t be stirred down forms.
- Cook to gel stage: Continue boiling, stirring often to prevent scorching. Skim foam if needed. Cook 10 to 18 minutes, until the jam reaches 220°F (104°C) at sea level or passes a wrinkle test on a cold plate. Add vanilla at the end if using.
- Check set: Place a spoonful on a chilled plate, wait 30 seconds, then push it with your finger. If it wrinkles and holds a line, it’s ready. If it runs, cook 2 to 3 minutes more and test again.
Fill and Process the Jars
- Ladle into hot jars: Use a funnel to fill jars, leaving 1/4 inch headspace.
- Remove bubbles: Slide a bubble remover or a clean butter knife along the sides. Adjust headspace as needed.
- Wipe rims: Use a damp towel to clean rims. Center lids and screw bands on until fingertip tight.
- Water-bath process: Lower jars into boiling water. Ensure 1 to 2 inches of water cover the jars. Process for 10 minutes (adjust for altitude; see notes below).
- Cool properly: Turn off heat, remove lid, and wait 5 minutes. Lift jars out and cool on a towel for 12 to 24 hours. Do not retighten bands.
- Check seals: Lids should be concave and not flex when pressed. Label and store sealed jars. Refrigerate any unsealed jars and use within 3 to 4 weeks.
Altitude Adjustments
- 1,001 to 3,000 ft: add 5 minutes (15 minutes total)
- 3,001 to 6,000 ft: add 10 minutes (20 minutes total)
- 6,001 to 8,000 ft: add 15 minutes (25 minutes total)
- 8,001 to 10,000 ft: add 20 minutes (30 minutes total)
Thermometer note: At higher altitudes, the gel point drops roughly 2°F for every 1,000 ft. Aim for that adjusted temp or rely on the plate test.
How to Store Your Canned Raspberry Jam
- Pantry storage: Keep sealed jars in a cool, dark place for up to 12 to 18 months. Heat and light fade color and flavor.
- After opening: Refrigerate and use within 3 to 4 weeks. Always use a clean spoon.
- Freezer option: Skip canning and freeze jam in freezer-safe containers for up to 6 months. Leave 1/2 inch headspace for expansion.
- Label clearly: Include date, batch size, and any flavor add-ins.
Why You’ll Love Making This Jam
- Ingredients you trust: Just berries, sugar, and lemon—pure fruit flavor shines.
- Dependable set: Natural pectin + proper cooking gives a classic, spoonable jam.
- Budget-friendly: Buy berries in season and preserve them at peak flavor.
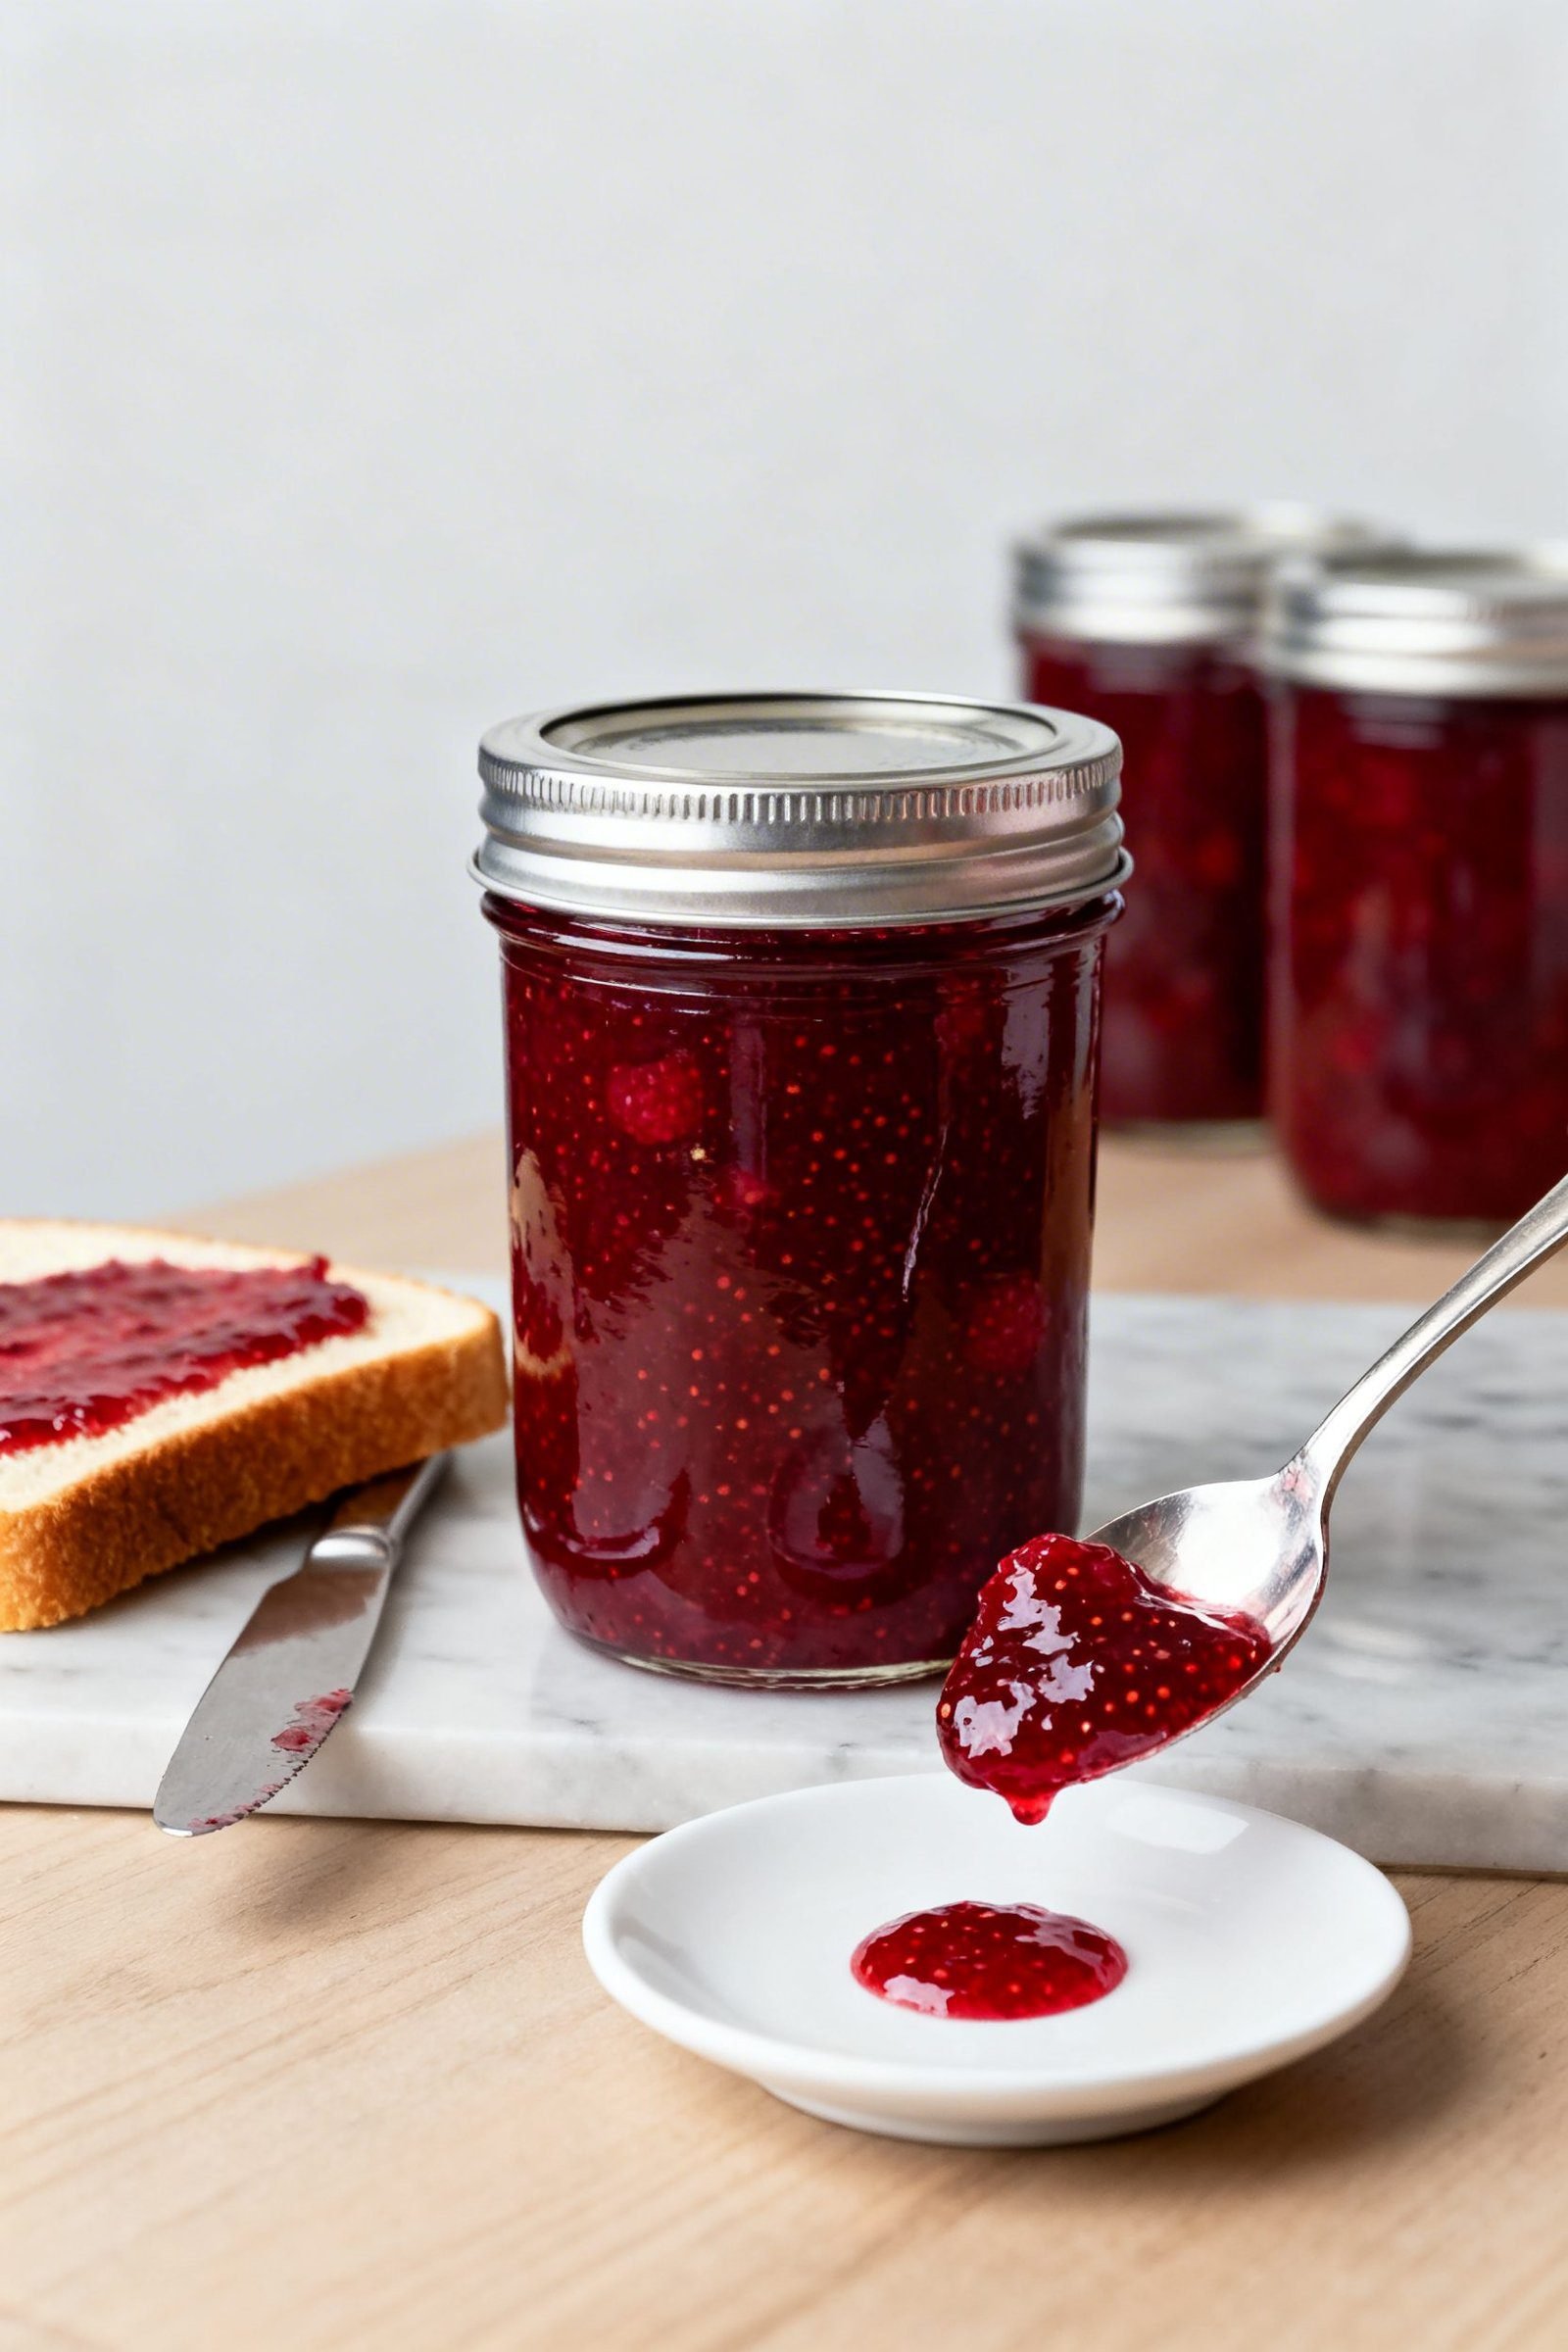
- Versatile: Spread on toast, fill cakes, swirl into oats, glaze pork chops, or shake into cocktails.
- Beginner-friendly canning: Water-bath canning is straightforward with big flavor payoff.
Mistakes to Avoid
- Skipping the wide pot: Surface area matters. A wide pot reduces faster and sets better.
- Under-measuring sugar: Too little sugar leads to a runny jam and shorter shelf life.
- Overcooking: Boiling past gel stage can darken color and give a chewy texture.
- Filling cold jars: Hot jam into cold glass risks thermal shock. Keep jars hot.
- Guessing the set: Use a thermometer and the plate test. Don’t wing it.
- Skipping acid: Lemon juice balances sweetness and helps the jam set. Don’t omit it.
Flavor Twists and Variations
- Seedless raspberry jam: Cook berries until soft, then press through a food mill or sieve before adding sugar.
- Lemon-raspberry: Add 1 tablespoon finely grated lemon zest with the sugar.
- Vanilla bean: Simmer jam with a split vanilla bean; remove before filling jars.
- Raspberry-rose: Stir in 1/2 to 1 teaspoon food-grade rosewater at the very end.
- Mixed berry: Swap up to half the raspberries with blackberries or strawberries. Keep total fruit weight the same.
- Lower sugar: Use 3 cups sugar and expect a softer set. Refrigerate after opening and use quickly.
FAQ
Can I use frozen raspberries?
Yes. Thaw completely and drain excess liquid to avoid a watery jam. Measure fruit after thawing.
My jam didn’t set. What now?
Give sealed jars 24 to 48 hours; jams often firm up. If still loose, you can open, reboil 3 to 5 minutes, and reprocess with new lids. Add 1 to 2 tablespoons lemon juice if flavor allows.
Do I need pectin?
No. With the right ratio and a strong boil to gel point, raspberries set without added pectin.
How much jam does this make?
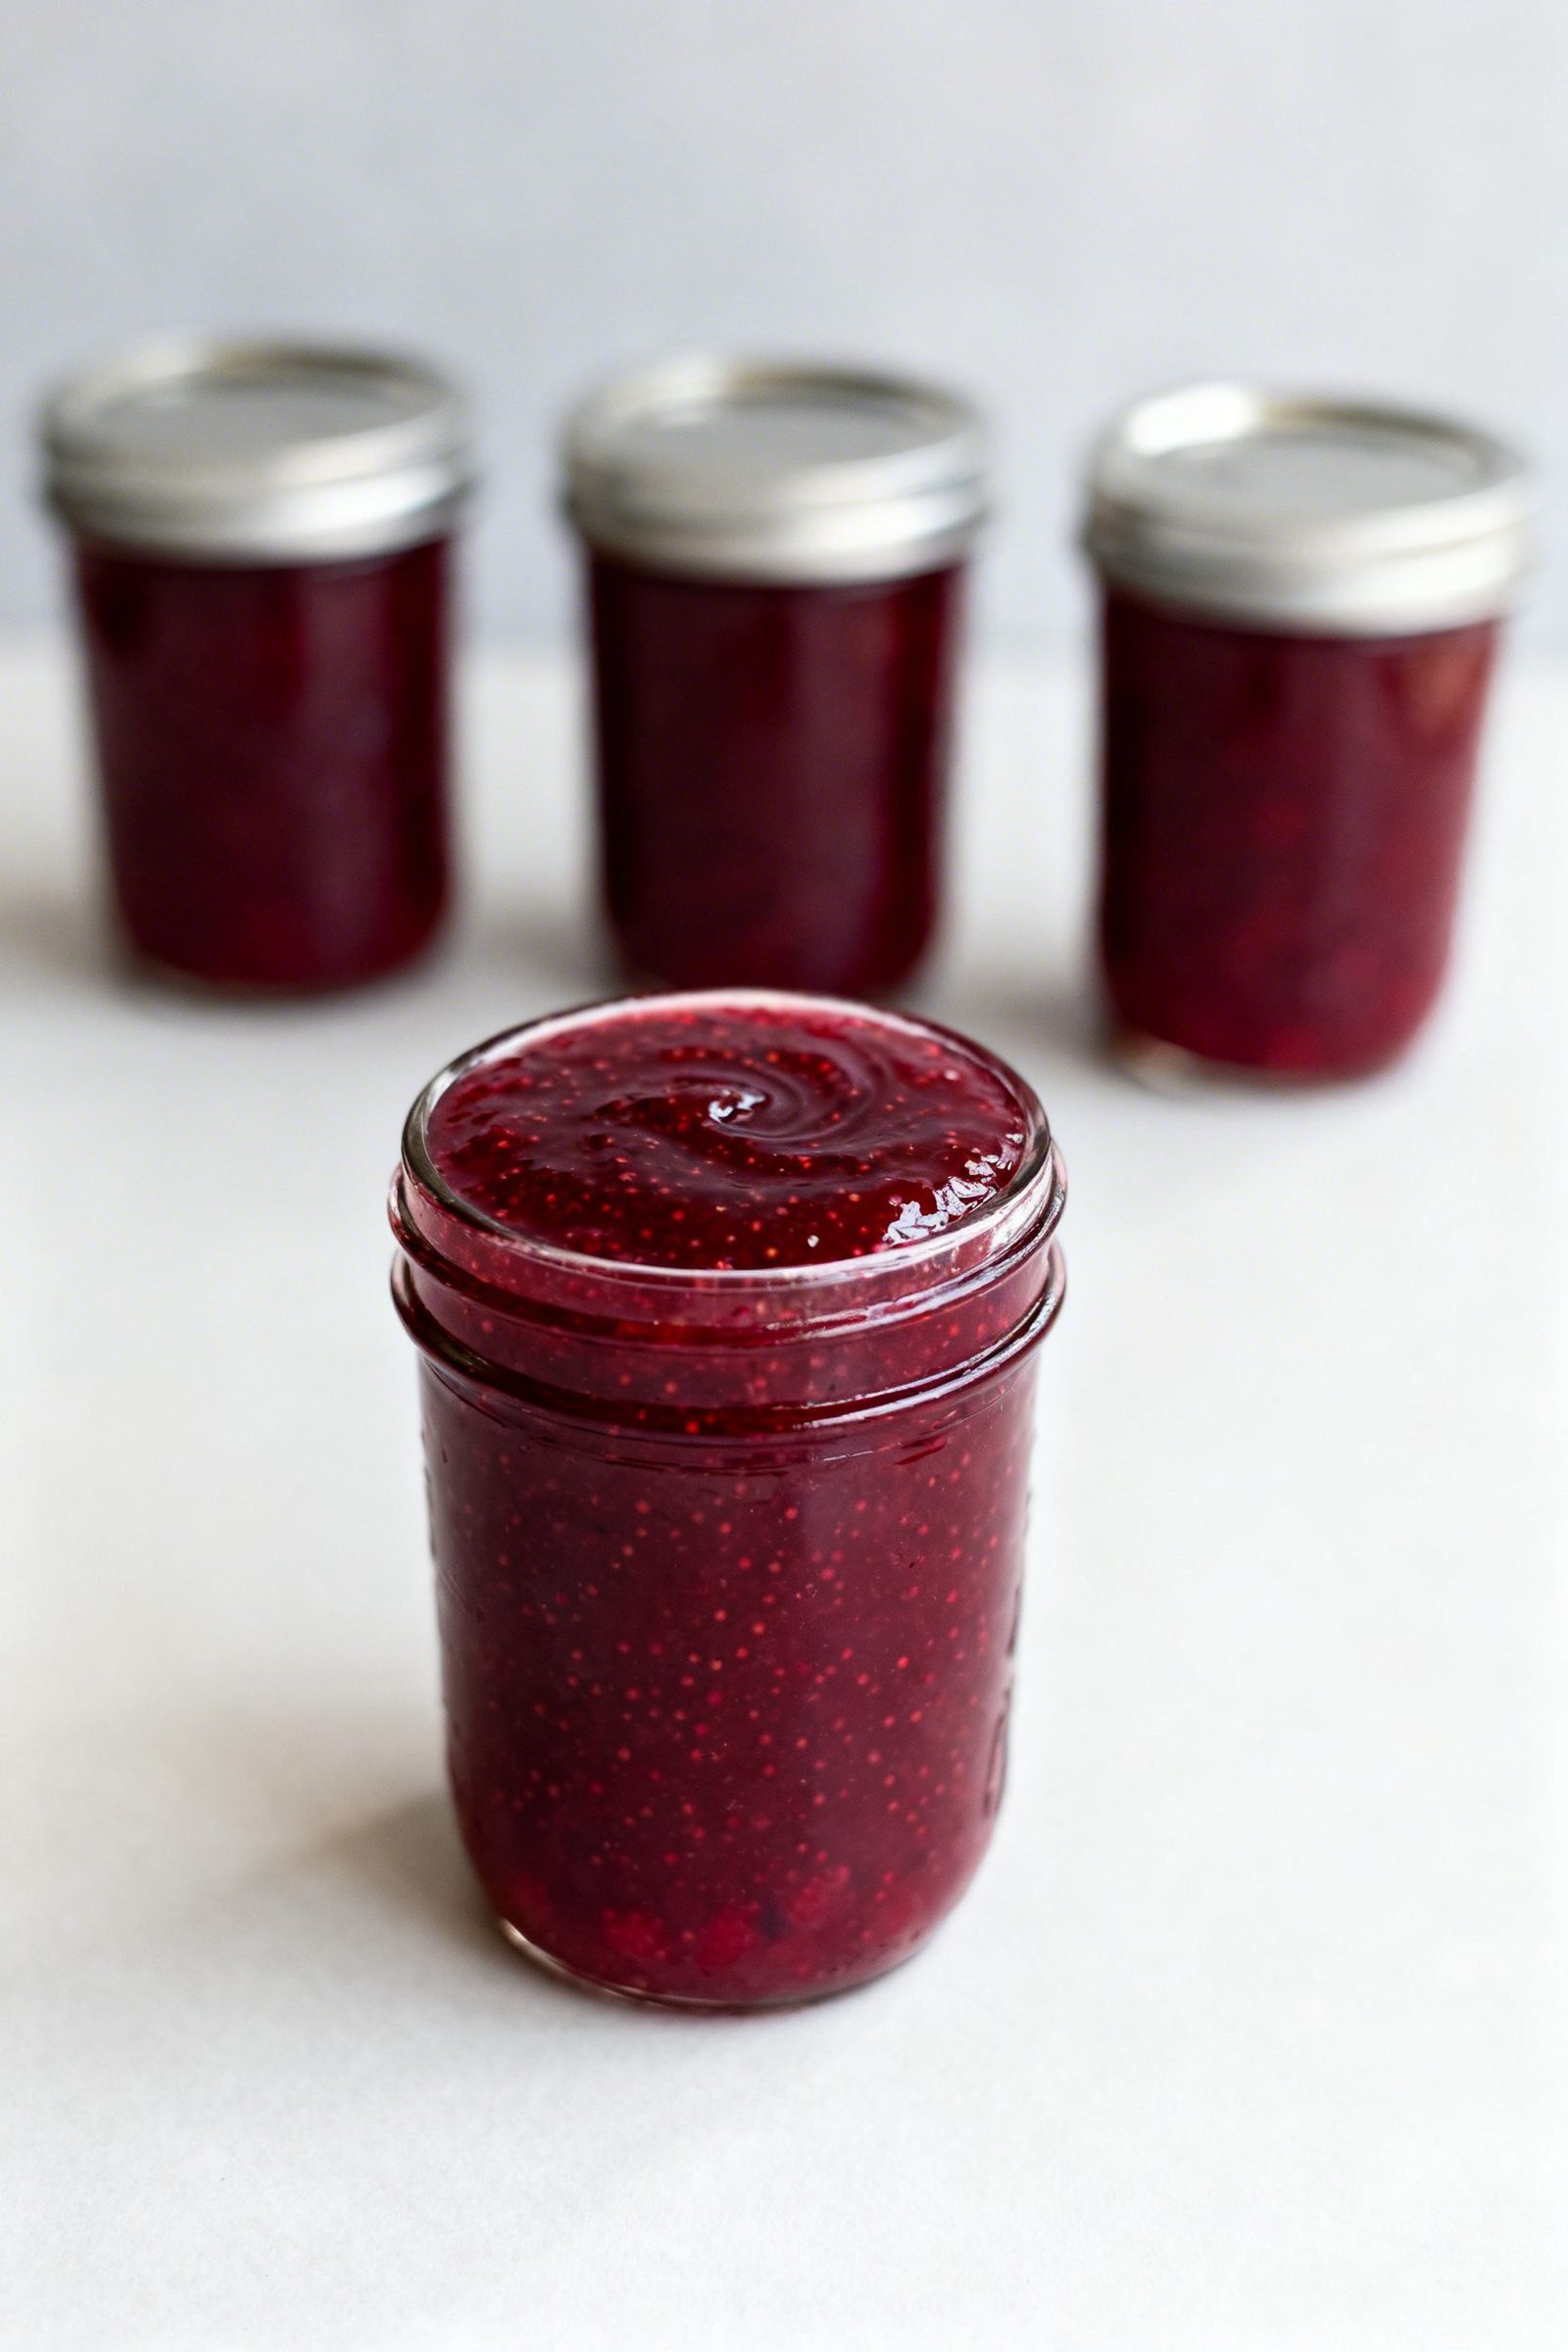
About 6 to 7 half-pint jars, depending on how much you cook it down.
How do I reduce seeds?
Strain some or all of the mashed berries through a fine sieve or food mill before cooking with sugar.
Can I cut the sugar?
Yes, to a point. Less sugar = softer set and shorter shelf life. For canning, don’t go below 3 cups for this batch size.
Is water-bath canning safe for this recipe?
Yes. Raspberry jam has high acidity and enough sugar. Follow the processing times and headspace guidelines.
Wrap-Up
You just learned how to make classic raspberry jam with everyday ingredients and a reliable canning method. Keep your pot wide, aim for gel stage, and let lemon and sugar do their magic. Stash a row of jewel-toned jars in the pantry and enjoy the sweet rewards in every season.
No-Pectin Raspberry Jam for Canning
Bright, ruby-red raspberry jam made with raspberries, sugar, and lemon, safely canned for a firm-but-spreadable set without added pectin.
Ingredients
- 4 pounds (1.8 kg) fresh raspberries, rinsed and drained
- 4 cups (800 g) granulated sugar (3 to 3 ½ cups for tarter, softer set)
- ¼ cup (60 ml) fresh lemon juice (about 2 lemons)
- Optional: 1 teaspoon vanilla extract or 1 split vanilla bean
Instructions
- Prep jars: Wash 6 to 7 half-pint jars, lids, and bands. Keep jars hot in simmering water or a 225°F (107°C) oven. Warm lids in hot water.
- Set up water-bath canner: Fill a deep pot with a rack; water should cover jars by 1 to 2 inches. Bring to a gentle simmer.
- Mash berries: Add raspberries to a wide, heavy pot and lightly mash to release juices.
- Combine: Stir in sugar and lemon juice; let sit 5 minutes to begin dissolving sugar.
- Boil: Cook over medium-high, stirring constantly, until a rolling boil that can’t be stirred down forms.
- Cook to gel: Boil 10 to 18 minutes, stirring often, skimming foam as needed, until the jam reaches 220°F (104°C) at sea level or passes a cold-plate wrinkle test. Stir in vanilla at the end if using.
- Test set: Place a spoonful on a chilled plate; after 30 seconds, push it. If it wrinkles and holds a line, it’s ready. If not, cook 2 to 3 minutes more and retest.
- Fill jars: Ladle hot jam into hot jars leaving ¼ inch headspace.
- Remove bubbles: Slide a bubble remover or clean knife along sides; adjust headspace as needed.
- Wipe rims and cap: Wipe rims with a damp towel. Center lids and apply bands until fingertip tight.
- Process: Lower jars into boiling water with 1 to 2 inches of water over tops. Process 10 minutes (adjust for altitude).
- Cool: Turn off heat, remove canner lid, wait 5 minutes, then lift jars out. Cool 12 to 24 hours on a towel; do not retighten bands.
- Check seals and store: Lids should be concave and not flex. Label and store sealed jars in a cool, dark place. Refrigerate unsealed jars and use within 3 to 4 weeks.