Original Rice Krispie Treats Recipe | Classic Crispy Marshmallow Bars
If you’re craving a nostalgic, no-bake treat that always delivers, you can’t beat original Rice Krispie Treats. These classic crispy marshmallow bars mix gooey, buttery sweetness with light, crunchy cereal for the perfect bite. They come together in minutes, set quickly, and disappear even faster.
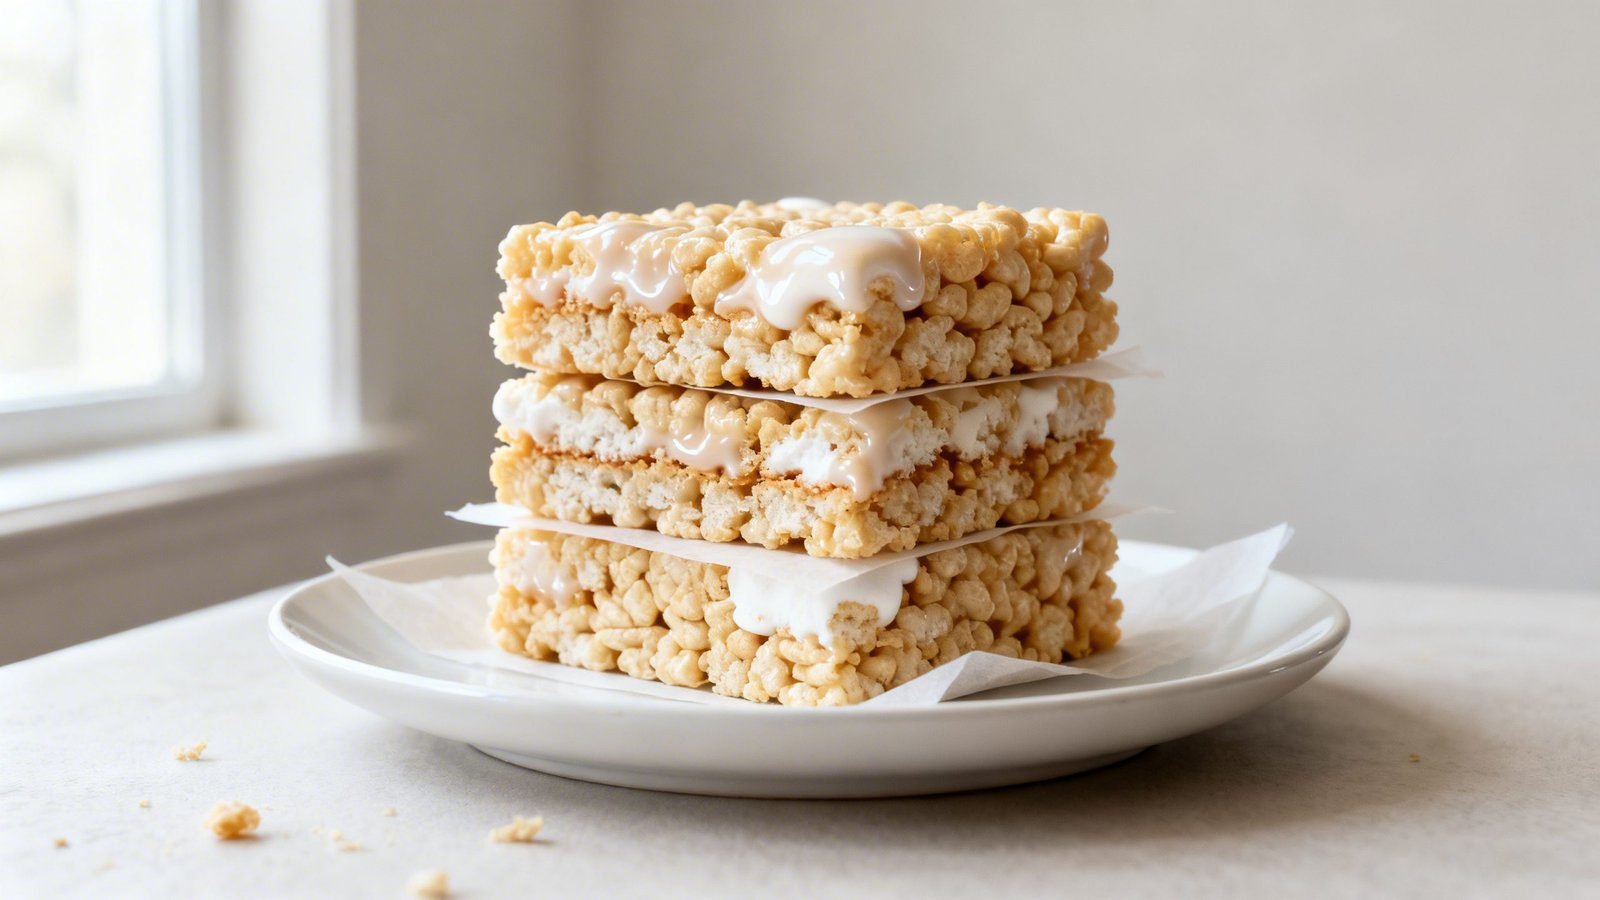
I’ve made countless batches for bake sales, birthday parties, and “just because” moments. This version nails that ideal balance: soft and chewy in the center, with defined crispy texture and clean slices. I’ll show you simple tricks to avoid hard, dry bars and get consistent, bakery-level squares every time.
Why This Classic Crispy Marshmallow Bar Recipe Works
- Low heat = soft texture: Gentle heat melts marshmallows smoothly, which keeps the bars chewy instead of tough.
- Extra marshmallows for pillowy bites: A slightly higher marshmallow-to-cereal ratio creates that irresistible pull-apart goo.
- Butter adds flavor, not just moisture: A touch more butter rounds out sweetness and helps the bars slice cleanly.
- Salt and vanilla balance sweetness: One pinch and a splash perk up every bite and keep the flavor from tasting flat.
- Right pan size ensures perfect thickness: Spreading in an 8×8 or 9×9 pan gives the iconic height you want.
Ingredients
- 6 cups crispy rice cereal (Rice Krispies or any crisp rice cereal)
- 10 ounces mini marshmallows (about 6 heaping cups), plus 1 cup extra for folding in
- 6 tablespoons unsalted butter
- 1 teaspoon pure vanilla extract
- 1/4 teaspoon fine sea salt (use 1/2 teaspoon if using unsalted cereal and you love salty-sweet)
- Neutral oil or nonstick spray for the pan and spatula
Ingredient notes:
- Mini marshmallows melt evenly and make mixing easier. Fresh, soft marshmallows work best.
- Unsalted butter lets you control salt. If you only have salted, reduce added salt slightly.
- Vanilla adds bakery-style aroma and deeper flavor. Don’t skip it.
How to Make Classic Rice Krispie Treats
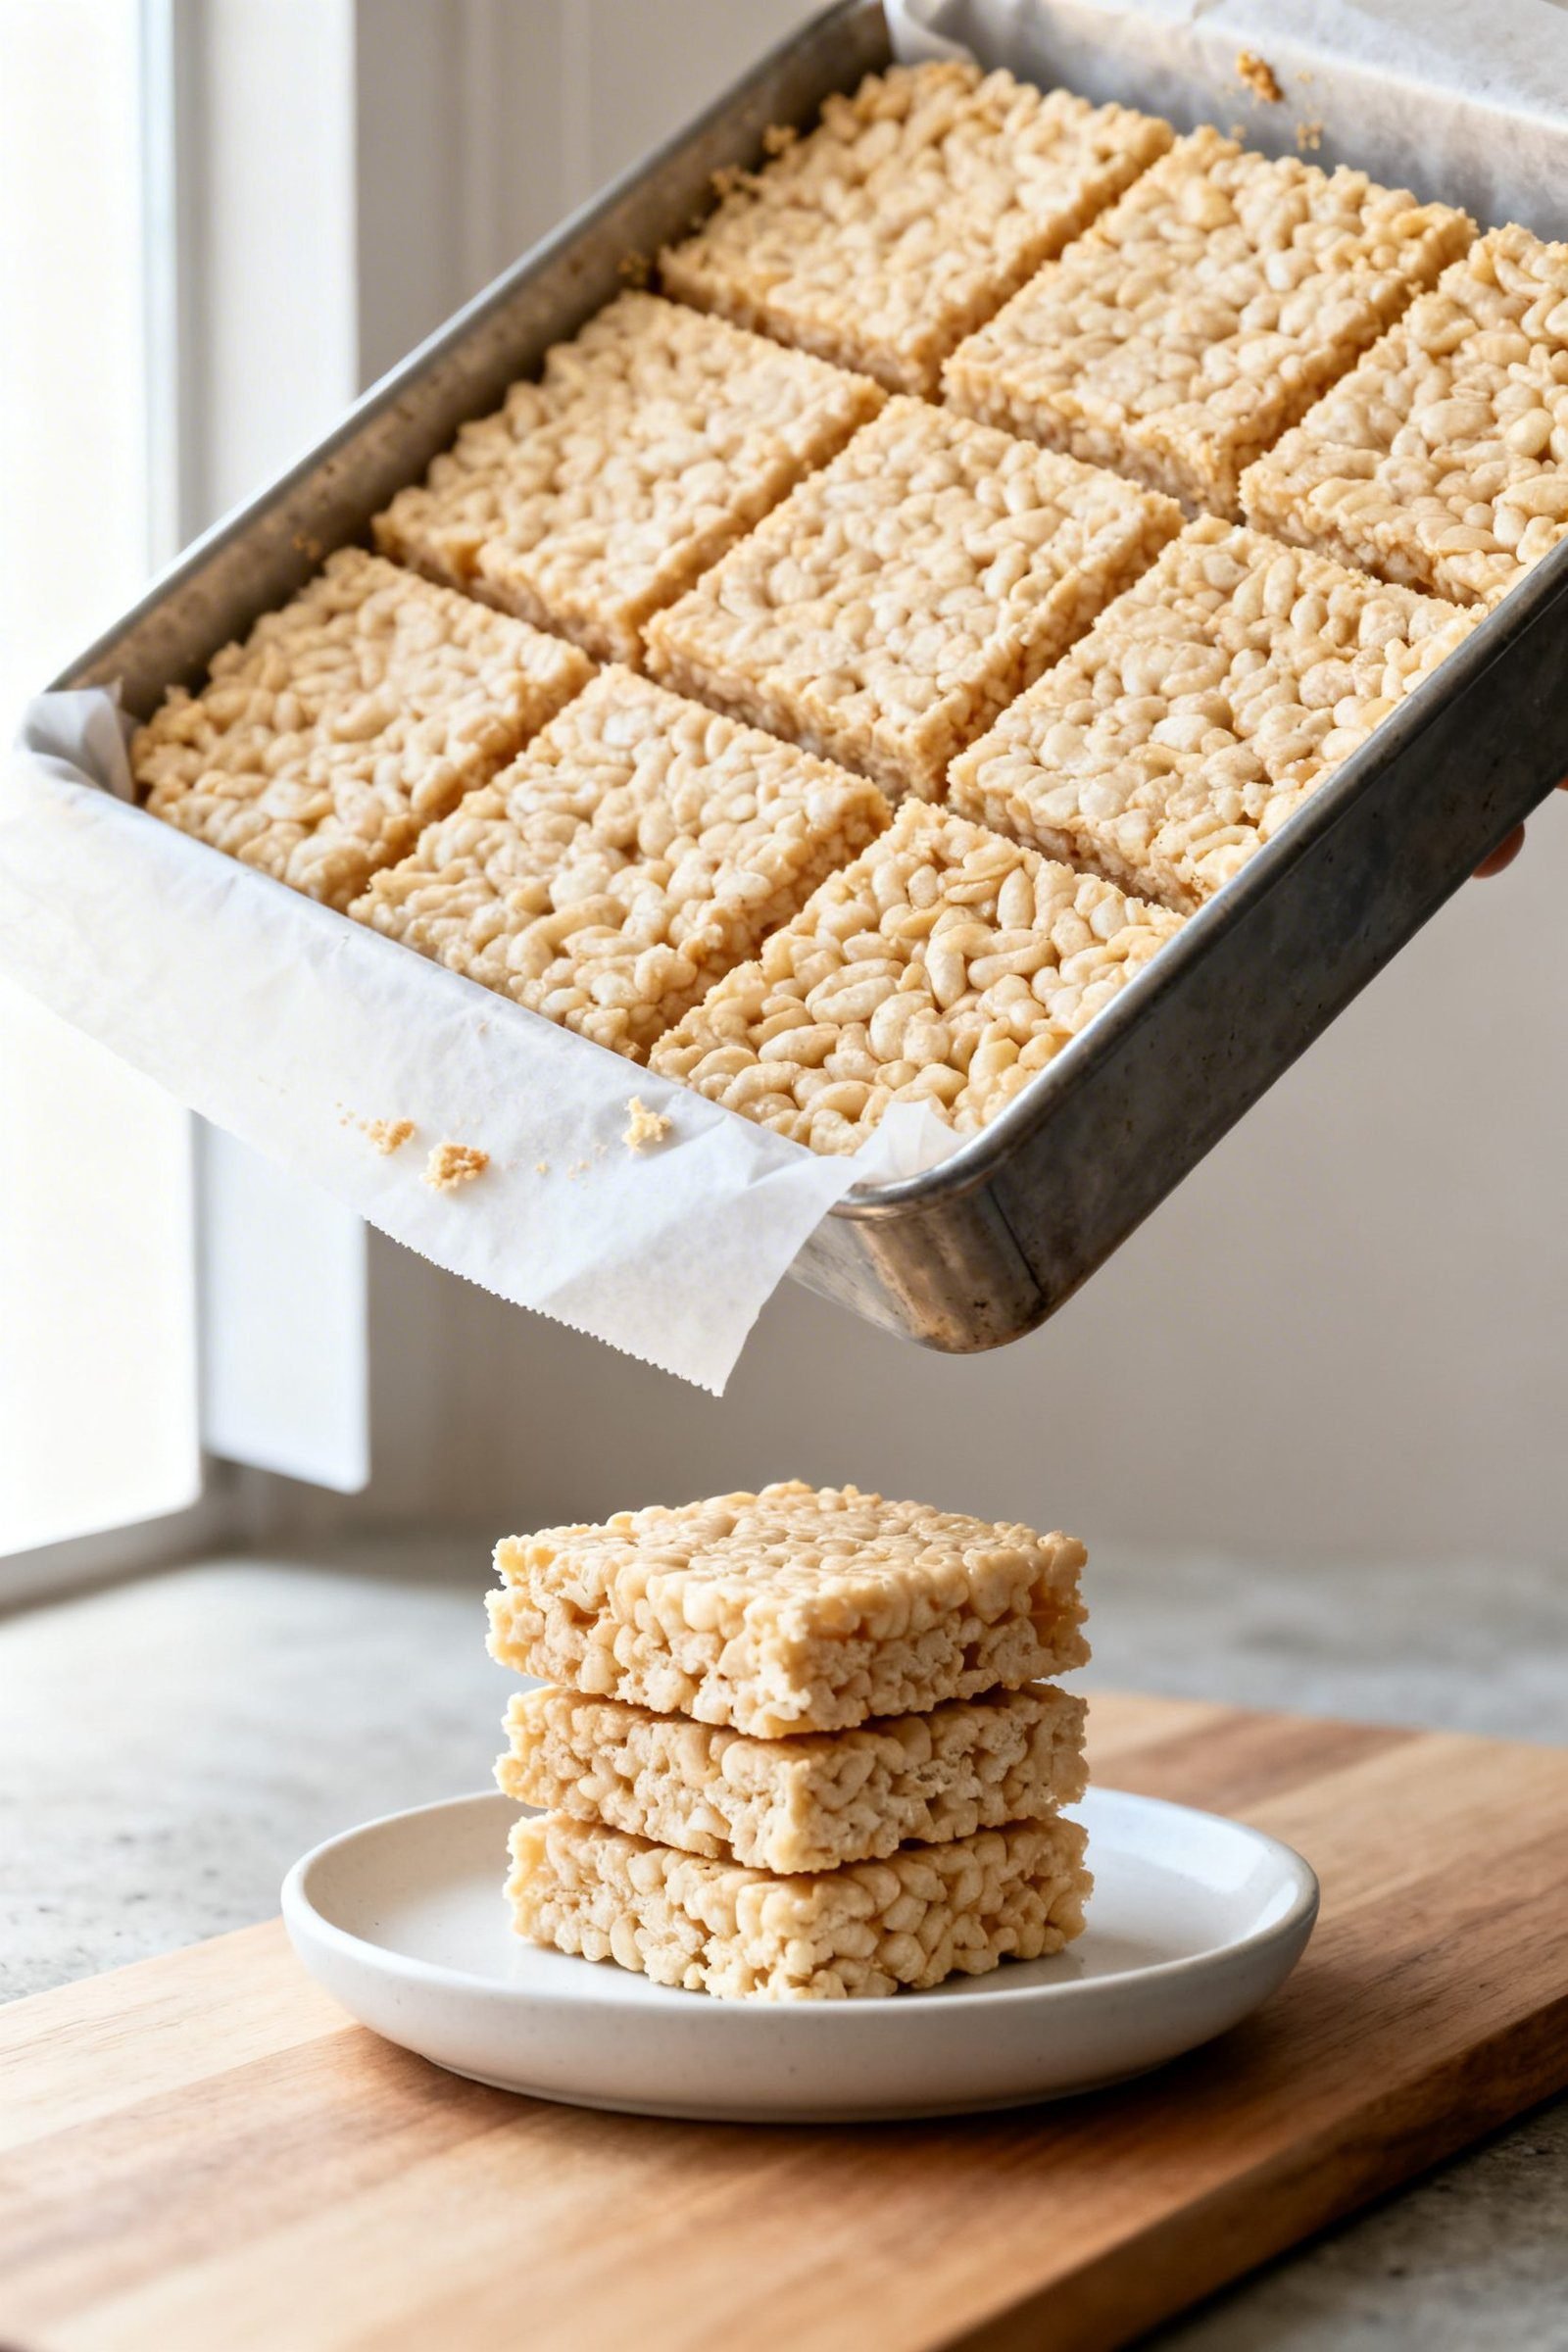
- Prep the pan: Lightly grease an 8×8 or 9×9-inch baking pan with oil or spray. Line with a parchment sling for easy removal and grease the parchment too.
- Measure first: Pour the cereal into a large mixing bowl. Set aside 1 cup mini marshmallows for folding in at the end.
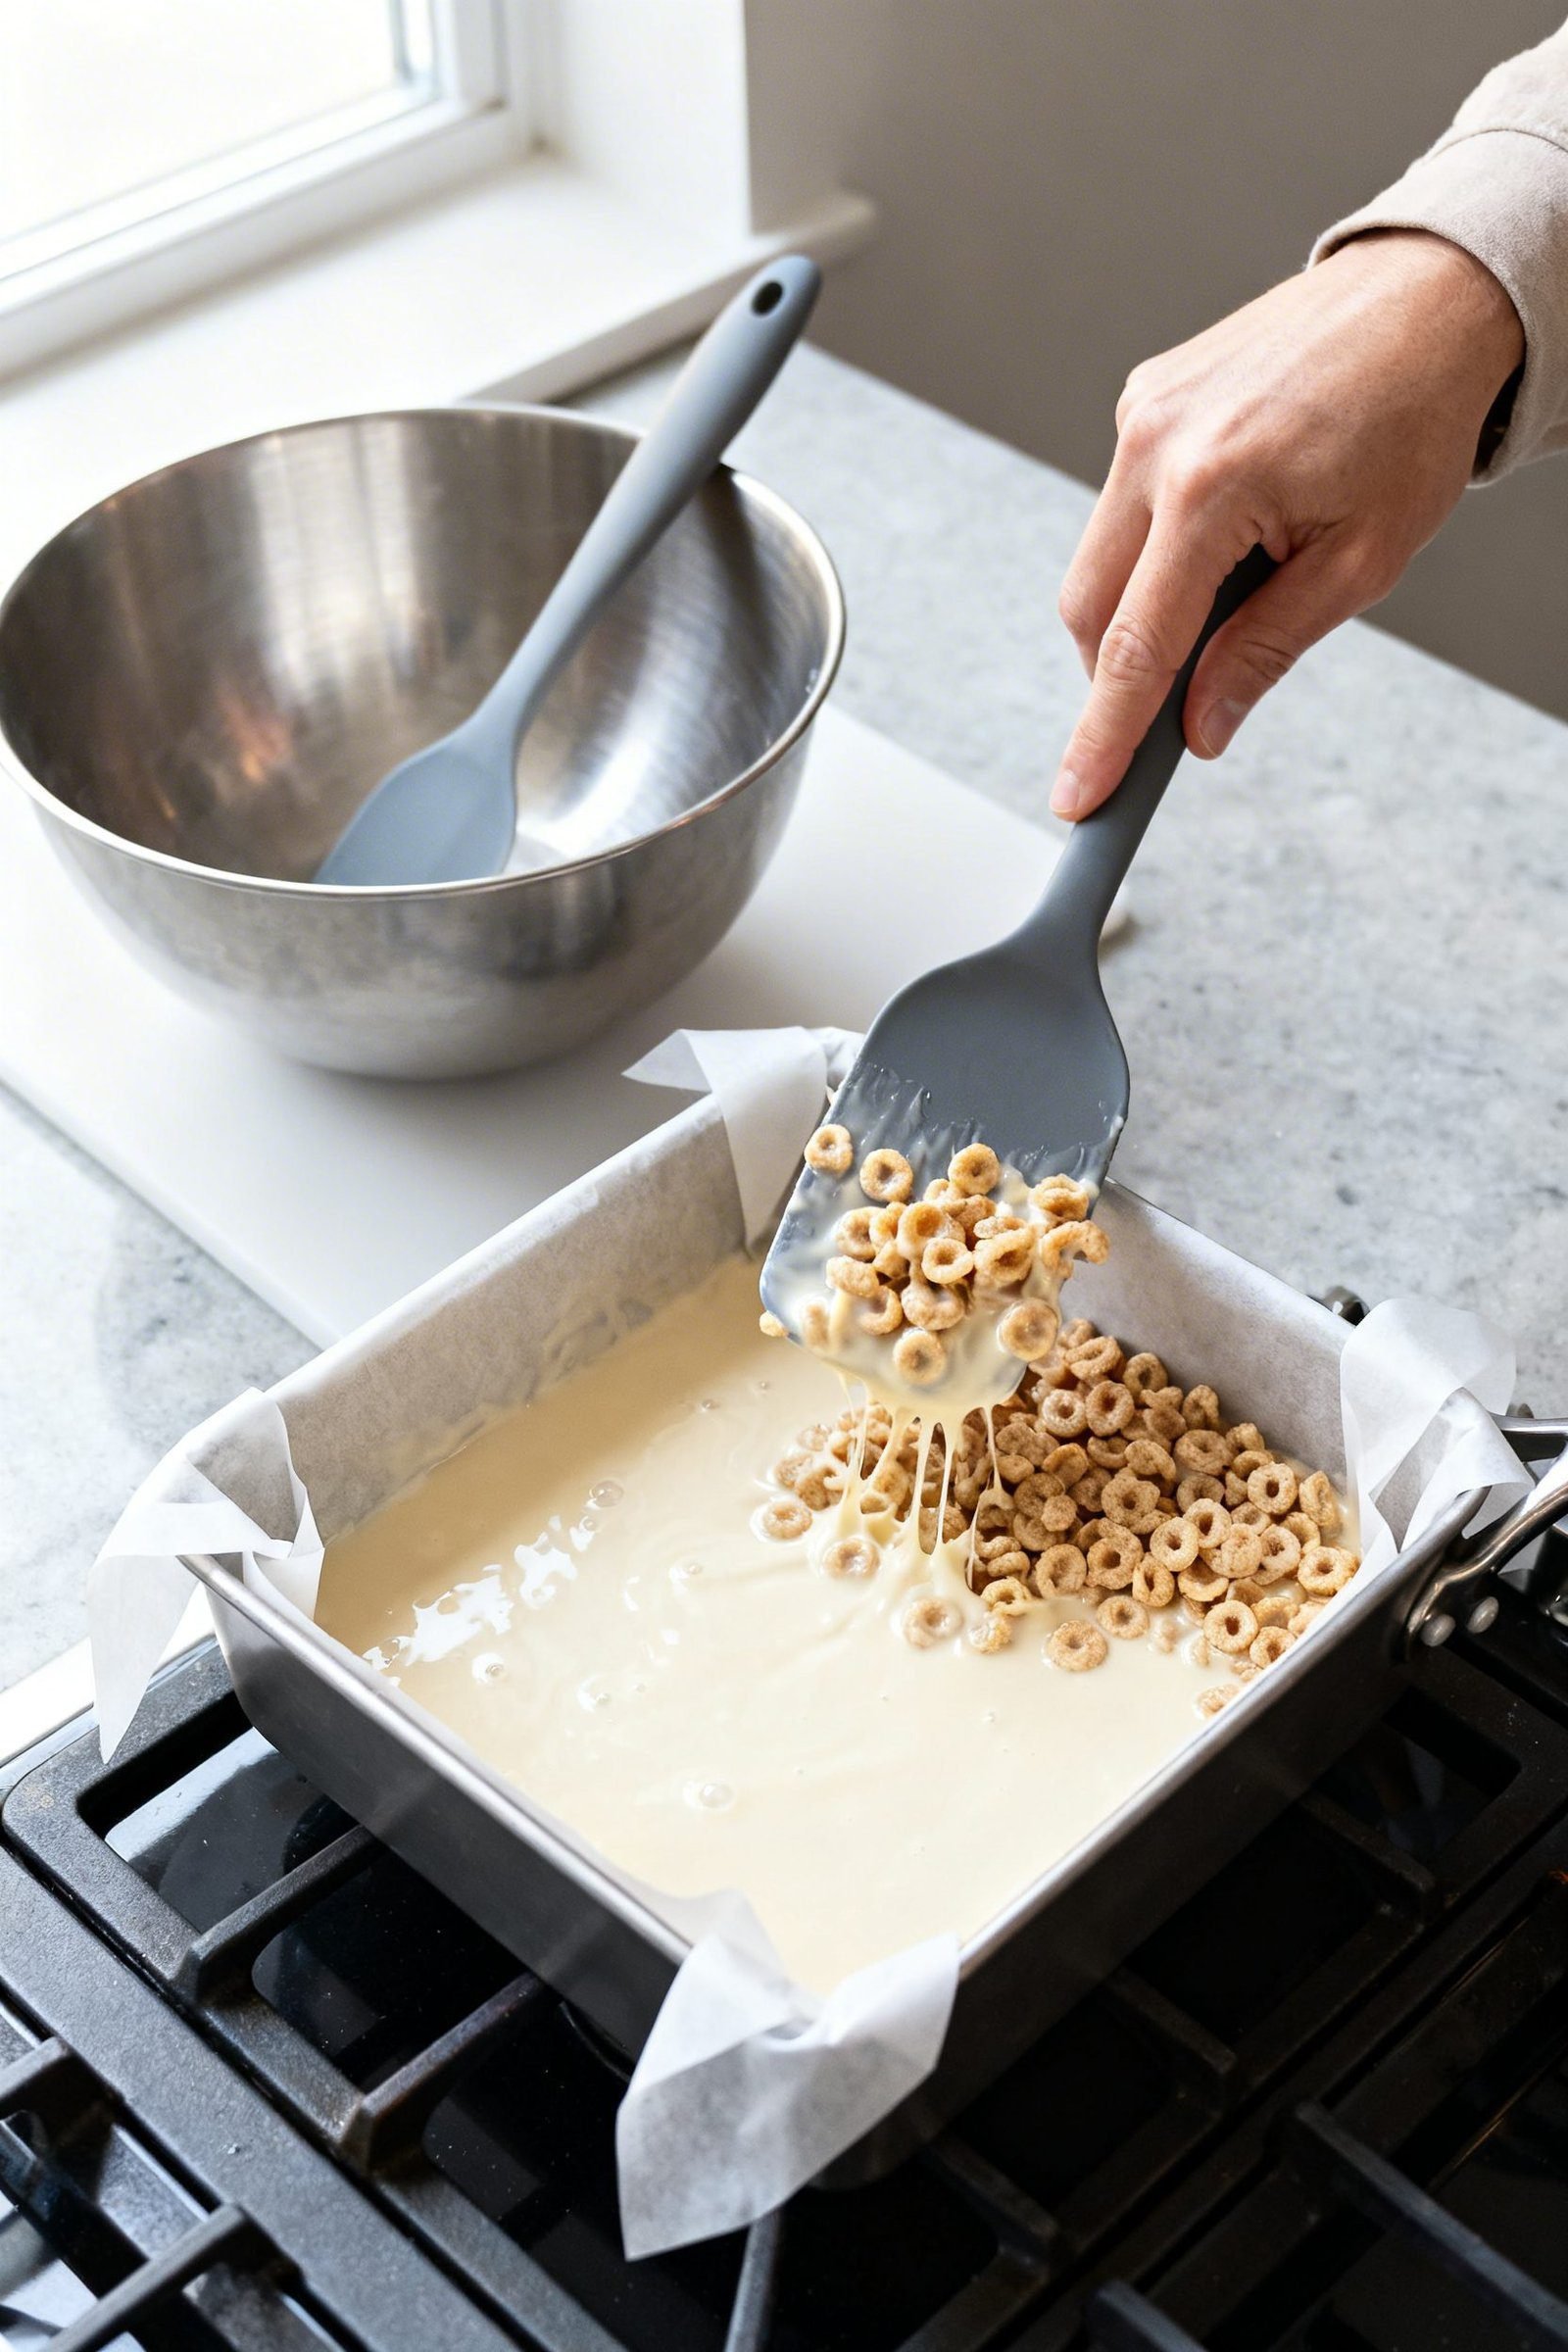
- Melt low and slow: In a large pot over low heat, melt the butter completely. Add the remaining marshmallows and stir continuously until just melted and smooth. Do not simmer or boil.
- Flavor the base: Remove the pot from heat. Stir in vanilla and salt until combined.
- Combine: Add the cereal to the pot and use a wide silicone spatula to fold gently until the cereal looks coated. Work quickly but don’t crush the cereal.
- Fold in extra marshmallows: Add the reserved 1 cup mini marshmallows and fold just until distributed. These create soft, melty pockets.
- Transfer to the pan: Scrape the mixture into the prepared pan.
- Press lightly: Lightly oil your hands or use a greased sheet of parchment. Press the mixture into an even layer with a gentle touch. Don’t pack it down hard or the bars will turn dense.
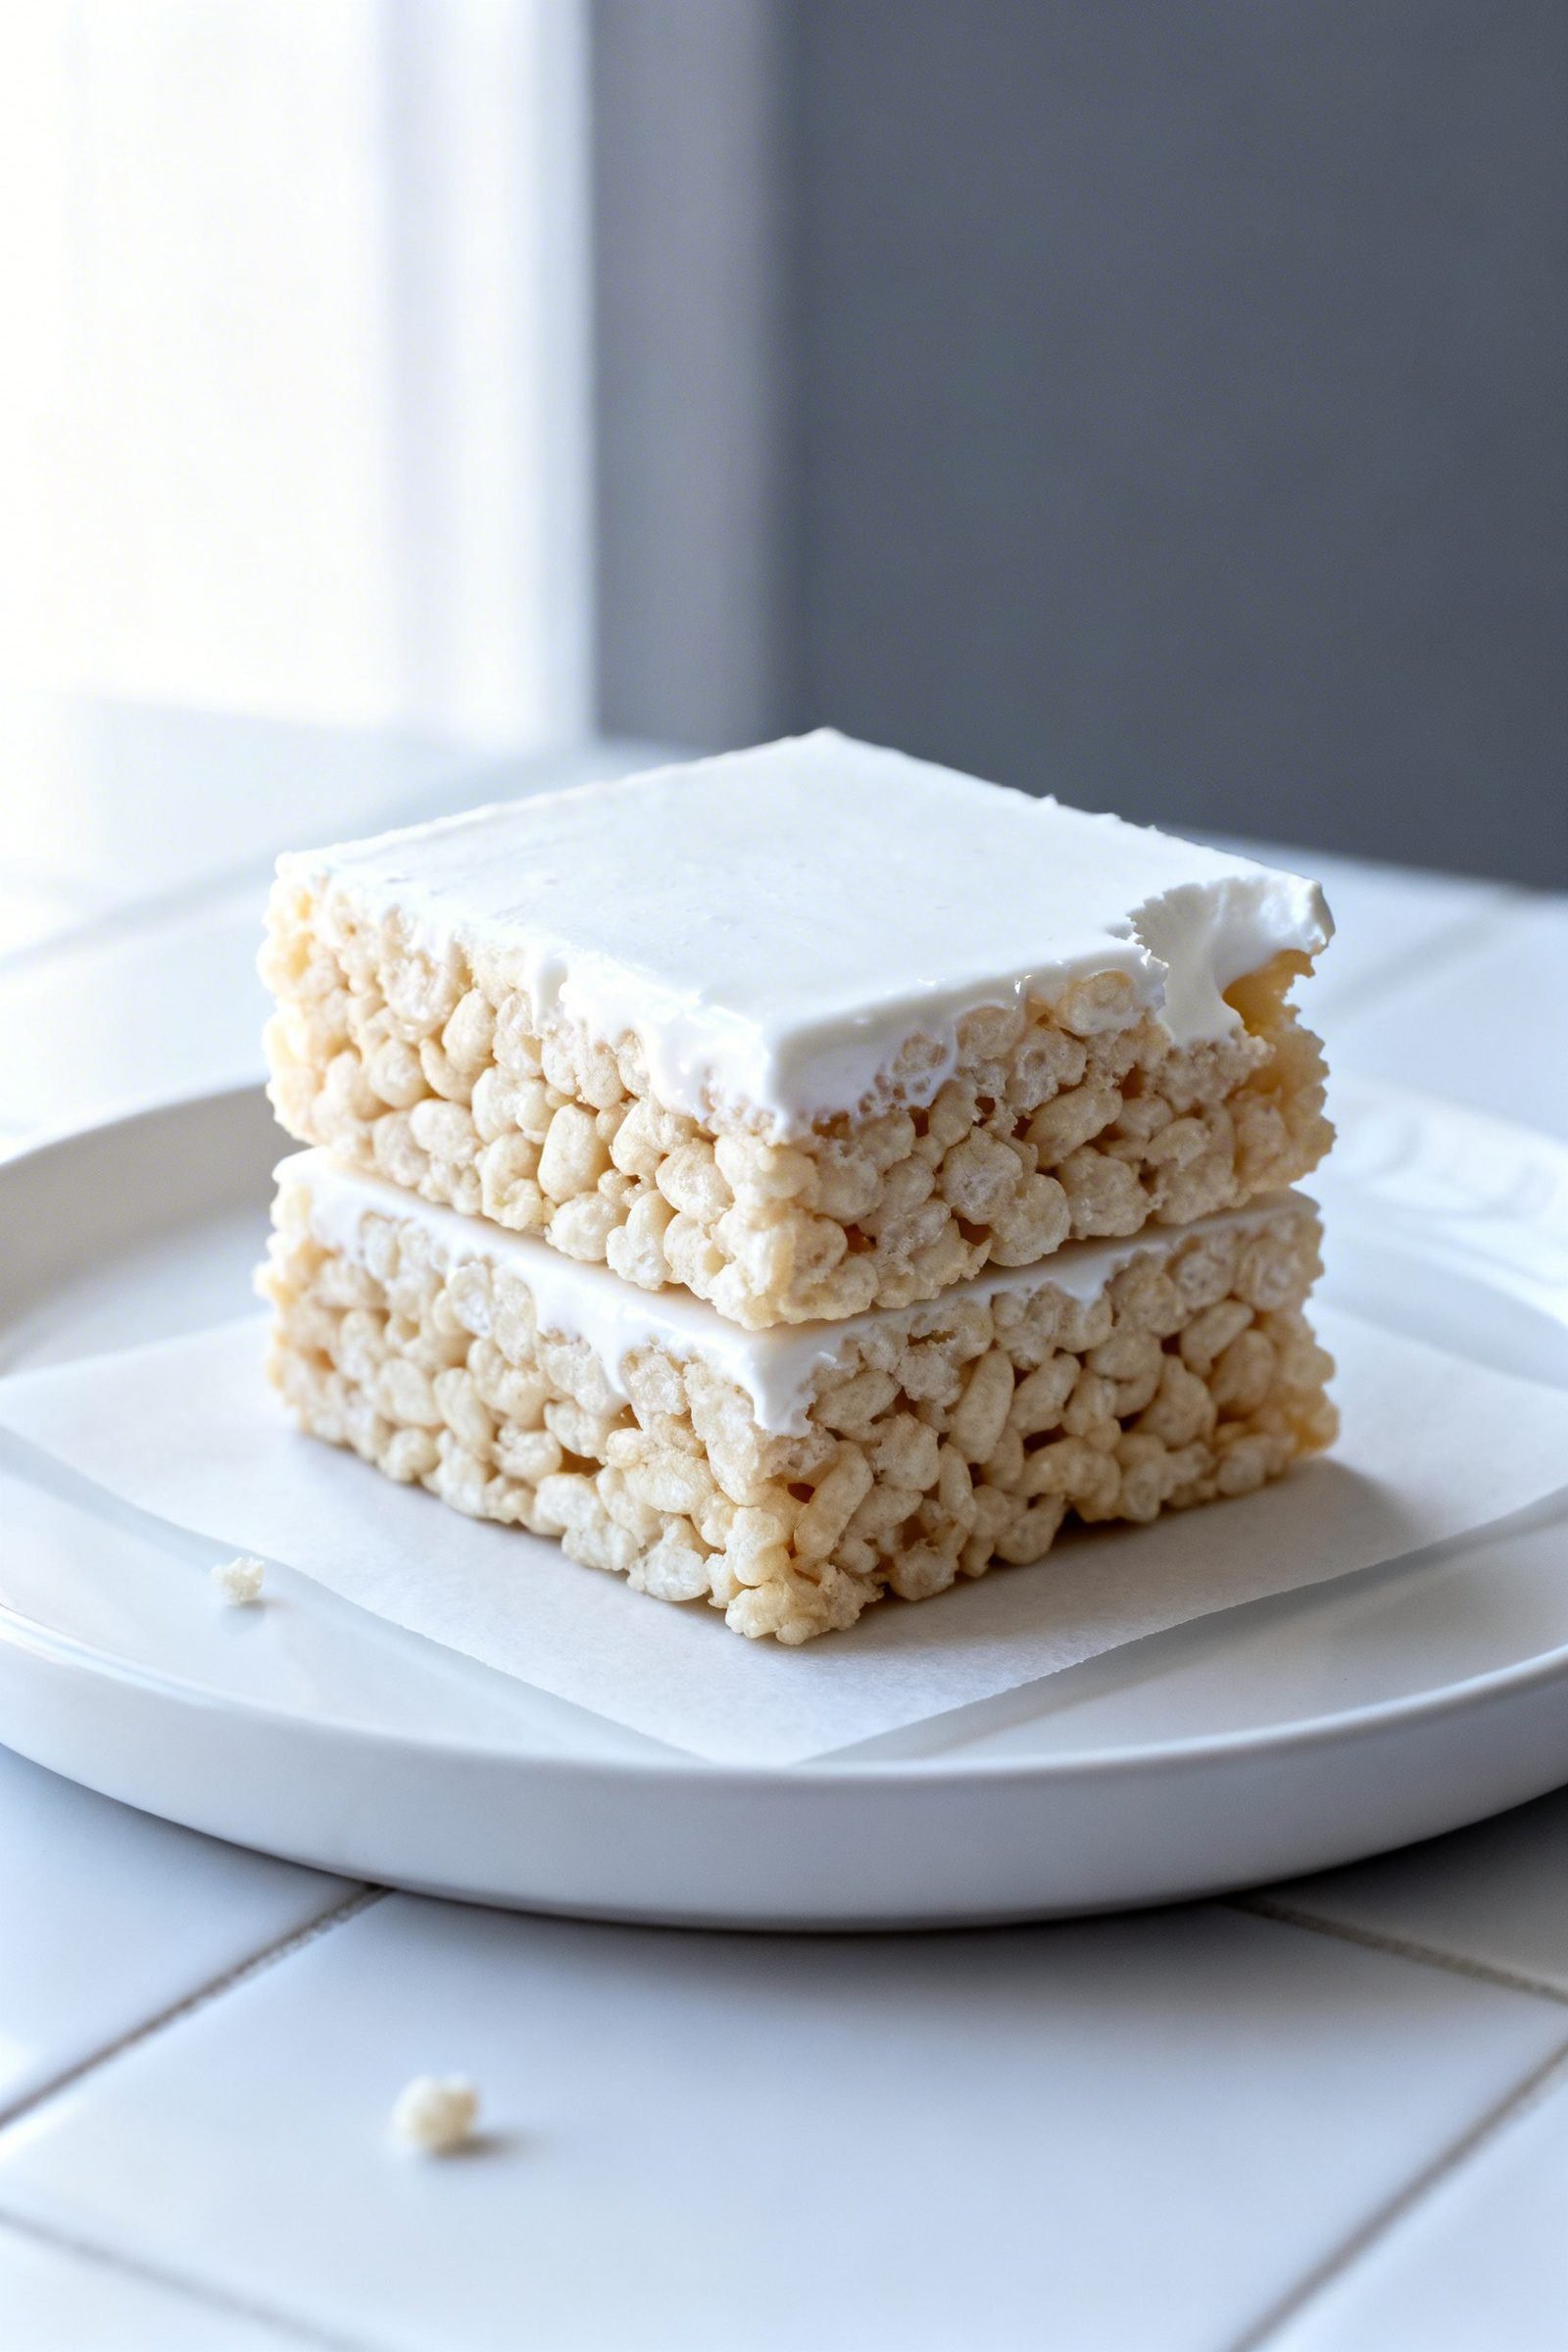
- Set and slice: Let stand at room temperature for 30–45 minutes until set. Lift out by the parchment sling and slice into 16 squares with a sharp knife.
Pro tip: If the mixture starts sticking, re-grease the spatula. Keep the pot off the heat once melted to prevent stiff bars.
How to Store Rice Krispie Treats
- Room temperature: Store in an airtight container for 2–3 days. Separate layers with parchment to prevent sticking.
- Do not refrigerate: The cold dries them out and makes them hard.
- Freeze short-term: You can freeze for up to 1 month. Wrap the slab or individual squares tightly in plastic, then place in a freezer bag. Thaw at room temp, still wrapped, for best texture.
- Refresh: If they firm up, microwave a square for 5–8 seconds to revive softness.
Why You’ll Love These Marshmallow Cereal Bars
- Fast and foolproof: Five ingredients, one pot, and no baking.
- Perfect texture: Soft-chewy center with crisp edges and no dry crumble.
- Kid- and crowd-friendly: Familiar flavor that suits any occasion.
- Customizable: Easy base for mix-ins or holiday spins.
- Portable: Great for picnics, potlucks, lunchboxes, and bake sales.
Mistakes to Avoid
- Overheating marshmallows: High heat turns the sugar grainy and the bars tough. Keep the flame low and stir often.
- Packing the mixture: Pressing too firmly compacts the cereal. Use a light hand to keep things airy.
- Old marshmallows: Stale or dry marshmallows don’t melt smoothly. Use fresh, soft bags.
- Skipping salt or vanilla: Without them, the flavor reads one-note sweet.
- Wrong pan size: A huge pan creates thin, brittle bars. Stick to 8×8 or 9×9 for classic height.
- Waiting too long to mix: Once melted, combine promptly so the mixture stays spreadable.
Fun Variations to Try
- Browned butter: Cook the butter over medium heat until golden and nutty, then lower the heat and melt marshmallows. Adds deep, toffee-like flavor.
- Salted sprinkle: Finish the pan with flaky sea salt for a gourmet salty-sweet hit.
- Chocolate drizzle: Drizzle melted dark or milk chocolate over the set bars and let it firm up before slicing.
- Cereal swap: Use half crispy rice and half cornflakes or Cocoa Krispies for a twist.
- Peanut butter: Stir 1/3 cup creamy peanut butter into the melted marshmallow mixture for nutty richness.
- Birthday confetti: Fold in rainbow sprinkles at the end (add after removing from heat so colors don’t bleed).
- Extra-gooey: Increase melted marshmallows to 12 ounces and keep cereal at 6 cups.
FAQ
How do I keep Rice Krispie treats soft?
Use low heat, fresh marshmallows, and don’t pack the mixture. Store airtight at room temperature and skip the fridge.
Why are my bars hard?
You likely overheated the marshmallows or pressed too firmly into the pan. Next time, melt gently and use a greased, light touch when pressing.
Can I double the recipe?
Yes. Use a 9×13-inch pan and increase everything proportionally. Watch the melt so the larger batch doesn’t overheat.
Can I make them dairy-free?
Yes. Use dairy-free butter or coconut oil and check that your marshmallows are gelatin- and dairy-free if needed.
How long do they take to set?
About 30–45 minutes at room temperature. You can speed it up slightly with a cool room, but avoid the fridge.
Can I use regular marshmallows instead of mini?
Yes. Cut them into smaller pieces so they melt evenly, and weigh to reach the same 10 ounces.
Conclusion
With the right ratio, gentle heat, and a light press, you’ll get Rice Krispie treats that taste exactly like you remember—maybe even better. Keep a bag of mini marshmallows and a box of cereal in the pantry and you’re never more than 15 minutes from a crowd-pleasing dessert. Happy stirring and snacking!
Original Rice Krispie Treats
Classic no-bake crispy marshmallow bars with a soft-chewy center and perfect crispy texture.
Ingredients
- 6 cups crispy rice cereal (Rice Krispies or any crisp rice cereal)
- 10 ounces mini marshmallows (about 6 heaping cups), plus 1 cup extra for folding in
- 6 tablespoons unsalted butter
- 1 teaspoon pure vanilla extract
- ¼ teaspoon fine sea salt (use ½ teaspoon if using unsalted cereal and you love salty-sweet)
- Neutral oil or nonstick spray for the pan and spatula
Instructions
- Lightly grease an 8×8 or 9×9-inch baking pan with oil or spray. Line with a parchment sling and grease the parchment.
- Measure the cereal into a large mixing bowl. Reserve 1 cup mini marshmallows for folding in at the end.
- Over low heat, melt the butter in a large pot. Add the remaining marshmallows and stir constantly until just melted and smooth. Do not simmer or boil.
- Remove from heat and stir in vanilla and salt.
- Add the cereal to the pot and gently fold with a wide silicone spatula until evenly coated.
- Fold in the reserved 1 cup mini marshmallows just until distributed.
- Scrape the mixture into the prepared pan.
- Lightly oil hands or use greased parchment to gently press into an even layer without compacting.
- Let set at room temperature for 30–45 minutes. Lift out by the parchment sling and slice into 16 squares.