Easy Panna Cotta Recipe | Silky Agar Agar Dessert Without Baking
You’ll love this easy panna cotta made with agar agar. It sets up silky-smooth, needs no baking, and comes together on the stovetop in minutes. If you’ve wanted a foolproof, elegant dessert you can make ahead, this one checks every box.
I’ll walk you through the exact steps, share pro tips for a glossy finish, and give you flavor riffs that keep things exciting. You’ll get reliable texture, gentle sweetness, and that signature wobble—without dealing with gelatin.
Why This Easy Agar Agar Panna Cotta Works
- No baking required: You heat, pour, and chill. That’s it.
- Plant-based setting agent: Agar agar sets beautifully and stays stable at room temperature longer than gelatin.
- Ultra-smooth texture: Proper blooming and simmering create a clean, silky set—never rubbery.
- Make-ahead friendly: You can prep it 2–3 days in advance for stress-free entertaining.
- Customizable: Keep it classic with vanilla, or add coffee, citrus, or fruit for easy twists.
Ingredients
For the panna cotta base
- Whole milk: Adds body and softness.
- Heavy cream: Creates that decadent, silky finish.
- Granulated sugar: Sweetens without overshadowing delicate flavors.
- Agar agar powder: The setting agent; sets firm yet tender when handled right.
- Pure vanilla extract or vanilla bean: Classic panna cotta flavor with fragrant warmth.
- Pinch of fine sea salt: Rounds out sweetness and brightens flavor.
Optional toppings
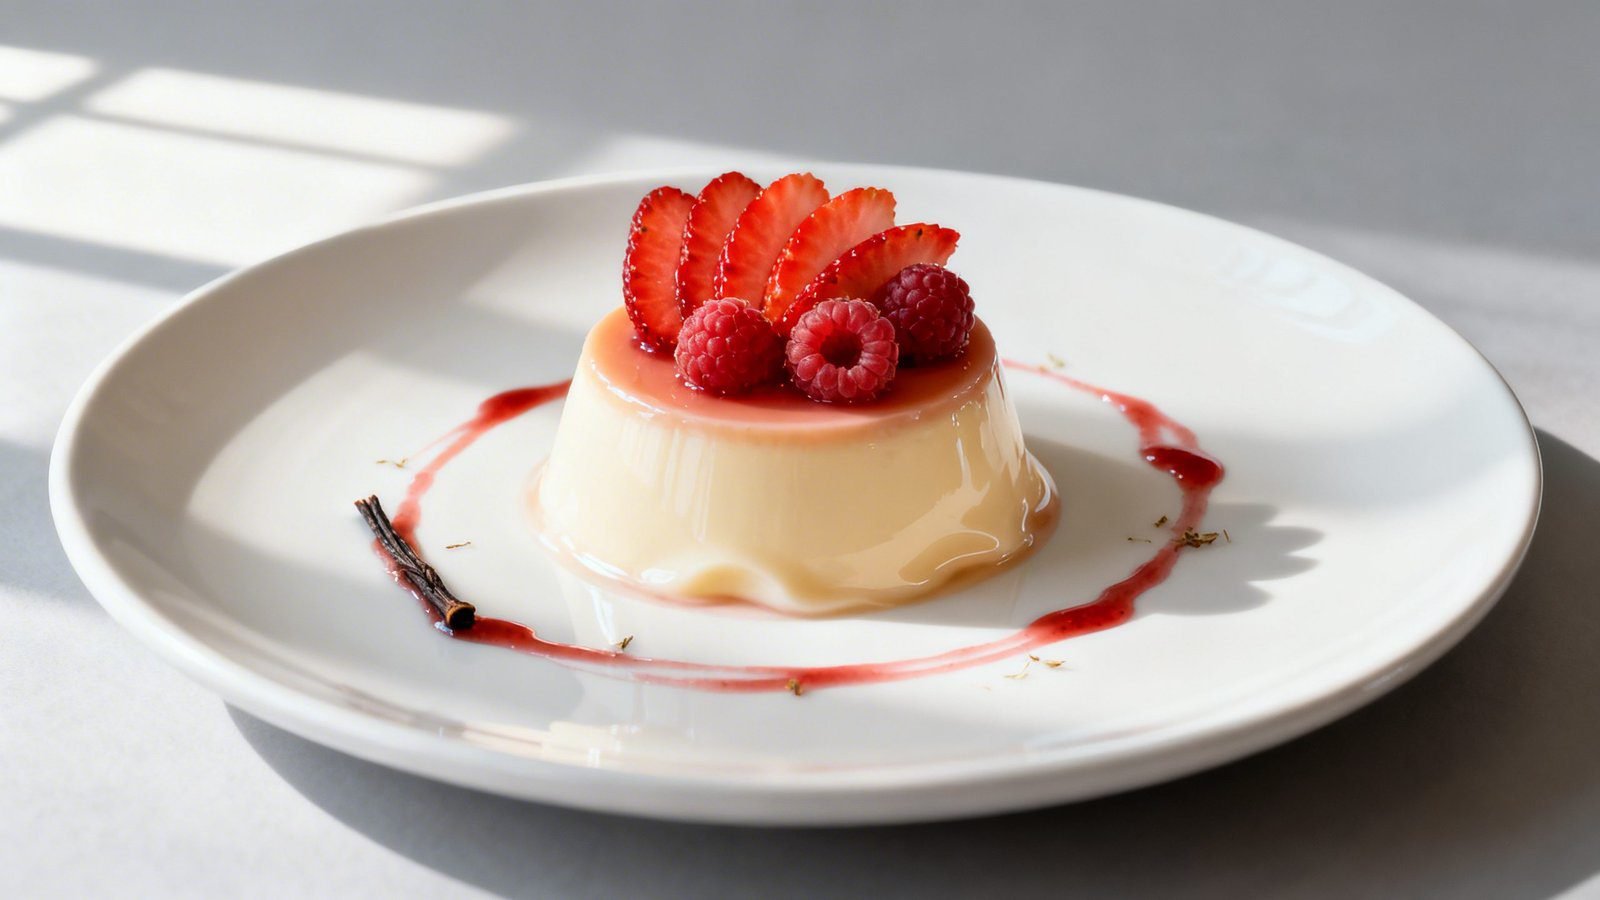
- Fresh berries: Strawberries, raspberries, or blueberries for tart contrast.
- Berry coulis or mango puree: Adds color and a tangy-fruity finish.
- Honey or caramel drizzle: For extra richness.
- Toasted coconut or chopped pistachios: A little crunch goes a long way.
- Lemon or orange zest: Brightens each bite.
How to Make Silky Agar Agar Panna Cotta
Before you start
- Use agar agar powder, not flakes: Flakes measure differently and can throw off the set.
- Measure precisely: Too much agar makes it firm; too little won’t set.
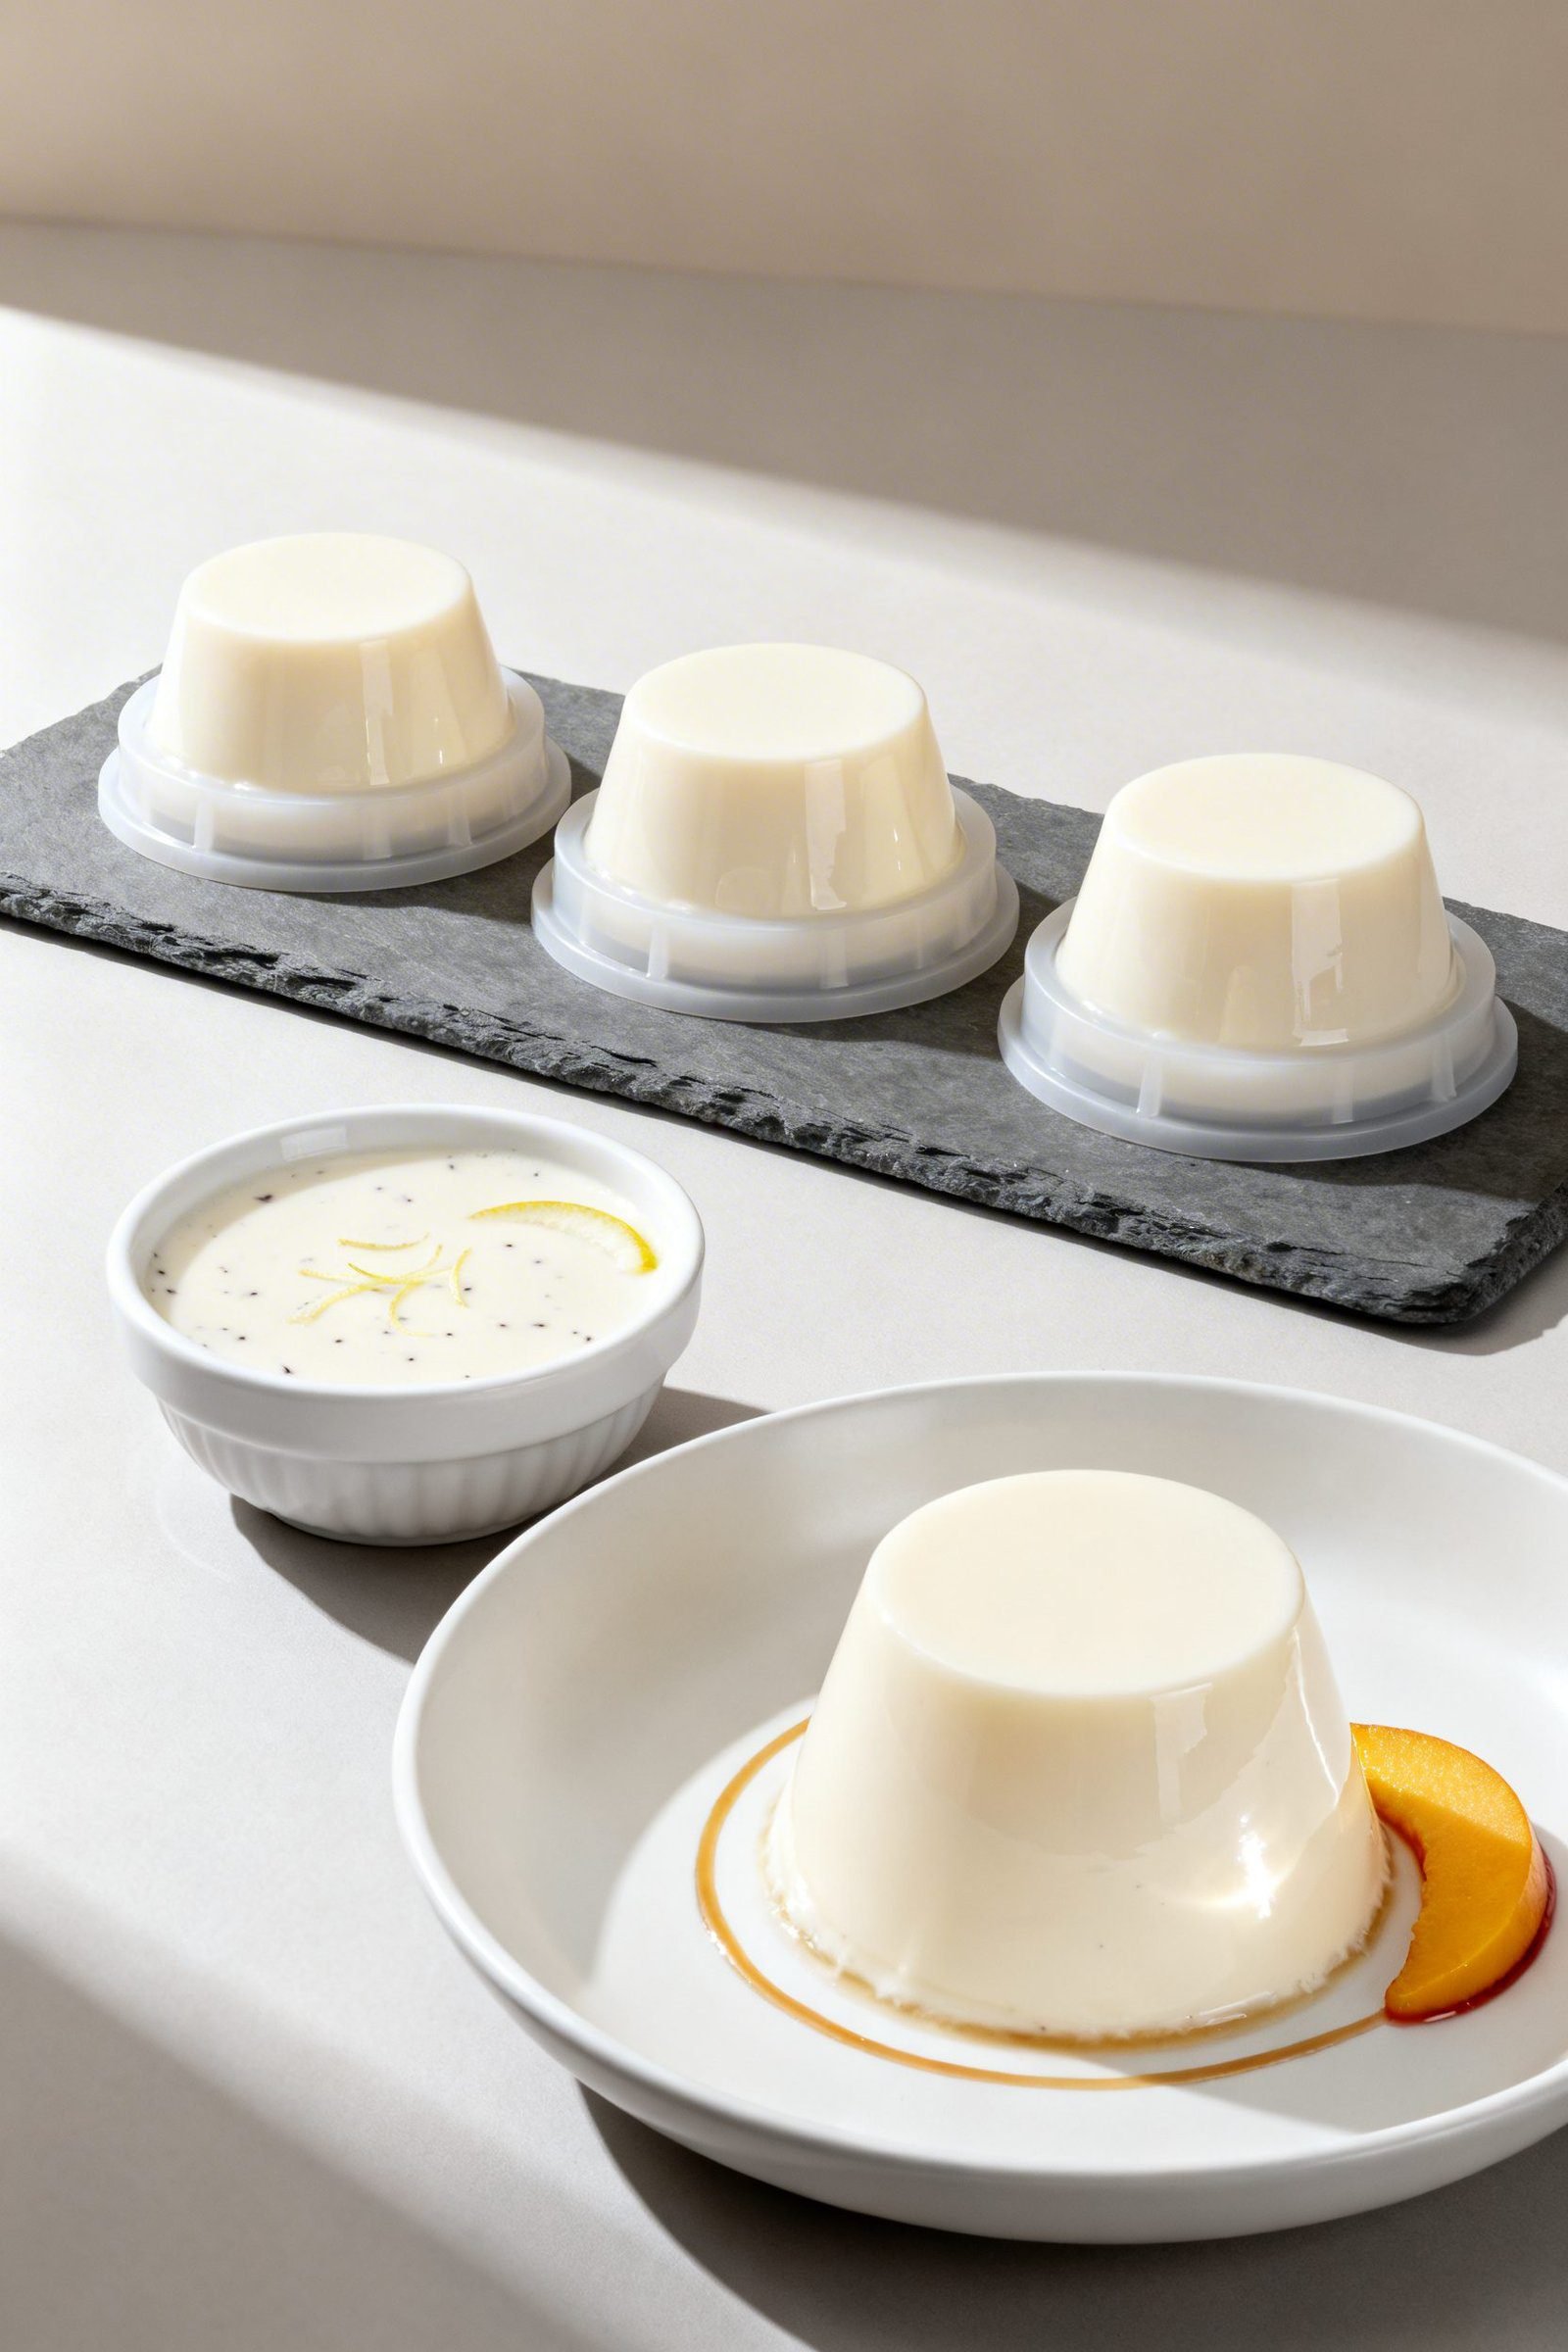
- Choose small ramekins or silicone molds: They chill faster and unmold easily.
Step-by-step instructions
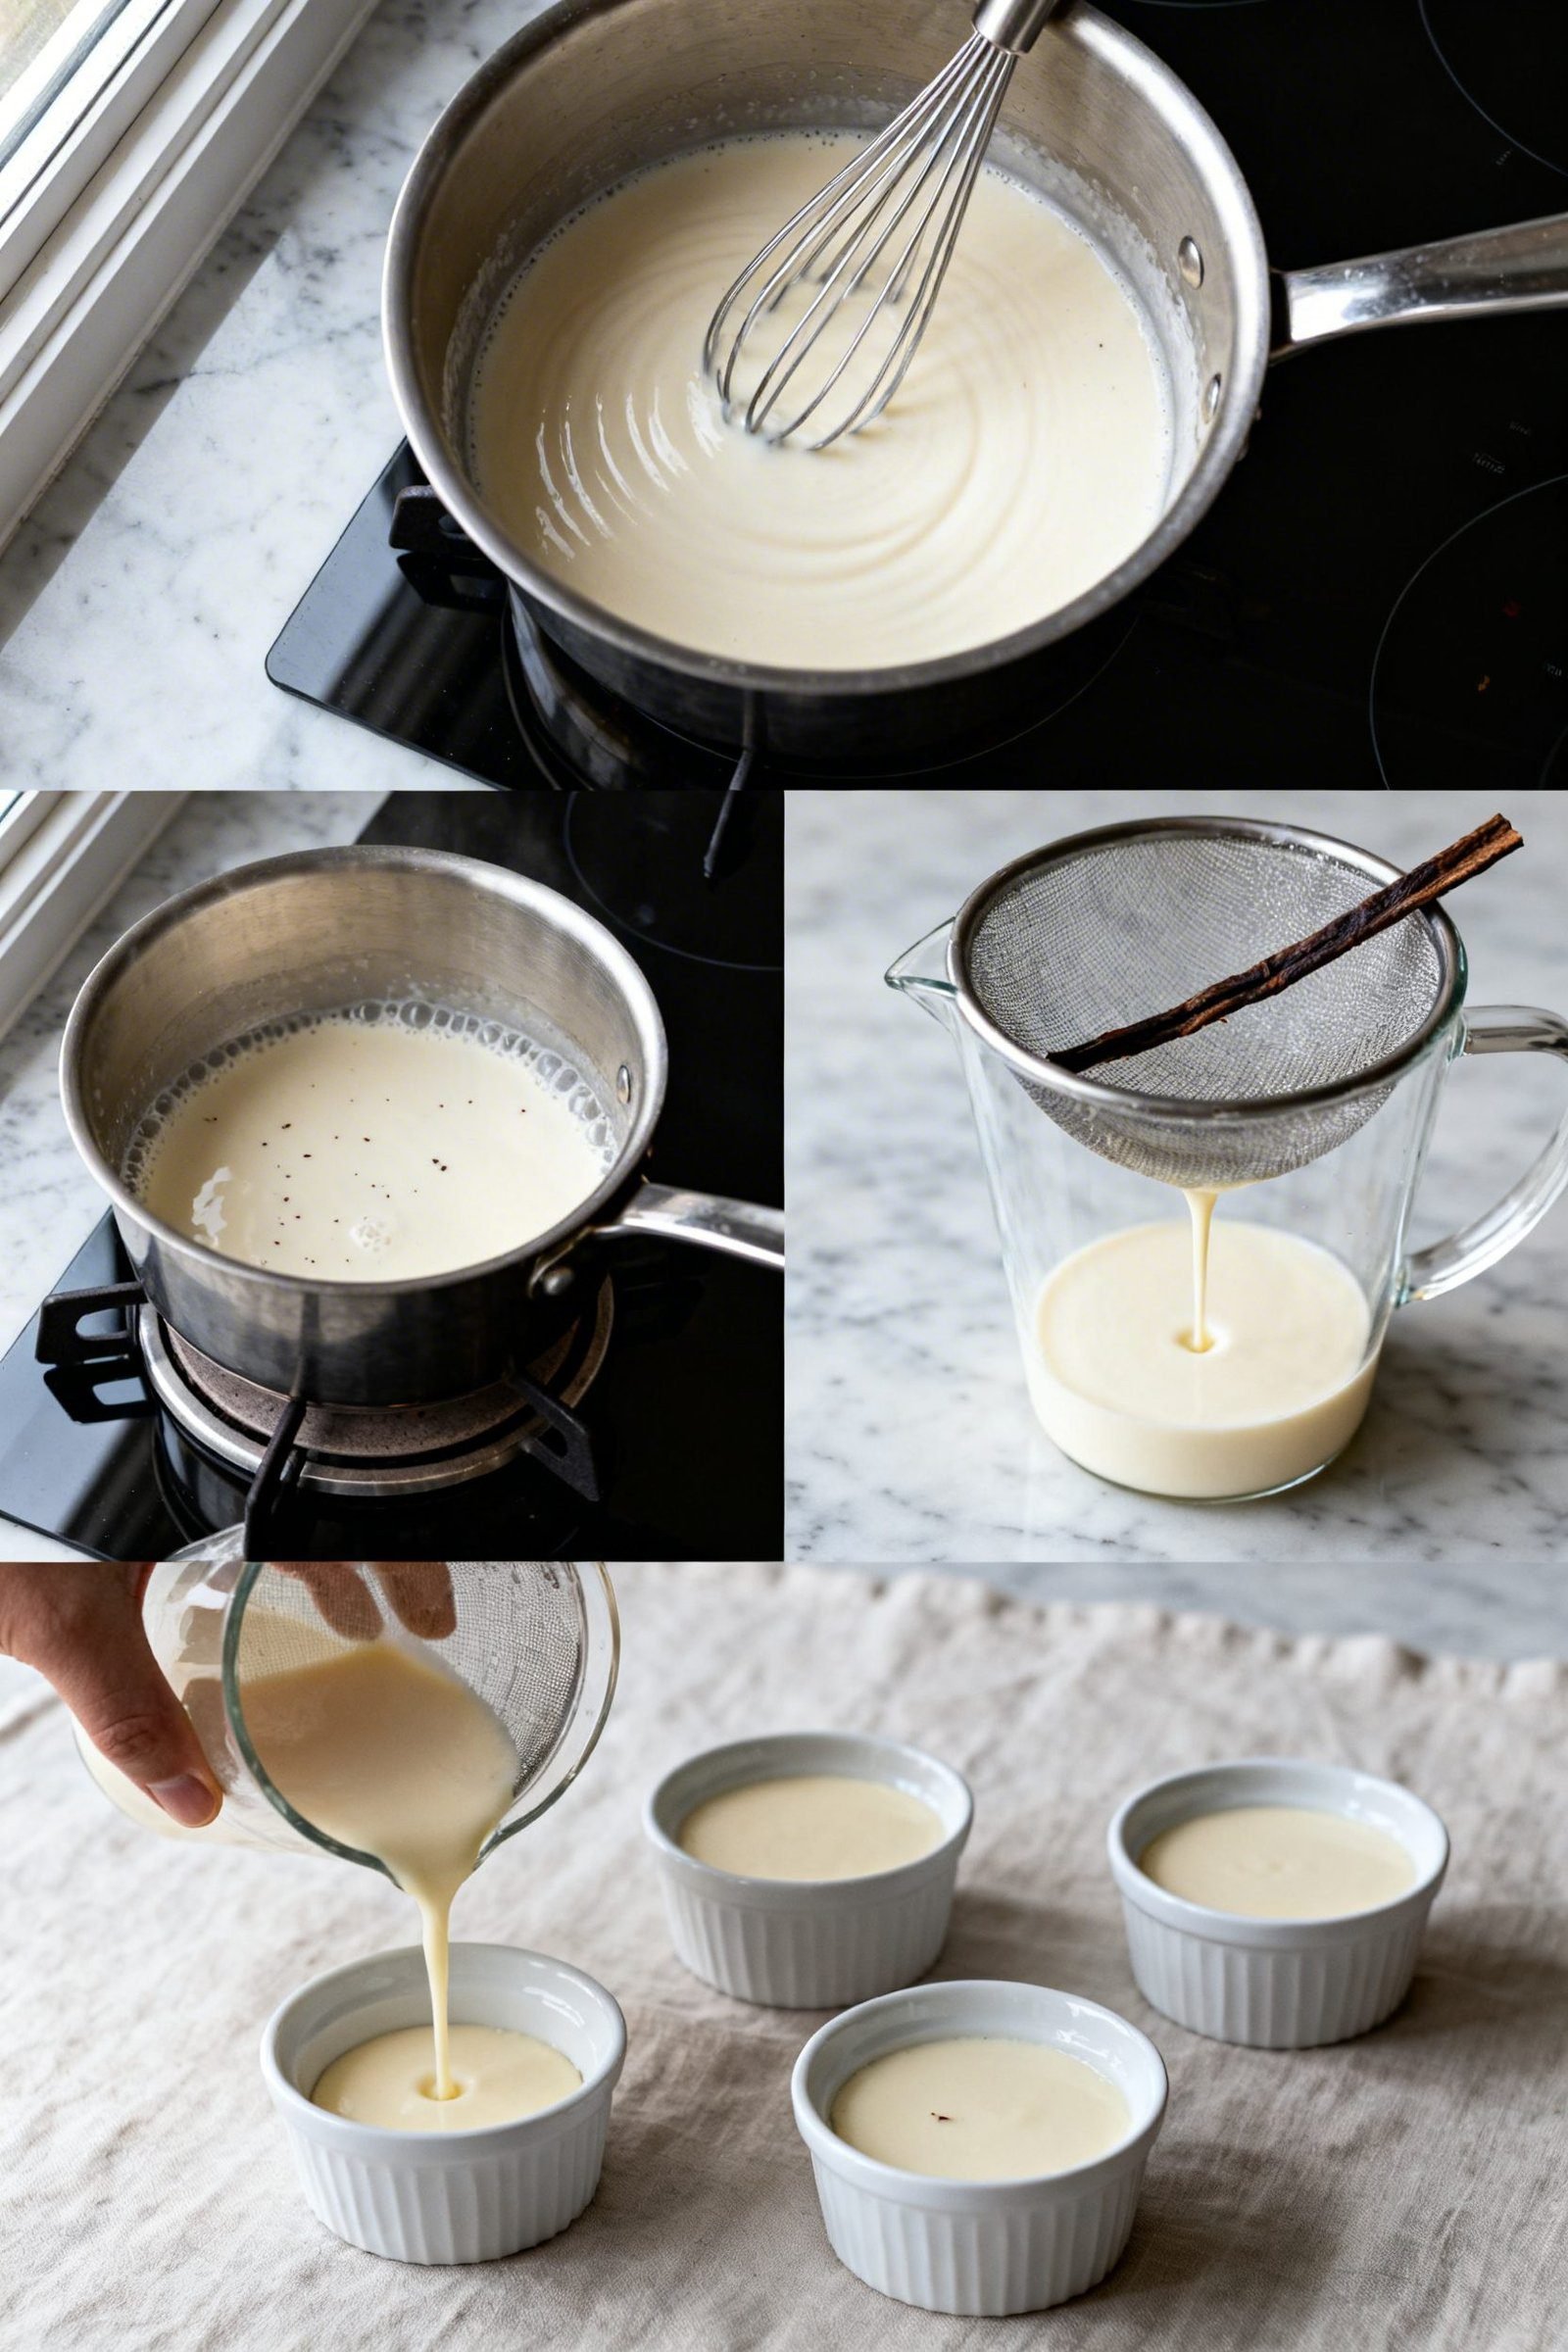
- Combine dairy: Add whole milk and heavy cream to a medium saucepan. Stir in sugar and a pinch of salt.
- Whisk in agar: Sprinkle agar agar powder evenly over the cold dairy. Whisk well so it hydrates with no clumps.
- Heat gently: Set the pan over medium heat. Whisk often and bring it to a steady simmer. Agar needs a good simmer (about 1–2 minutes) to activate. Keep it at a gentle bubble; do not boil hard.
- Flavor it: Remove from the heat. Stir in vanilla extract, or scrape a vanilla bean into the pot for specks and deeper aroma.
- Strain for smoothness: Pour the mixture through a fine-mesh sieve into a heatproof jug. Straining removes any tiny undissolved bits for the glossiest texture.
- Pour and chill: Divide into ramekins or molds. Let them cool on the counter for 15–20 minutes, then cover and chill 2–4 hours, until set with a gentle wobble.
- Serve: Enjoy straight from the ramekin or unmold. To unmold, dip the ramekin in warm water for 10–15 seconds, run a thin knife around the edge, and invert onto a plate.
Texture checkpoints
- Right after simmering: The mixture looks smooth and lightly thickened, not syrupy.
- After chilling: The panna cotta quivers slightly when you nudge it, but holds clean edges.
- If too firm: Use slightly less agar next time (reduce by 1/8 to 1/4 teaspoon).
How to Store Your Agar Panna Cotta
- Refrigerate covered: Wrap each ramekin or the serving platter to prevent fridge odors.
- Best within 3 days: The texture stays pristine and the flavor remains fresh.
- Add toppings at serving: Fruit and sauces can weep; spoon them on right before you eat.
- Do not freeze: Freezing can make the texture grainy and watery once thawed.
Benefits of Making Panna Cotta with Agar Agar
- No gelatin needed: A great option if you prefer a seaweed-derived setting agent.
- Reliable set at warmer temps: Agar holds up better on a dessert table than gelatin.
- Quick turnaround: The stovetop cook takes about 10 minutes, then it chills while you prep dinner.
- Elegant but easy: Restaurant-quality look with minimal effort and equipment.
What to Avoid for Perfect Texture
- Don’t skip the simmer: Agar must fully dissolve at a simmer to activate.
- Don’t hard-boil: Aggressive boiling can introduce bubbles and a rough texture.
- Don’t add acidic juices before simmering: Citrus can weaken the set; add acidic flavors after activation.
- Don’t overdo agar: Extra agar turns silky into bouncy. Measure with a leveled spoon.
- Don’t rush the chill: Warm centers won’t set evenly. Give it enough time in the fridge.
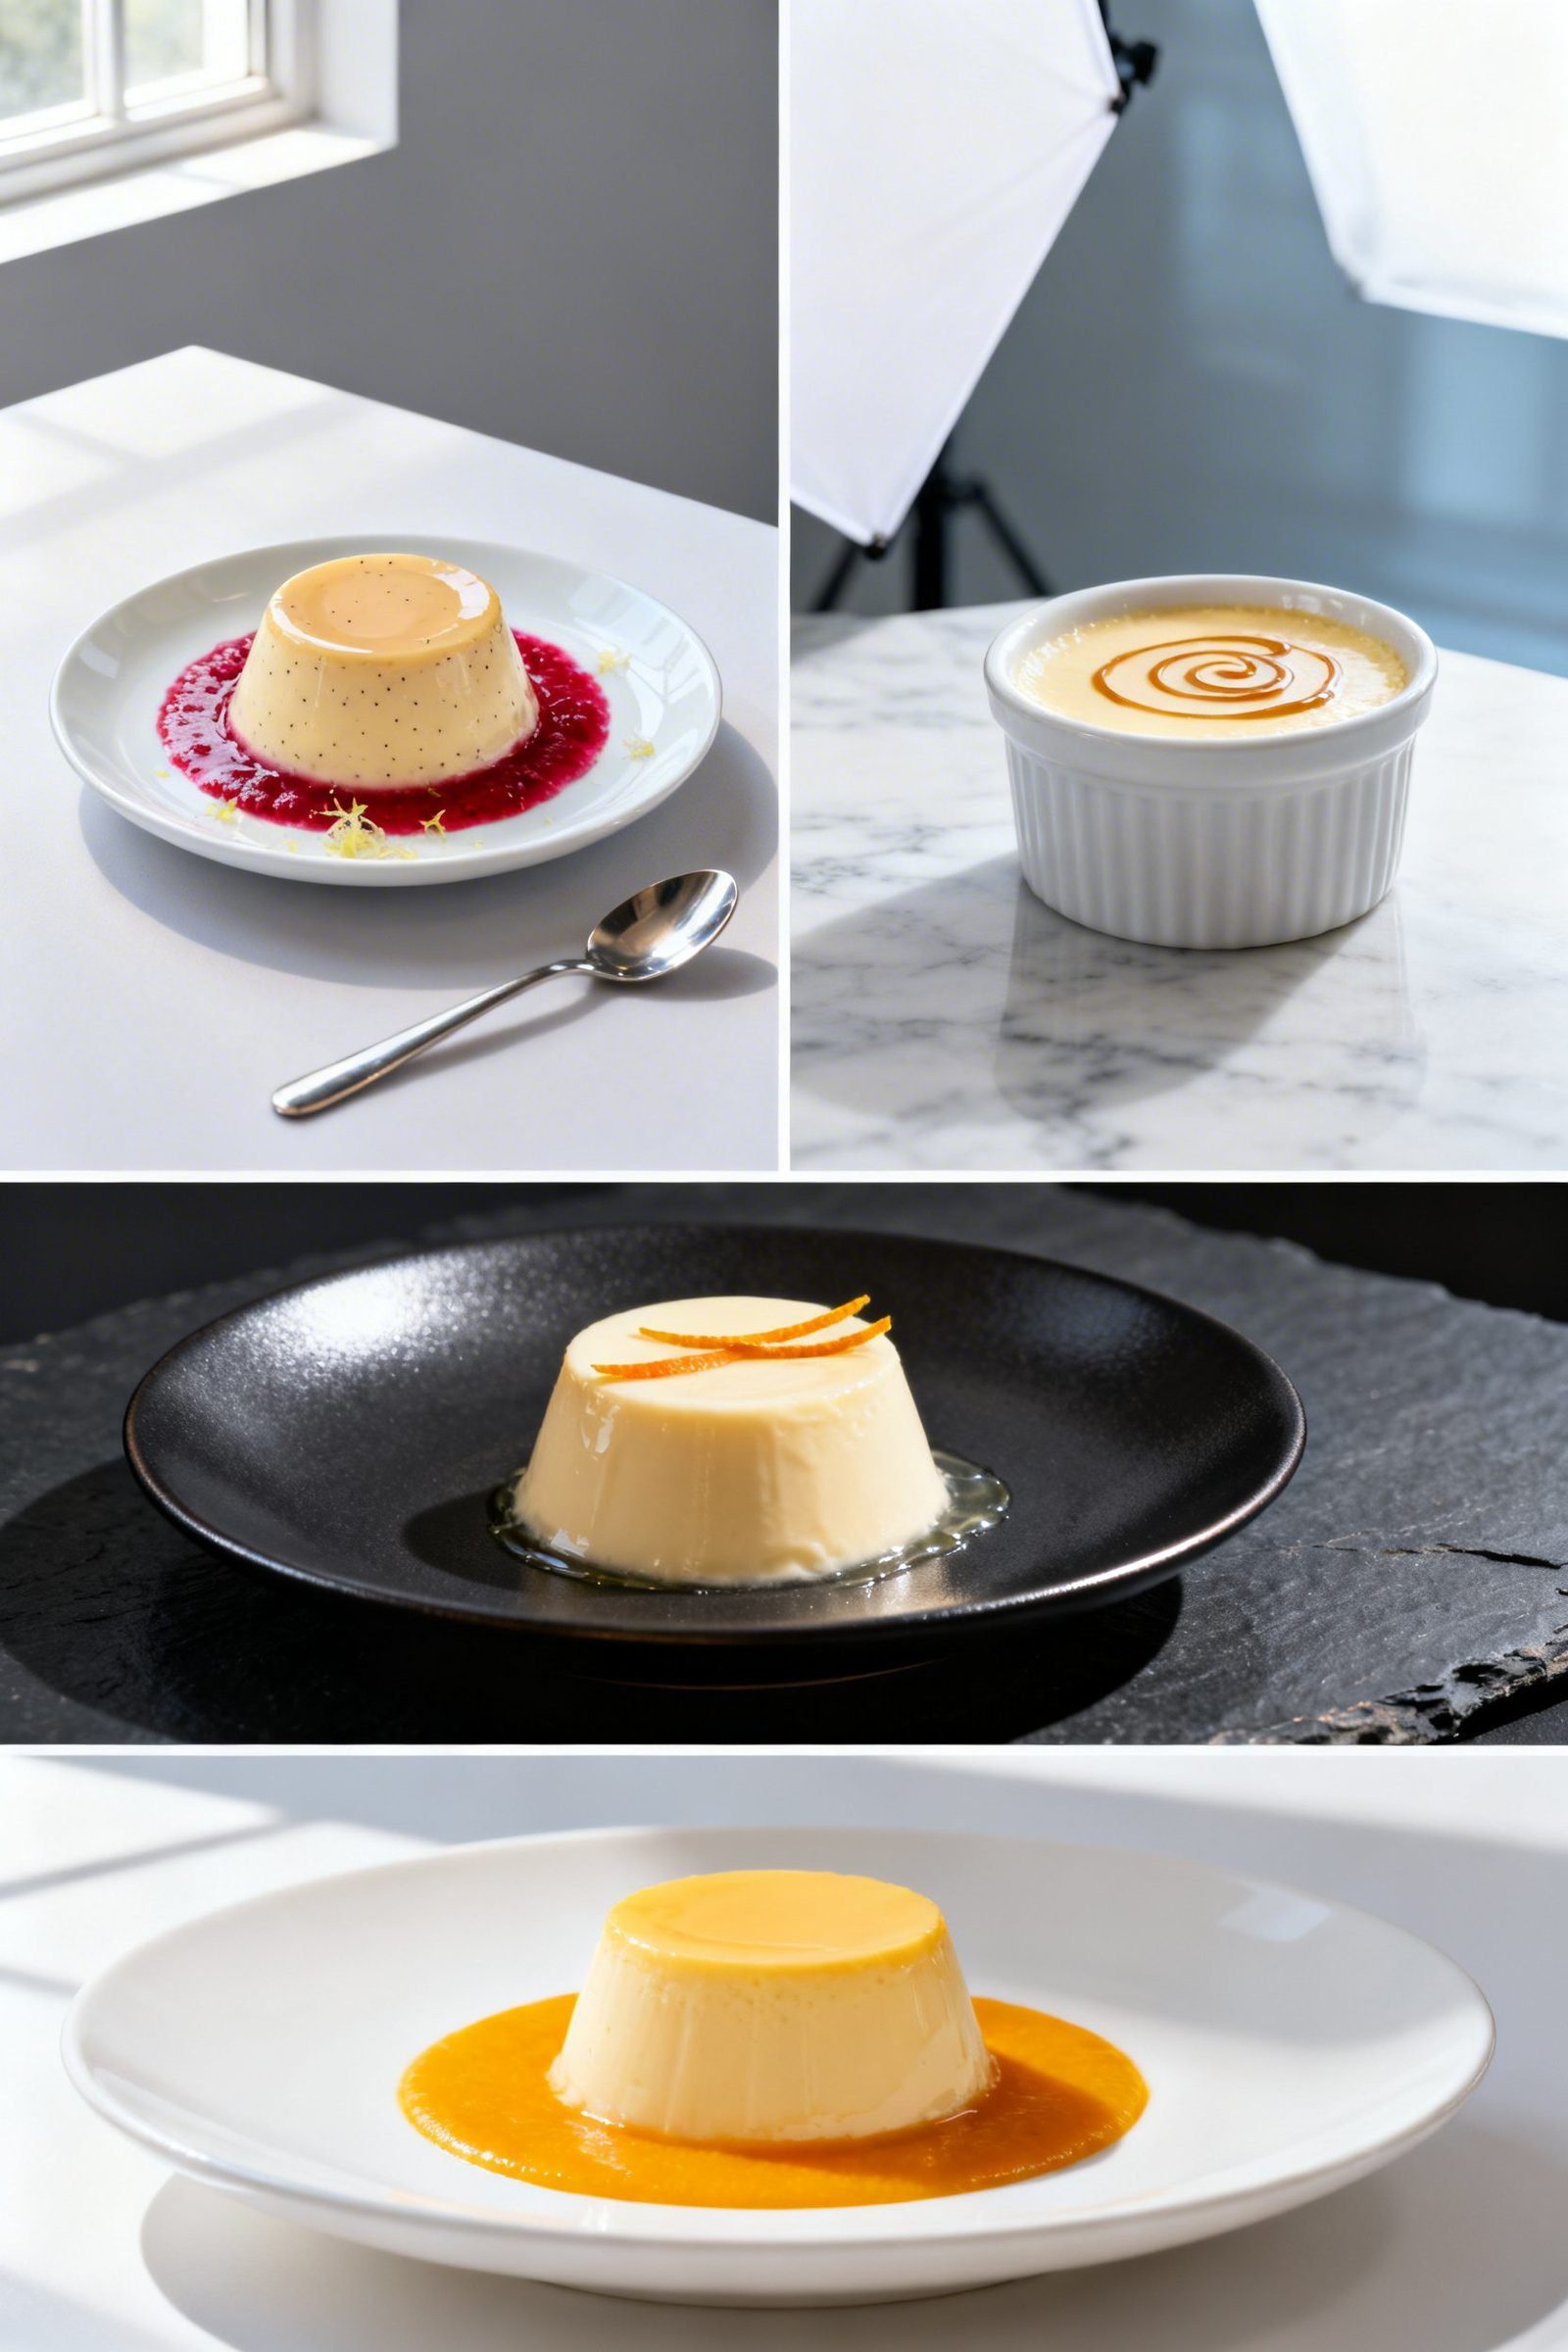
Variations You Can Try
- Vanilla bean classic: Use half a scraped vanilla bean plus extract for layered vanilla notes.
- Coffee panna cotta: Stir in a shot of strong espresso after simmering for a café-style dessert.
- Lemon or orange zest: Add zest after removing from heat; serve with a citrus coulis.
- Coconut twist: Swap part of the cream for full-fat coconut milk; add toasted coconut on top.
- Matcha green tea: Whisk 1–2 teaspoons sifted matcha into the hot mixture off heat for an earthy, pale-green finish.
- Berry swirl: Spoon a little berry coulis into the bottom of each mold, pour panna cotta over, and chill.
- Chocolate panna cotta: Whisk in chopped dark chocolate off heat until melted and smooth.
FAQ
Can I use agar agar flakes instead of powder?
Yes, but they dissolve slower and measure differently. If you only have flakes, grind them to a powder and dissolve thoroughly at a simmer. For consistent results, I recommend powder.
Why did my panna cotta set too firmly?
Too much agar or a heavy reduction can create a firm, bouncy texture. Next time, level the measuring spoon, avoid long simmering, and consider reducing agar slightly.
How do I prevent a rubbery mouthfeel?
Measure agar carefully, simmer just long enough to dissolve, and strain before pouring. A pinch of salt and the right cream-to-milk ratio also help with a creamy perception.
Can I make it dairy-free?
Yes. Use a mix of coconut milk and a neutral plant milk like almond or oat. Choose unsweetened varieties and keep the fat content moderate for a silky set.
Do I need to bloom agar first?
You don’t bloom agar like gelatin. You whisk it into a cool liquid, then bring it to a simmer to activate fully.
How long does it take to set?
Two to four hours in the fridge, depending on mold size. Small ramekins set faster; larger molds need the full time.
Can I reheat the mixture if it starts setting?
Yes. Gently return it to the stove and warm until fluid again. Agar resets after reheating, which makes it very forgiving.
Conclusion
This easy agar agar panna cotta delivers a silky, elegant dessert with minimal effort and zero baking. With careful measuring, a short simmer, and a good chill, you’ll get a creamy wobble every time. Keep it classic with vanilla or dress it up with coffee, citrus, or berries—either way, it’s a reliable, make-ahead treat that always impresses.
Easy Agar Agar Panna Cotta
Silky, no-bake panna cotta set with agar agar, prepared on the stovetop and chilled to a gentle wobble.
Ingredients
- Whole milk
- Heavy cream
- Granulated sugar
- Agar agar powder
- Pure vanilla extract or vanilla bean
- Pinch of fine sea salt
- Optional toppings: fresh berries; berry coulis or mango puree; honey or caramel drizzle; toasted coconut or chopped pistachios; lemon or orange zest
Instructions
- Add whole milk and heavy cream to a medium saucepan; stir in granulated sugar and a pinch of salt.
- Sprinkle agar agar powder evenly over the cold dairy and whisk well to hydrate with no clumps.
- Set over medium heat, whisk often, and bring to a steady simmer; maintain a gentle simmer for 1–2 minutes to activate the agar without hard boiling.
- Remove from heat and stir in vanilla extract or scraped vanilla bean.
- Strain the mixture through a fine-mesh sieve into a heatproof jug to remove any undissolved bits.
- Divide into ramekins or molds; cool 15–20 minutes at room temperature, then cover and chill 2–4 hours until set with a gentle wobble.
- Serve from the ramekin or unmold by dipping in warm water for 10–15 seconds, running a thin knife around the edge, and inverting onto a plate; add optional toppings just before serving.