Easy Cherry Dump Cake Recipe | Delicious White Cake Mix Dessert
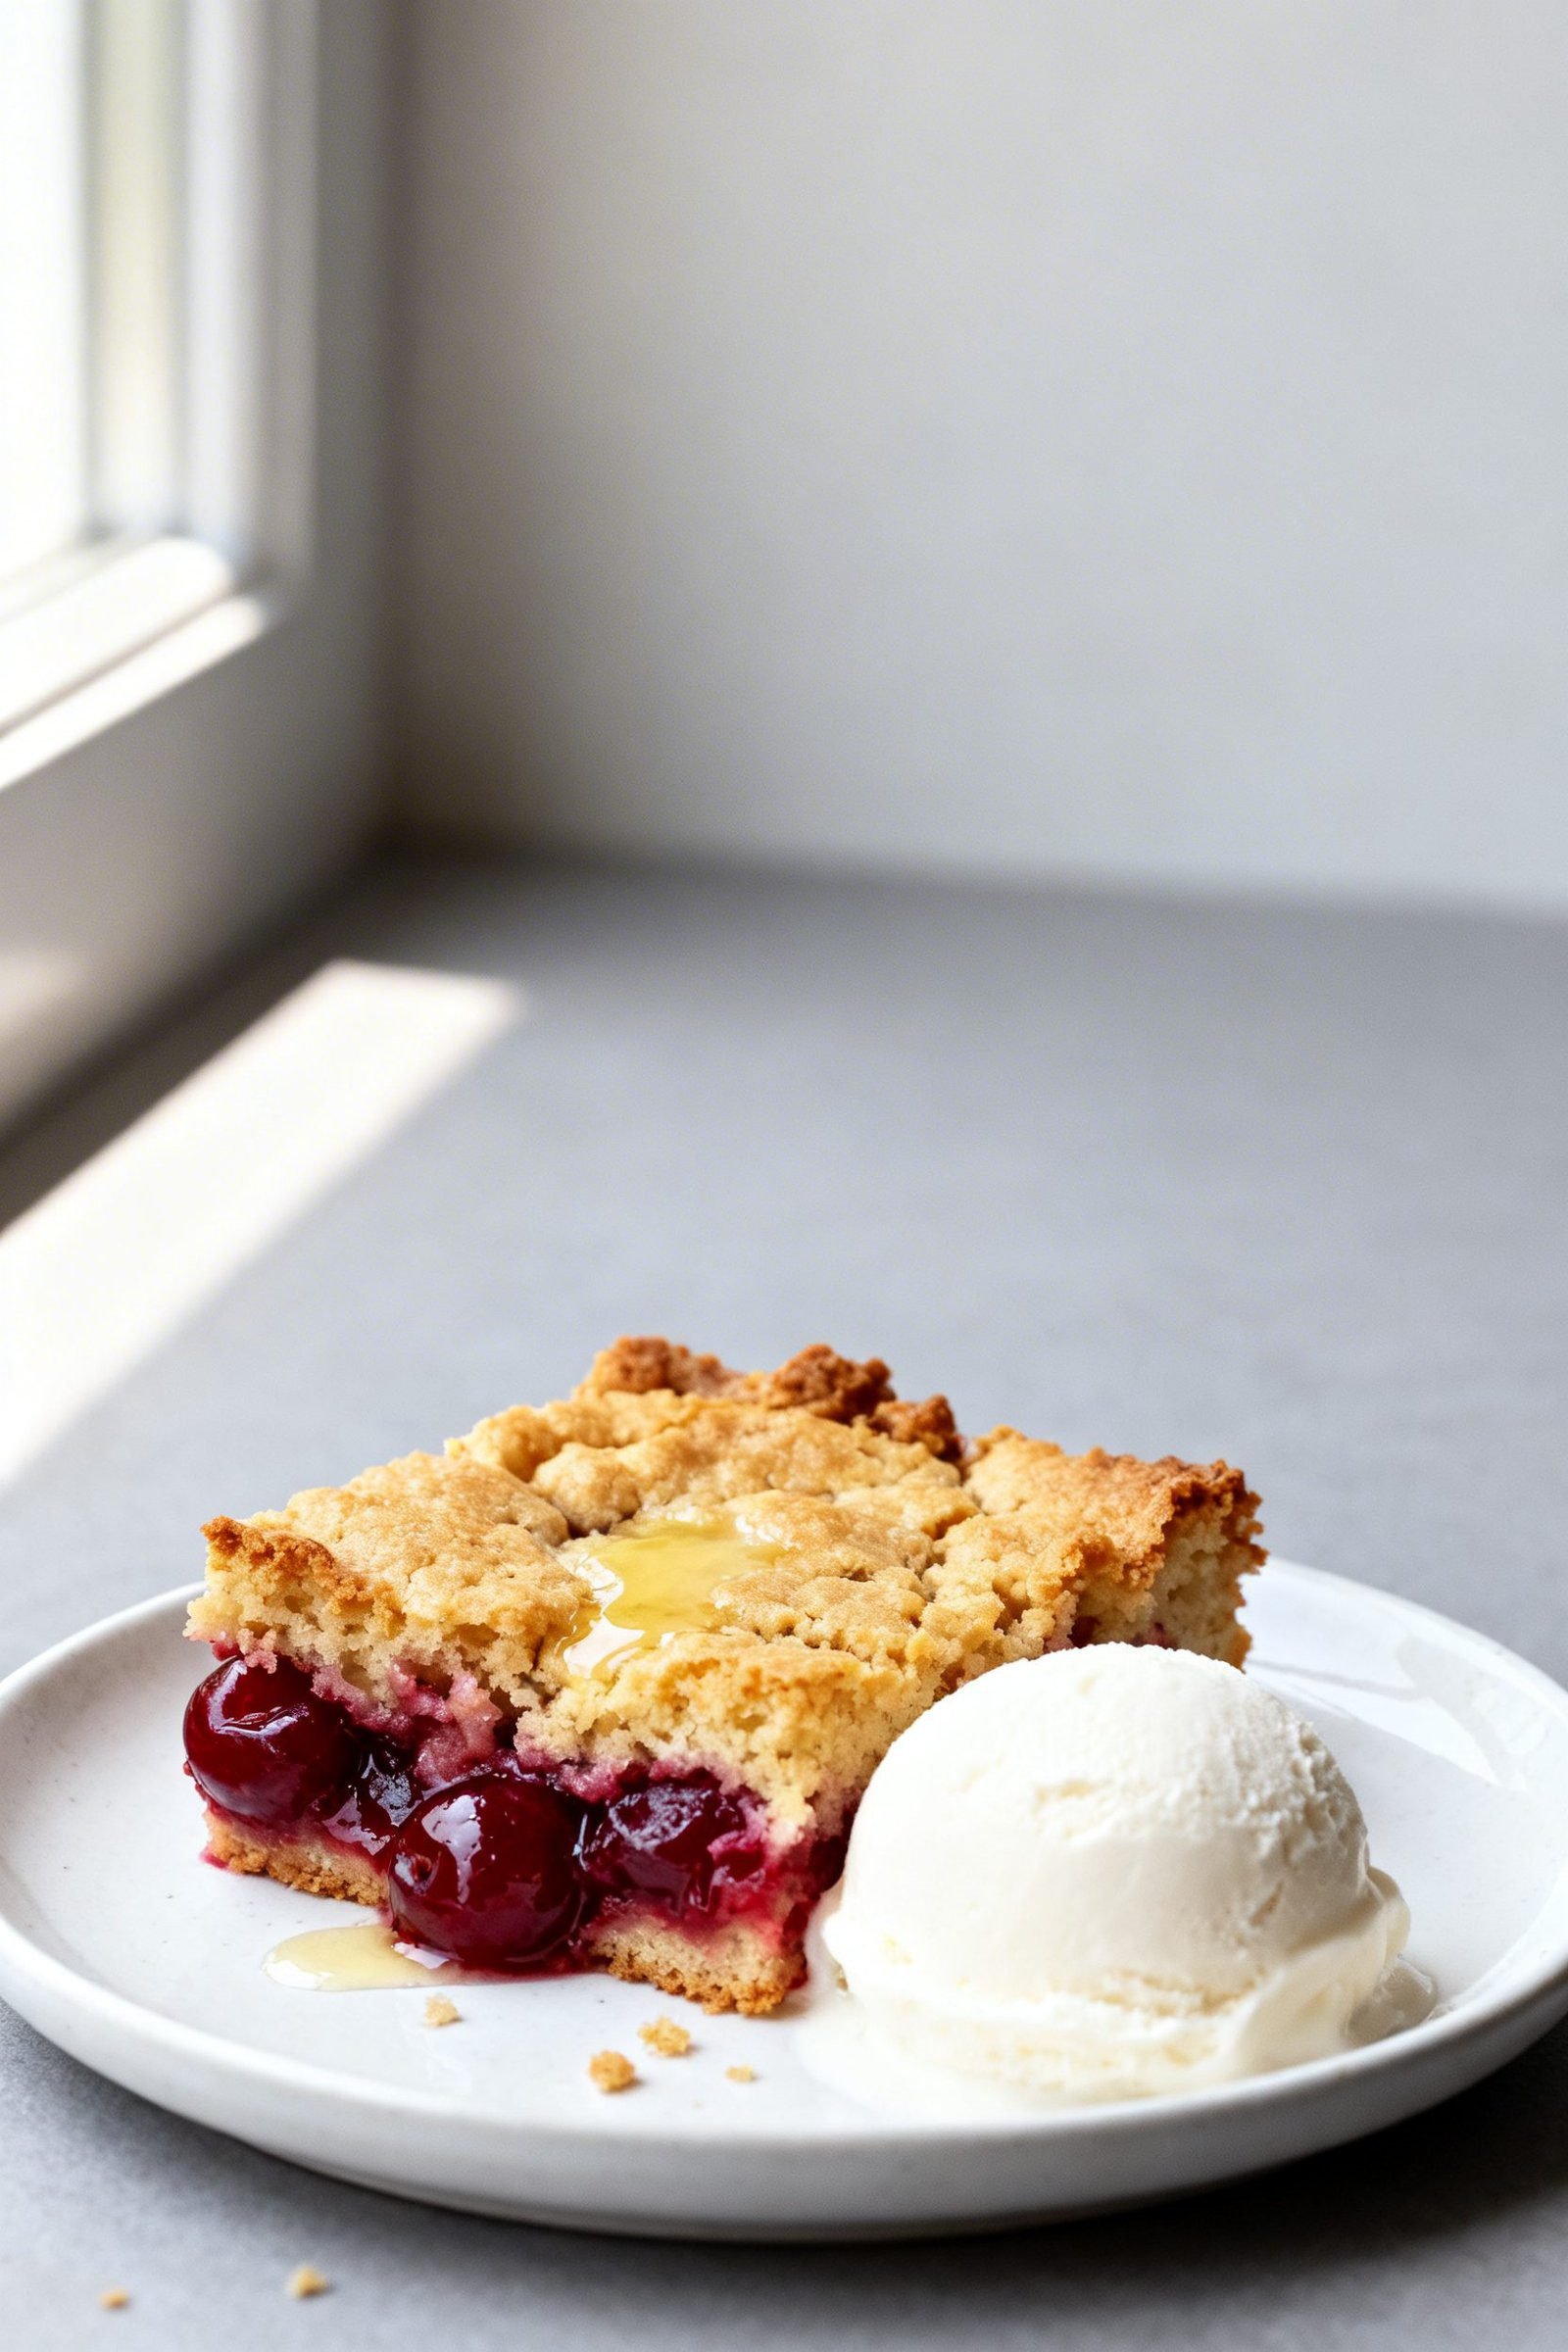
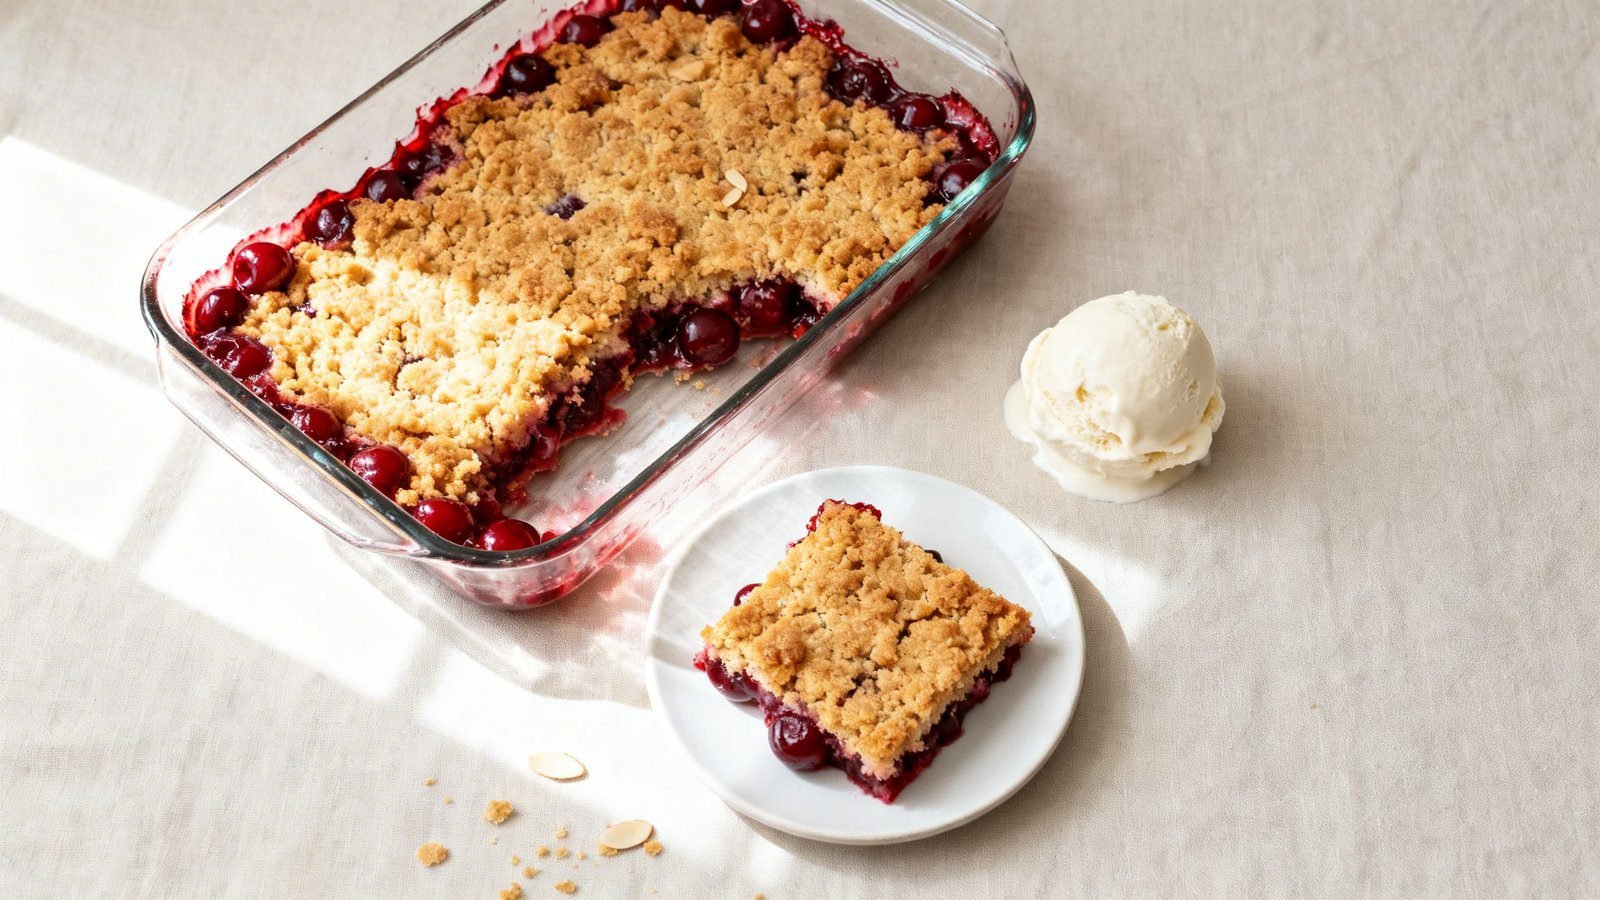
If you want a no-fuss dessert that always disappears fast, this easy cherry dump cake has your back. You only need a handful of pantry staples, one pan, and about five minutes of prep. The result? A bubbly cherry filling under a buttery, golden white cake topping that tastes like a cross between cobbler and shortcake. It’s warm, cozy, and perfect with a scoop of vanilla ice cream.
I love this dessert for busy nights, last-minute guests, and holidays when oven space runs tight. You don’t need any mixing bowls, just a baking dish and a spoon. Even better, the white cake mix keeps the flavor light and sweet so the cherry filling shines. Let’s walk through how to make it turn out perfectly every time.
Why This Cherry Dump Cake Turns Out So Good
- Minimal prep, maximum payoff: You layer ingredients and bake. That’s it. No mixers, no fancy steps.
- White cake mix for a tender crumb: It bakes up buttery and delicate, which pairs beautifully with tart cherries.
- Perfect texture contrast: Juicy fruit on the bottom, crisp and golden cake on top.
- Pantry-friendly: Keep canned cherry pie filling and cake mix on hand for instant dessert insurance.
- Crowd-pleasing flavor: It tastes like a rustic cherry cobbler but even easier.
Ingredients
- Cherry pie filling: Two 21-ounce cans. Choose a brand you love since it drives the flavor.
- White cake mix: One standard 15.25-ounce box. White mix keeps the flavor light and sweet.
- Unsalted butter: 1 cup (2 sticks), melted or thinly sliced. Melted gives even coverage and crisp edges.
- Almond extract (optional): 1/2 teaspoon to boost cherry flavor.
- Vanilla extract (optional): 1 teaspoon for a bakery-style aroma.
- Lemon zest (optional): From 1/2 lemon to brighten the filling.
- Pinch of salt (optional): Balances sweetness and rounds out the flavors.
How to Make This Cherry Dump Cake
Before You Start
- Prep the oven: Heat to 350°F (175°C). Grease a 9×13-inch baking dish.
- Melt the butter: You can also slice it thin if you prefer dotting the top instead of pouring.
Step-by-Step Instructions
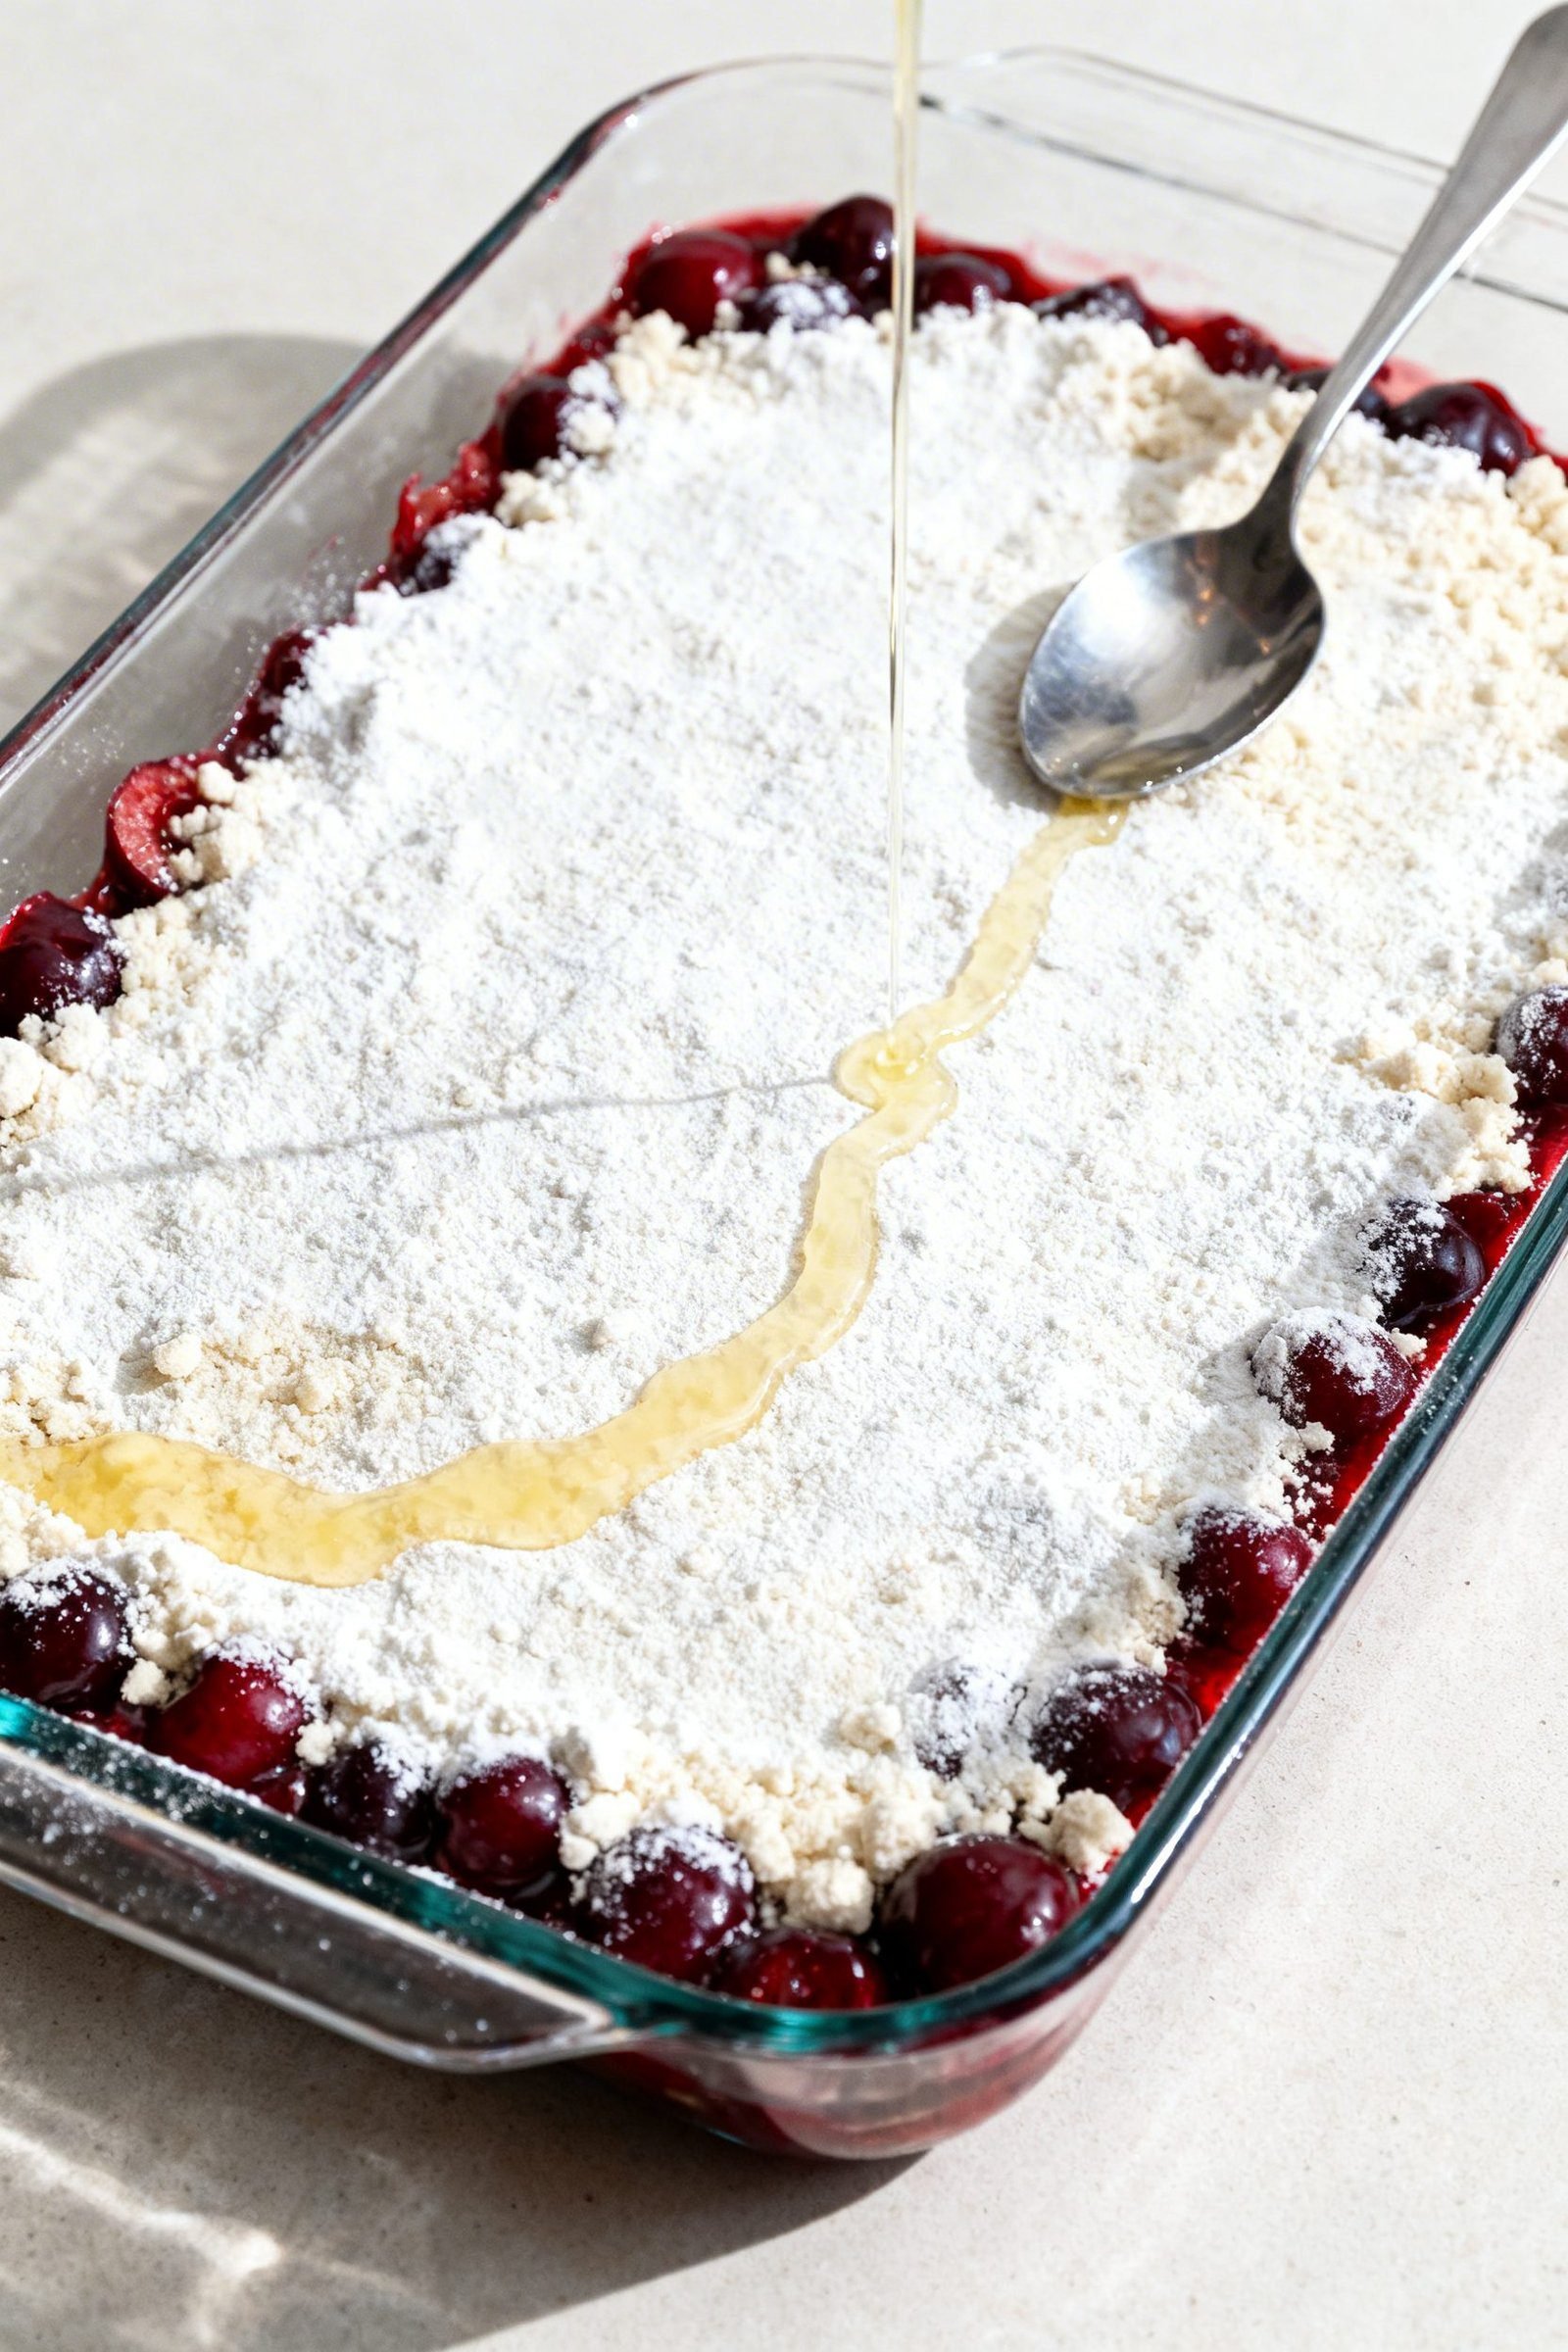
- Add the fruit layer: Spread the cherry pie filling in the bottom of the prepared dish. If using almond extract, vanilla, or lemon zest, stir them into the filling right in the pan for fewer dishes.
- Sprinkle the cake mix: Evenly cover the cherries with the dry white cake mix. Don’t stir.
- Add butter: Pour melted butter evenly over the surface, aiming to moisten as much cake mix as possible. If you use sliced butter, arrange slices in a tight, even layer to minimize dry spots.
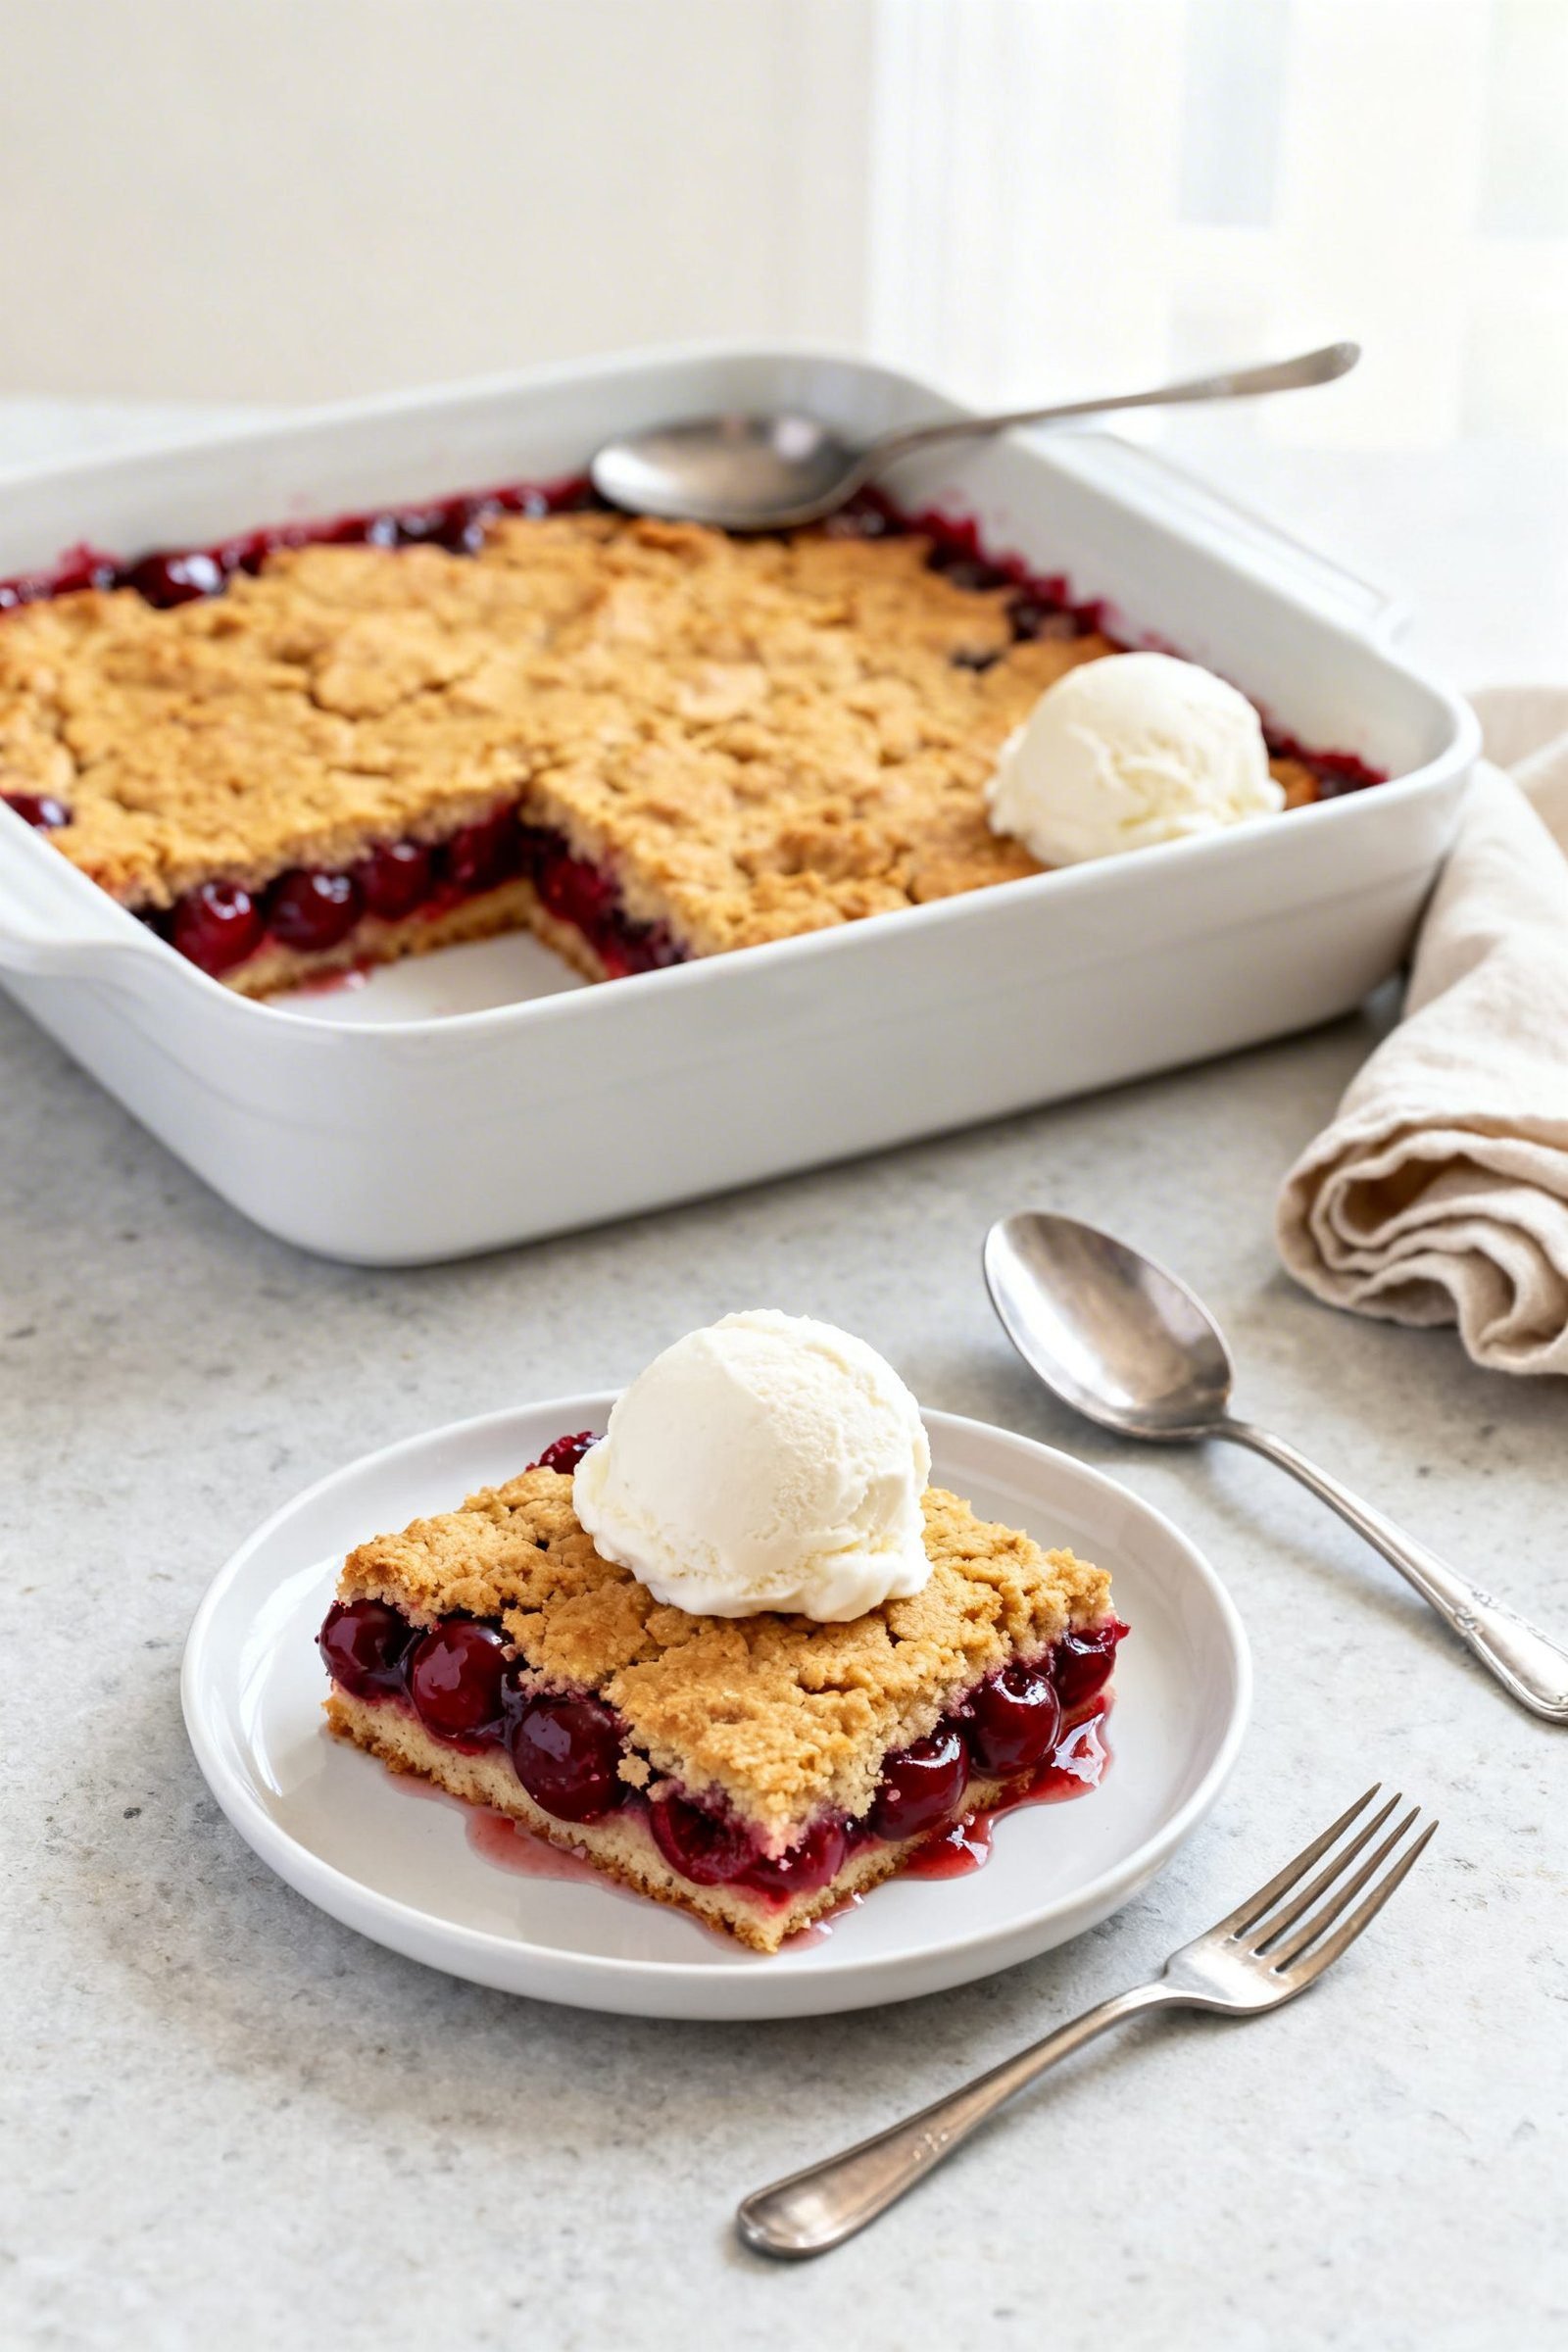
- Bake: Place the pan on the center rack and bake for 40–50 minutes until the top looks golden and crisp and the filling bubbles around the edges.
- Rest and serve: Let it cool for 10–15 minutes. Serve warm with vanilla ice cream or lightly sweetened whipped cream.
Tips for the Best Texture
- Cover dry patches: If you spot any stubborn dry cake mix near the end of baking, drizzle 1–2 tablespoons melted butter or a splash of milk over those spots and return the dish to the oven for 5–10 minutes.
- Don’t overbake: Pull the cake when the top browns and the edges bubble. Overbaking dries the topping.
- Go for even layers: Spread the cherries flat and the cake mix evenly to avoid thick, gummy pockets.
How to Store Cherry Dump Cake
- Cool completely: Let the pan reach room temperature before covering to prevent condensation.
- Refrigerate: Cover the dish or transfer leftovers to an airtight container. Store in the fridge for up to 4 days.
- Reheat: Warm individual portions in the microwave for 20–30 seconds, or reheat the whole pan at 300°F for 10–15 minutes.
- Freeze: Freeze tightly wrapped portions for up to 2 months. Thaw overnight in the fridge and reheat until warm.
Why You’ll Love Making This Dessert
- Fast and flexible: You can assemble it while the oven preheats.
- Budget-friendly: Simple ingredients with big payoff.
- Great for sharing: A 9×13 pan easily serves a crowd at potlucks and holidays.
- Beginner-proof: No mixing bowls or special equipment required.
- Seasonless favorite: Tastes summery in July and cozy in December.
What to Avoid for Best Results
- Don’t stir the layers: Resist the urge. Stirring muddies the topping and filling.
- Don’t skimp on butter: The fat ensures even browning and that crisp, cookie-like top.
- Don’t leave thick clumps of cake mix: Spread the dry mix in a thin, even layer for even hydration.
- Don’t under-bake: Make sure the topping sets and browns so it doesn’t taste floury.
- Don’t skip the rest time: A short cool-down lets the juices thicken for cleaner scoops.
Cherry Dump Cake Variations to Try
- Cherry-almond crunch: Stir 1/2 teaspoon almond extract into the filling and sprinkle 1/2 cup sliced almonds over the cake mix before baking.
- Cherry pineapple: Add a 20-ounce can of crushed pineapple (drained) over the cherries for a sweet-tart twist.
- Chocolate-cherry black forest style: Swap the white cake mix for chocolate and add chocolate chips on top.
- Lighter lemon-cherry: Use white cake mix and add lemon zest to the filling plus a light dusting of powdered sugar after baking.
- Nutty streusel topper: Mix 1/2 cup chopped pecans with the dry cake mix before adding butter for extra crunch.
- Butter pattern: If you use sliced butter, overlap slices tightly for even melting and a more uniform crust.
FAQ
Can I use yellow cake mix instead of white?
Yes. Yellow cake mix tastes a bit richer and more buttery. White cake mix tastes lighter and lets the cherry flavor pop more.
Do I need to add eggs or milk?
No. Dump cake uses the dry mix as-is. The butter and fruit juices hydrate the topping during baking.
Can I use fresh or frozen cherries?
You can, but you’ll need to make a quick filling. Simmer pitted cherries with sugar and a little cornstarch until thick and jammy, then proceed with the recipe. Canned pie filling keeps this truly effortless.
Why did I get dry spots on top?
Some areas didn’t get enough butter. Next time, pour butter slowly and evenly, or use thin slices to cover the surface. You can always drizzle a bit more butter during baking if needed.
How do I know it’s done?
The top turns golden and crisp, and the filling bubbles around the edges. Start checking at 40 minutes.
Can I make it in a smaller pan?
Yes, but the layers will be thicker and may need a longer bake. Keep an eye on color and bubbling rather than the clock.
Is this good served cold?
Absolutely. It firms up in the fridge and tastes like a cherry shortcake bar. I still love it slightly warm with ice cream.
Conclusion
This easy cherry dump cake brings big comfort with tiny effort. Layer cherries, sprinkle white cake mix, add butter, and bake until golden and bubbly. It’s the kind of dessert you can make on a whim and be proud to share—sweet, jammy, and irresistibly crisp on top. Keep the ingredients in your pantry, and you’ll always have a crowd-pleasing treat ready when the craving hits.
Easy Cherry Dump Cake
A no-fuss cherry dump cake with white cake mix and butter baked to a golden, crisp topping over bubbly cherry filling.
Ingredients
- Two 21-ounce cans cherry pie filling
- One 15.25-ounce box white cake mix
- 1 cup (2 sticks) unsalted butter, melted or thinly sliced
- ½ teaspoon almond extract (optional)
- 1 teaspoon vanilla extract (optional)
- Zest from ½ lemon (optional)
- Pinch of salt (optional)
Instructions
- Preheat oven to 350°F (175°C) and grease a 9×13-inch baking dish.
- Spread cherry pie filling evenly in the dish; if using almond extract, vanilla, lemon zest, or a pinch of salt, stir them into the filling in the pan.
- Evenly sprinkle the dry white cake mix over the cherries; do not stir.
- Pour melted butter evenly over the surface (or arrange thin butter slices in a tight, even layer).
- Bake on the center rack for 40–50 minutes, until the top is golden and crisp and the filling bubbles at the edges.
- Let cool 10–15 minutes before serving. Serve warm with vanilla ice cream or whipped cream.