Best Ever Lunch Lady Brownies Recipe | Fudgy School Cafeteria Bars
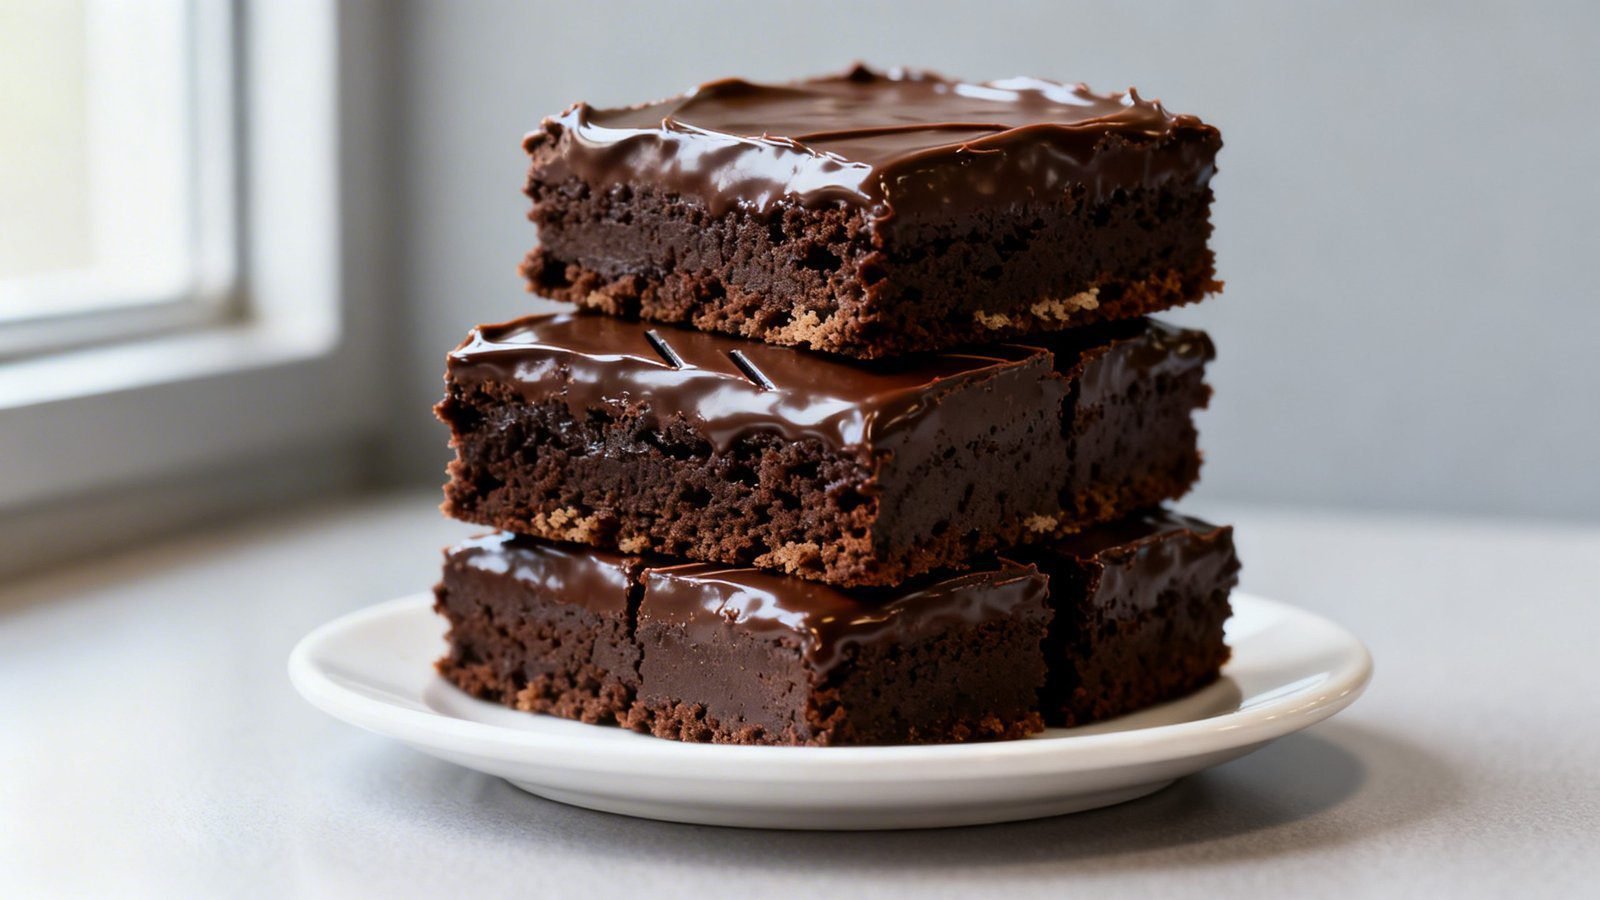
Let’s bring back the sweetest part of school lunch: those rich, fudgy Lunch Lady Brownies with the shiny chocolate frosting. This recipe gives you that exact nostalgic bite—thick, chocolatey bars with a tender crumb and a soft, fudgy center.
I’ve tested these until they tasted exactly like the cafeteria classics. You mix simple pantry staples in one bowl, bake until just set, and slather on a creamy chocolate frosting while the brownies are still warm. The result? Crowd-pleasing, old-school brownies that never disappoint.
Why This Lunch Lady Brownies Recipe Works
- Classic cafeteria texture: Fudgy middle, soft edges, and a glossy, set frosting on top.
- One-bowl batter: Melted butter plus cocoa means minimal mess and maximum chocolate flavor.
- Frost-while-warm trick: Spreads like a dream and lightly melts into the top for that signature finish.
- No special tools: You only need a bowl, whisk, and a 9×13 pan.
- Reliable results: Clear visual cues ensure you never overbake.
Ingredients
For the Brownies
- Unsalted butter: 1 cup (2 sticks), melted
- Granulated sugar: 2 cups
- Large eggs: 4, room temperature
- Vanilla extract: 2 teaspoons
- All-purpose flour: 1 1/2 cups, spooned and leveled
- Unsweetened cocoa powder: 1/2 cup (natural, not Dutch-process for classic flavor)
- Salt: 1/2 teaspoon
- Whole milk: 1/4 cup (keeps them soft and fudgy)
For the Frosting
- Unsalted butter: 1/2 cup (1 stick), softened
- Unsweetened cocoa powder: 1/4 cup
- Powdered sugar: 2 1/2 to 3 cups, sifted
- Milk or half-and-half: 1/4 cup, plus more as needed
- Vanilla extract: 1 teaspoon
- Pinch of salt: to balance the sweetness
How to Make Classic Lunch Lady Brownies
Prep
- Heat the oven: 350°F (177°C).
- Prepare the pan: Grease a 9×13 metal pan and line with a parchment sling for easy removal.
Mix the Brownie Batter
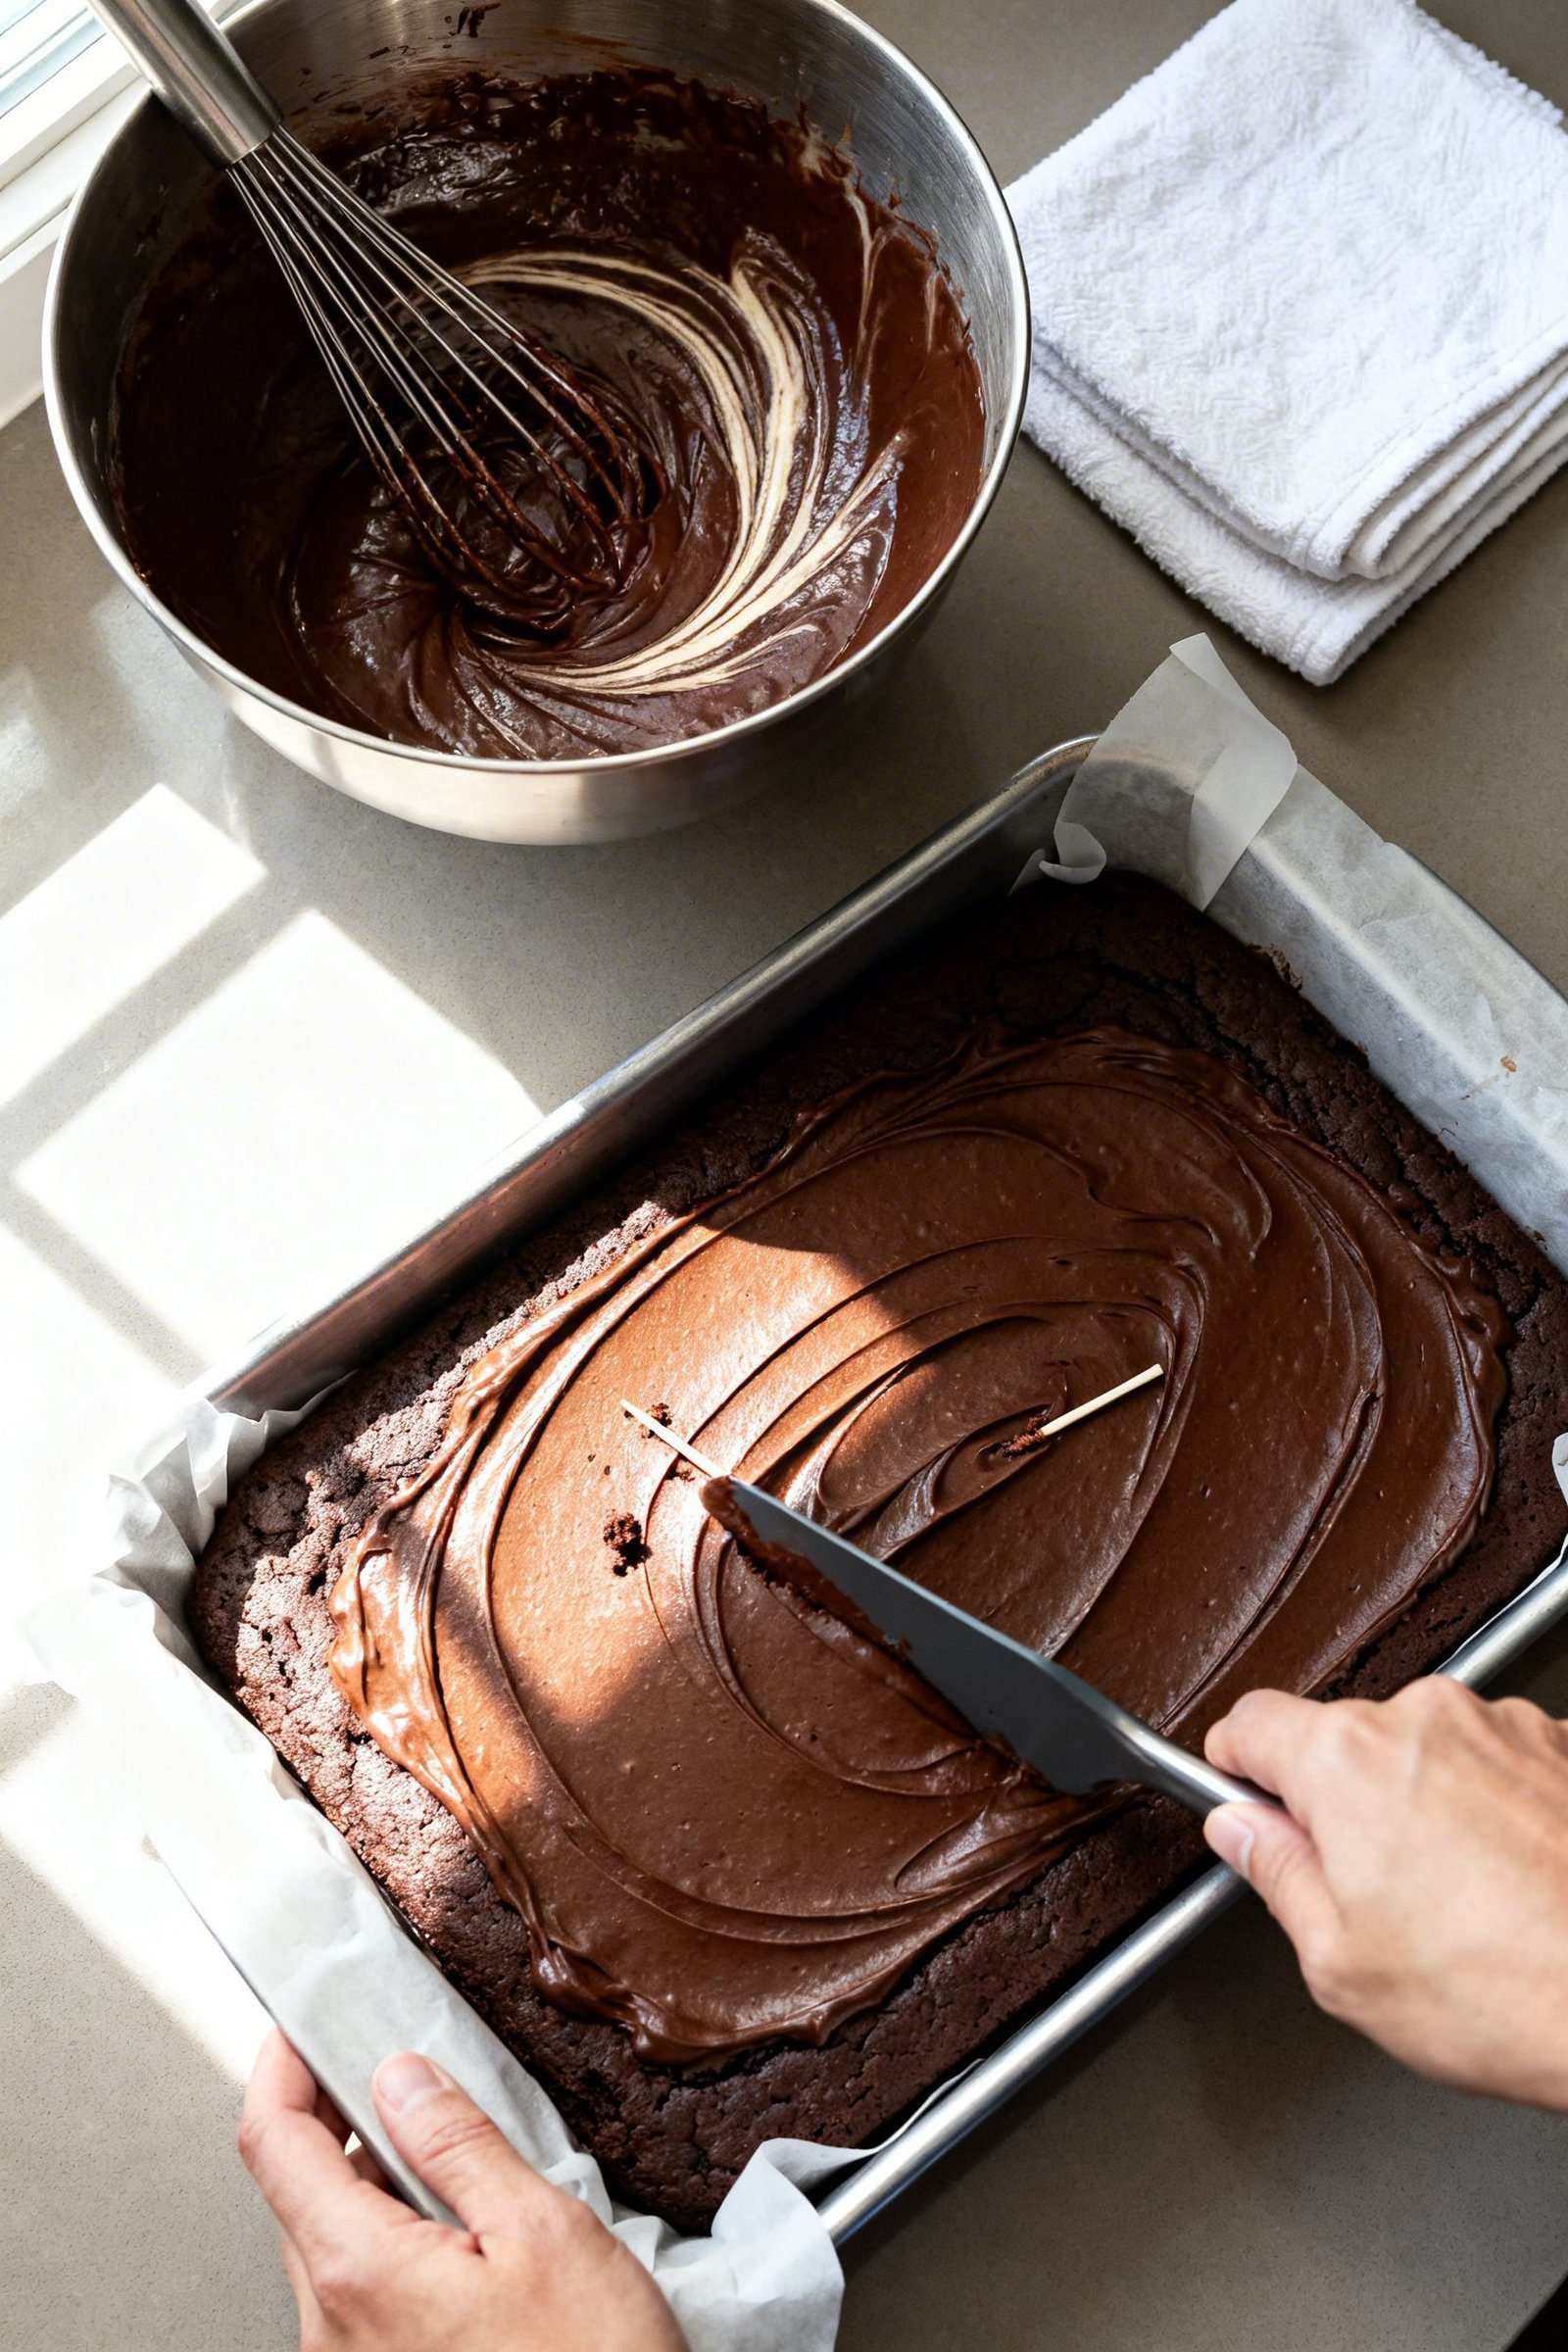
- Whisk wet ingredients: In a large bowl, whisk melted butter and sugar until glossy, about 30 seconds. Whisk in eggs one at a time, then add vanilla.
- Combine dry ingredients: In a separate bowl, stir flour, cocoa, and salt to break up any clumps.
- Bring it together: Add dry ingredients to the wet and whisk just until mostly combined. Stir in milk until the batter looks thick and smooth. Do not overmix.
- Spread and bake: Pour into the pan and smooth the top. Bake 20–25 minutes, until the center looks set and a toothpick comes out with moist crumbs, not wet batter.
Make the Frosting
- Beat the butter: In a bowl, beat softened butter until creamy.
- Add dry ingredients: Mix in cocoa, then gradually add powdered sugar.
- Adjust consistency: Add milk, vanilla, and a pinch of salt. Beat until smooth and spreadable—think thick but pourable. Add a splash more milk if needed.
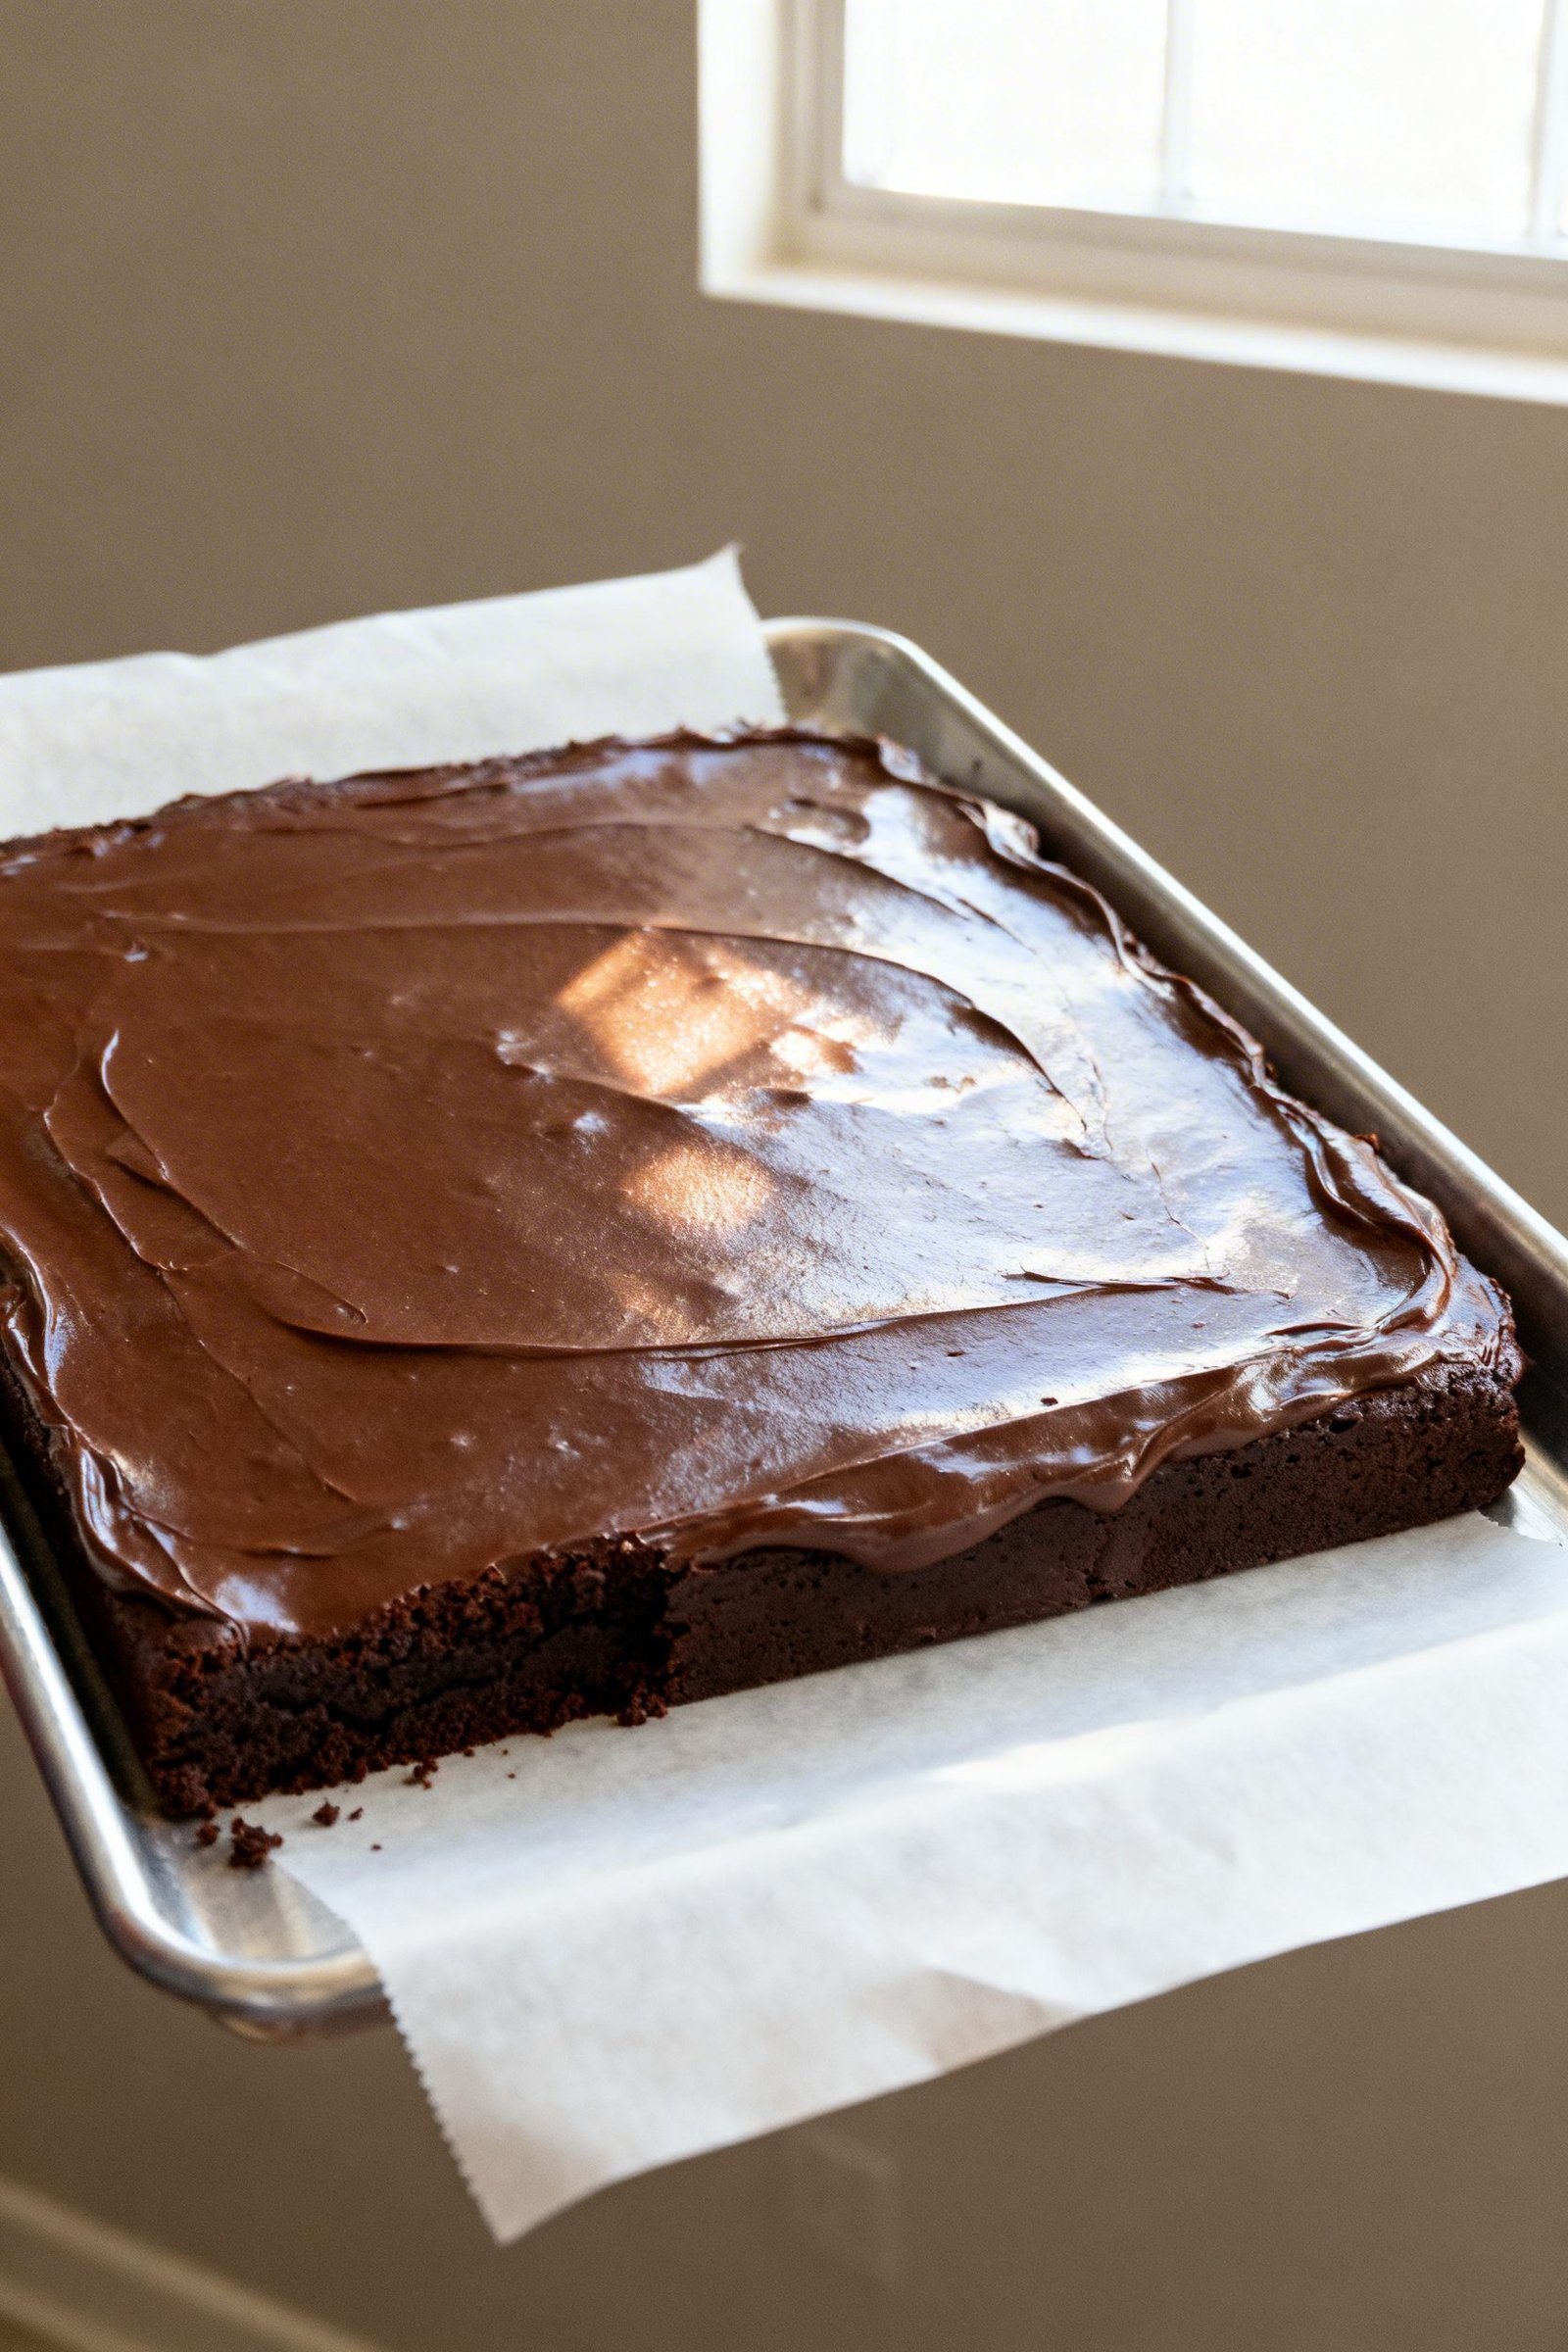
Frost While Warm
- Timing matters: Spread frosting over the warm (not hot) brownies—about 10 minutes after they come out.
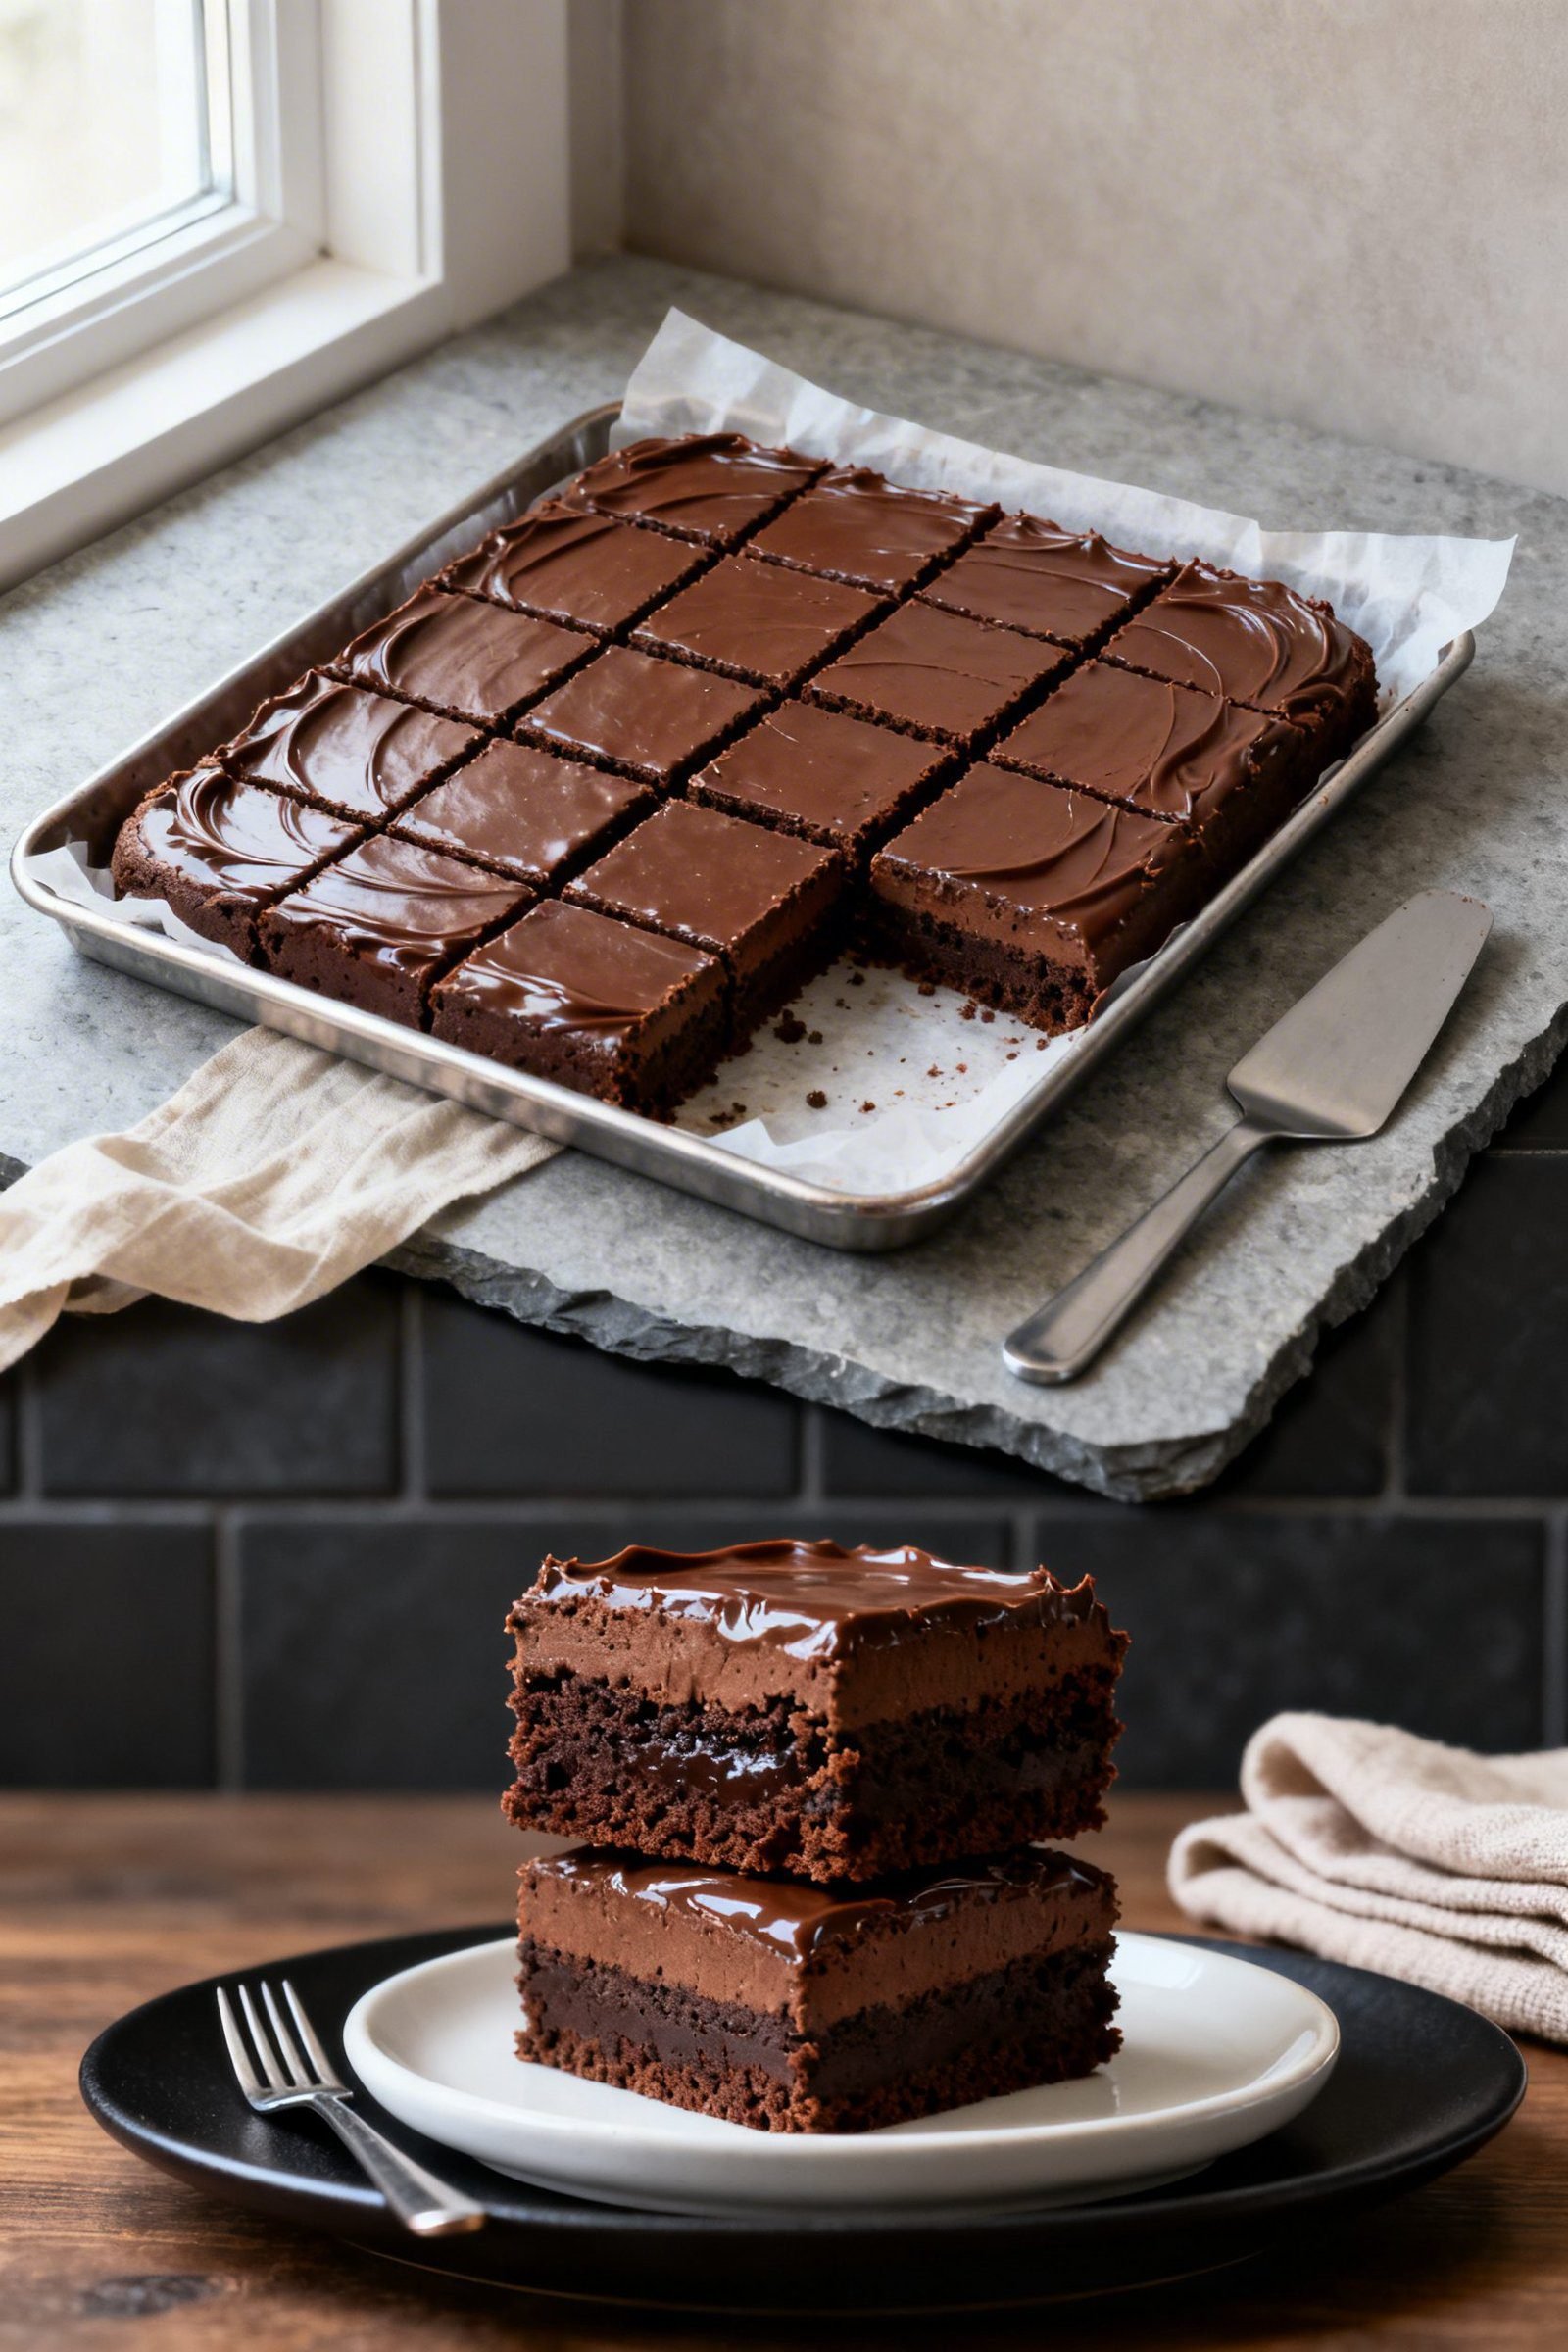
- Set and slice: Let the frosting set 30–45 minutes. Lift the slab out with the parchment and cut into bars with a warm knife for clean edges.
How to Store These Fudgy Brownies
- Room temperature: Keep in an airtight container for 3–4 days. The frosting stays soft and glossy.
- Refrigerator: Store up to 1 week if your kitchen runs warm. Bring to room temp before serving for the best texture.
- Freezer: Freeze slices tightly wrapped for up to 2 months. Thaw wrapped at room temp to avoid condensation on the frosting.
Benefits of Making Lunch Lady Brownies at Home
- Pure nostalgia: You get that true cafeteria taste and texture without preservatives.
- Big-batch friendly: A 9×13 pan serves a crowd—perfect for parties, potlucks, or bake sales.
- Budget ingredients: Everyday pantry staples keep costs low.
- Consistent results: Easy method with visual doneness cues.
- Customizable sweetness: Adjust the frosting to hit your perfect level.
What Not to Do
- Don’t overbake: Dry edges and a cakey center happen fast. Pull them when crumbs cling to the tester.
- Don’t skip the milk in the batter: It keeps the crumb tender and fudgy.
- Don’t frost too hot or too cold: Too hot melts the frosting; too cold prevents that signature meld.
- Don’t overmix after adding flour: Overworking develops gluten and toughens the brownies.
- Don’t use a glass pan without adjusting: Glass bakes hotter. If you must use glass, reduce oven temp by 25°F and watch closely.
Variations You Can Try
- Mocha lunch lady brownies: Add 1–2 teaspoons instant espresso to the batter and 1/2 teaspoon to the frosting.
- Nutty crunch: Fold in 1 cup chopped toasted walnuts or pecans.
- Extra fudgy: Swap 1/4 cup flour for 1/4 cup additional cocoa and bake on the shorter time.
- Peanut butter swirl: Dollop 1/3 cup warmed peanut butter over the batter and swirl before baking.
- Mint cafeteria style: Add 1/2 teaspoon peppermint extract to the frosting and top with crushed chocolate mints.
- Gluten-free: Use a 1:1 gluten-free baking flour with xanthan gum. Watch doneness early.
FAQ
Can I halve the recipe?
Yes. Bake in an 8×8 or 9×9 pan. Start checking at 18–20 minutes.
Why melt the butter instead of creaming it?
Melted butter creates a denser, fudgier crumb and that classic cafeteria texture.
Which cocoa powder works best?
Natural unsweetened cocoa delivers the most nostalgic taste. You can use Dutch-process for a deeper chocolate note, but the flavor shifts slightly.
How do I know they’re done?
Edges look set, the center looks matte (not shiny), and a toothpick shows moist crumbs. If it looks wet, give it a few more minutes.
My frosting looks too thick. What should I do?
Whisk in milk 1 teaspoon at a time until it spreads easily. If it gets too thin, add a little more powdered sugar.
Can I add chocolate chips?
Absolutely. Fold in 3/4 to 1 cup semisweet chips for extra pockets of chocolate.
Do I need a mixer?
No. A whisk and spatula handle everything, including the frosting if the butter is soft.
Conclusion
These Lunch Lady Brownies deliver everything you remember: a thick, fudgy bar with a silky chocolate frosting that sets just right. You can whip them up with pantry staples, frost them while warm, and slice into perfect cafeteria-style squares. Bake a pan today and watch them disappear—fast.
Best Ever Lunch Lady Brownies
Thick, nostalgic cafeteria-style fudgy brownies topped with glossy chocolate frosting, made in one bowl and frosted while warm.
Ingredients
- Unsalted butter: 1 cup (2 sticks), melted
- Granulated sugar: 2 cups
- Large eggs: 4, room temperature
- Vanilla extract: 2 teaspoons
- All-purpose flour: 1 ½ cups, spooned and leveled
- Unsweetened cocoa powder: ½ cup (natural)
- Salt: ½ teaspoon
- Whole milk: ¼ cup
- For the frosting:
- Unsalted butter: ½ cup (1 stick), softened
- Unsweetened cocoa powder: ¼ cup
- Powdered sugar: 2 ½ to 3 cups, sifted
- Milk or half-and-half: ¼ cup, plus more as needed
- Vanilla extract: 1 teaspoon
- Pinch of salt
Instructions
- Heat oven to 350°F (177°C). Grease a 9×13 metal pan and line with a parchment sling.
- In a large bowl, whisk melted butter and sugar until glossy, about 30 seconds. Whisk in eggs one at a time, then add vanilla.
- In a separate bowl, stir together flour, cocoa, and salt to break up clumps.
- Add dry ingredients to wet and whisk just until mostly combined. Stir in milk until batter is thick and smooth; do not overmix.
- Spread batter in the prepared pan and smooth the top. Bake 20–25 minutes, until the center looks set and a toothpick comes out with moist crumbs (not wet batter).
- While brownies bake or cool slightly, beat softened butter until creamy. Mix in cocoa, then gradually add powdered sugar.
- Add milk (or half-and-half), vanilla, and a pinch of salt; beat until smooth and spreadable, adding a splash more milk if needed.
- After brownies cool about 10 minutes (warm, not hot), spread frosting evenly over the top.
- Let frosting set 30–45 minutes, then lift out with parchment and slice into bars with a warm knife.