
Traditional Danish Butter Cookies Recipe | Classic Holiday Treat
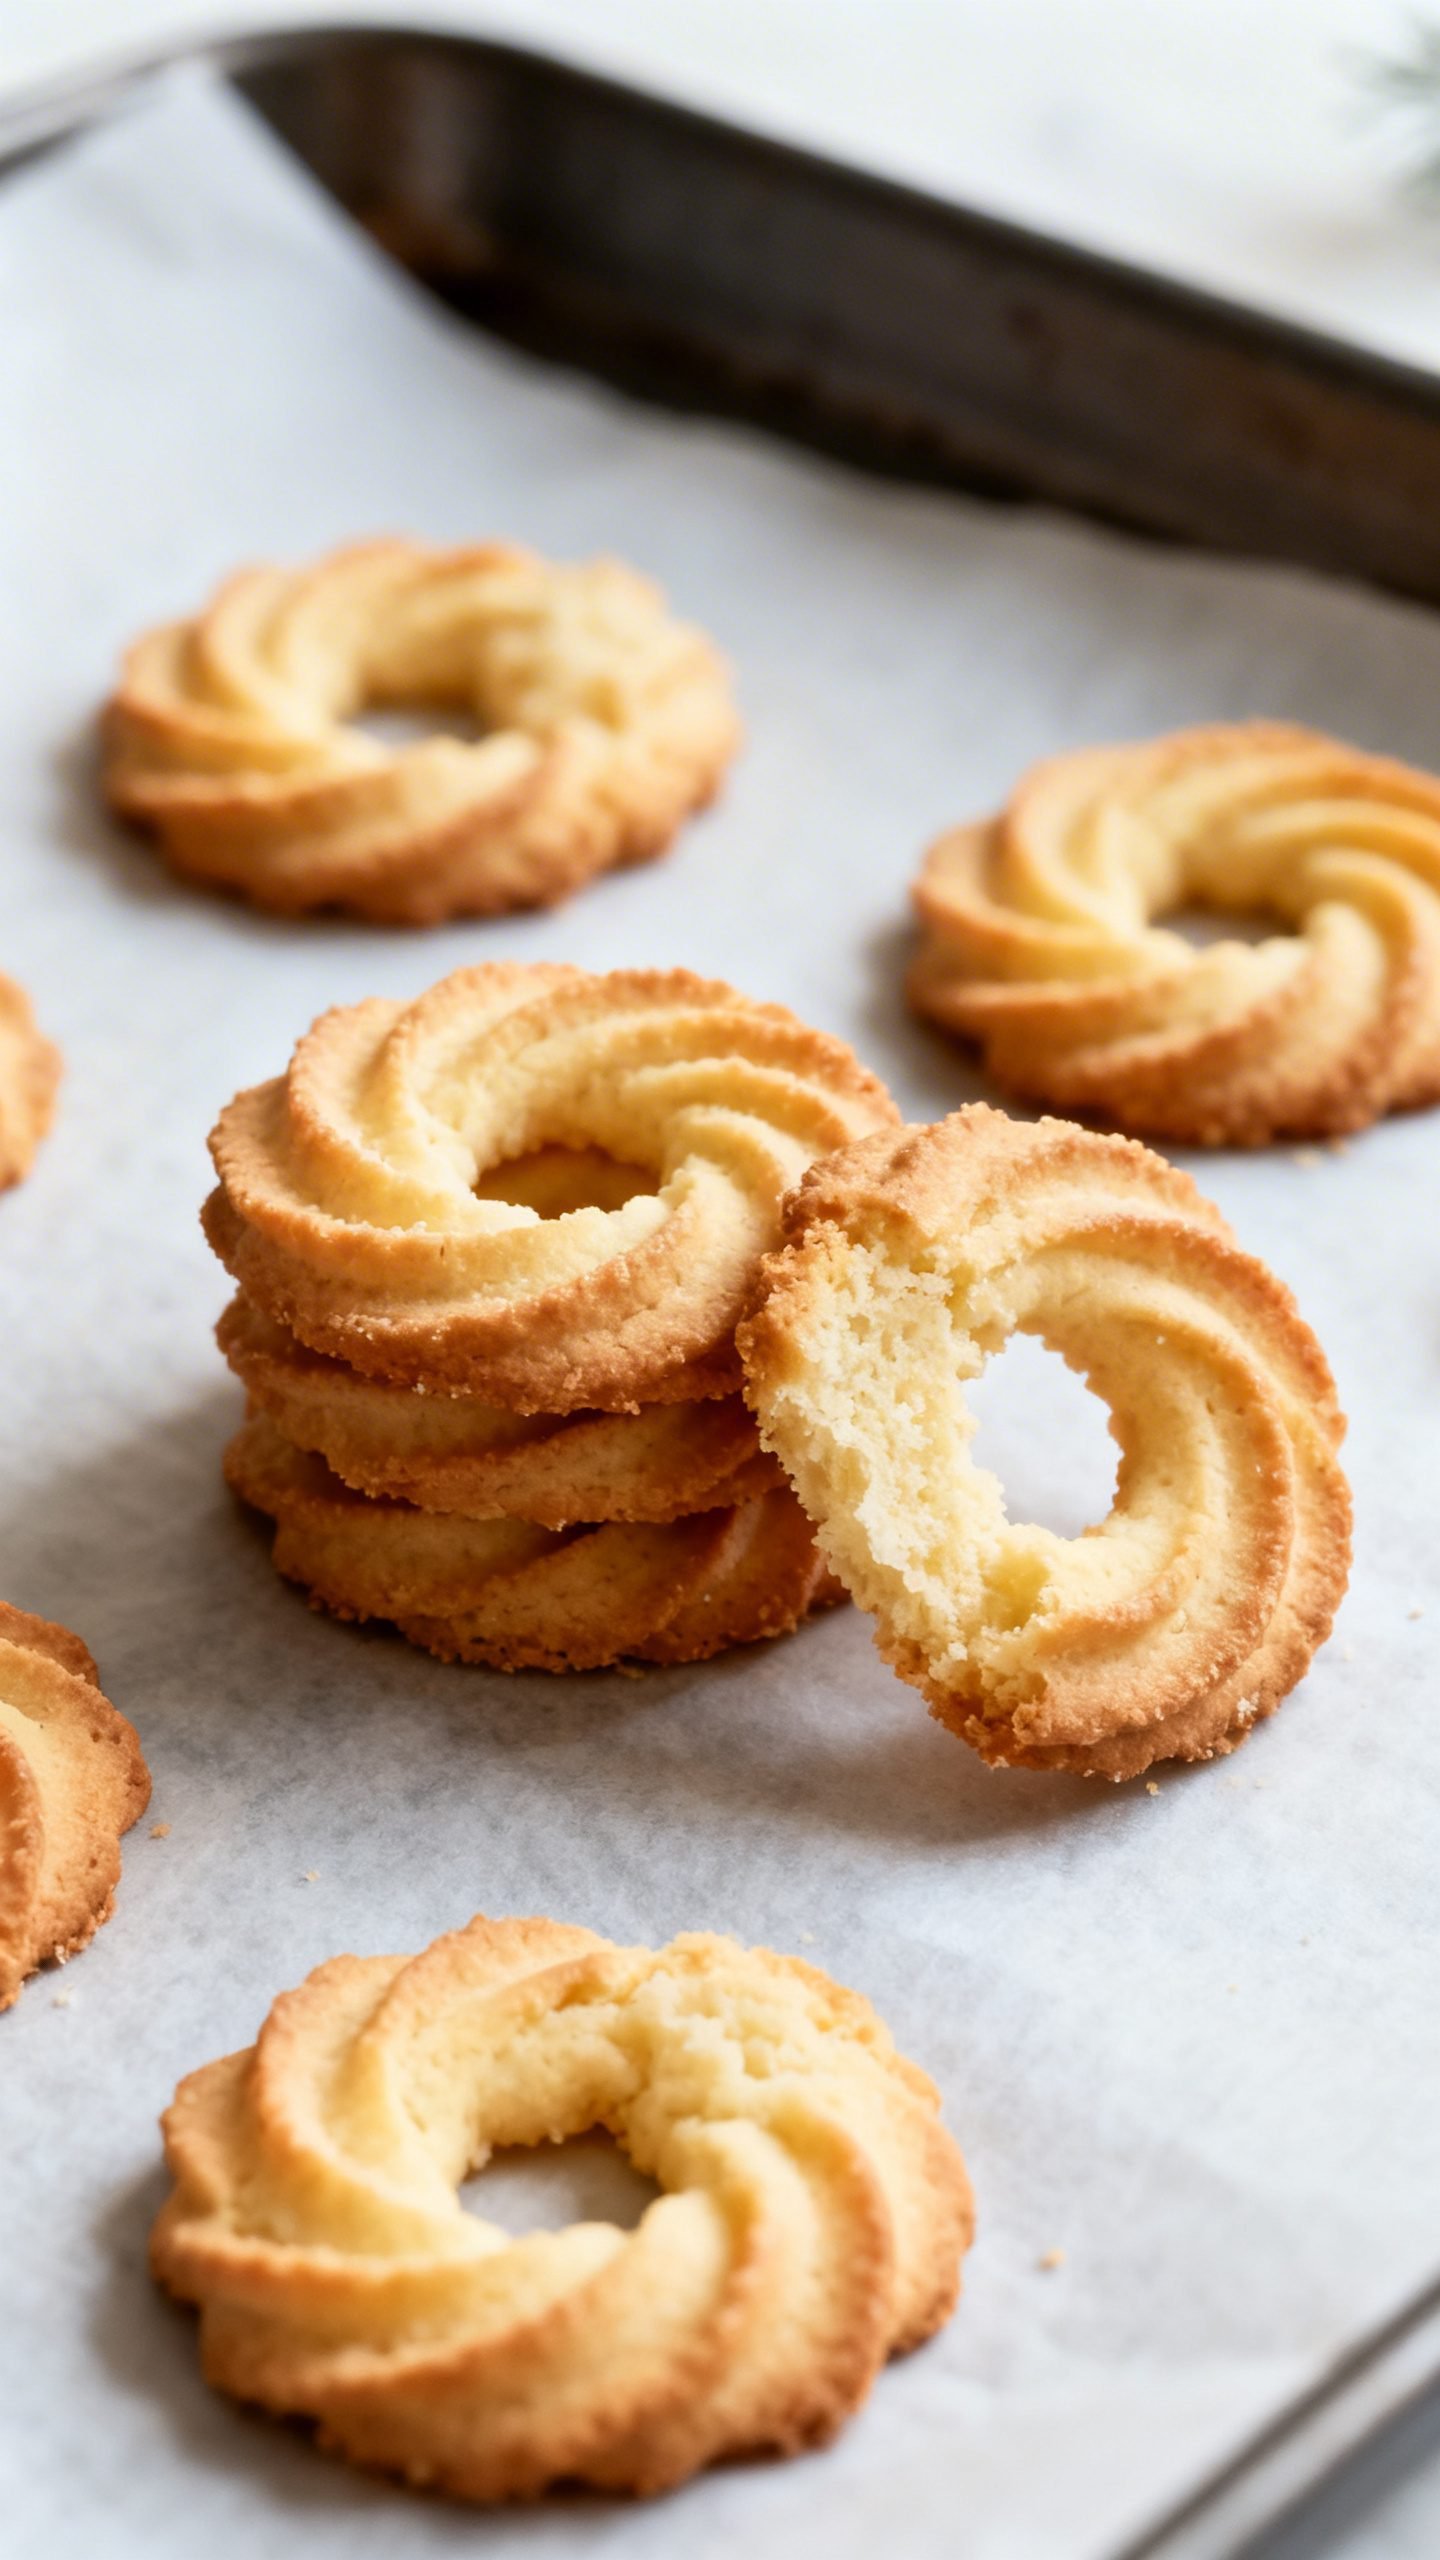
Crumbly, buttery, and perfectly golden, Danish butter cookies are the kind of treat that make the whole house smell like the holidays. You only need a handful of pantry staples, a mixer, and a baking sheet to pull them off. No fancy techniques, just simple steps and a few tips for that signature tender bite.
I’ve baked countless batches for cookie tins, neighbor gifts, and late-night tea. This classic recipe captures the authentic taste: rich butter flavor, light sweetness, and a melt-in-your-mouth texture. I’ll show you how to pipe the signature wreath shapes, bake them evenly, and store them so they stay fresh and crisp.
Why This Danish Butter Cookies Recipe Works
- High butter-to-flour ratio creates that ultra-tender, sandy crumb and rich flavor.
- Confectioners’ sugar blends smoothly into the butter for a fine, delicate texture with no grittiness.
- Cornstarch (or potato starch) lightens the dough and ensures the cookies hold a beautiful shape while staying crisp at the edges.
- Proper mixing order (cream, then add egg and dry ingredients) delivers structure without toughness.
- Chill time helps the cookies keep their piped ridges and prevents spreading.
- Low, even baking temperature promotes gentle browning and an even bake from edge to center.
Ingredients
- 1 cup (226 g) unsalted butter, softened – use high-quality European-style butter for best flavor.
- 3/4 cup (90 g) confectioners’ sugar – sifts easily and dissolves cleanly.
- 1 large egg, room temperature – binds and adds tenderness.
- 1 1/2 teaspoons pure vanilla extract – classic aroma; optional 1/4 teaspoon almond extract for a bakery-style note.
- 1/4 teaspoon fine sea salt – balances sweetness and intensifies butter flavor.
- 2 cups (240 g) all-purpose flour – measured by spoon-and-level for accuracy.
- 1/4 cup (30 g) cornstarch – for delicate texture and clean edges.
- Optional toppings: coarse sanding sugar, chocolate for dipping, festive sprinkles.
How to Make Classic Danish Butter Cookies
Before You Start
- Soften the butter until it yields easily to a finger press but doesn’t look greasy.
- Line two baking sheets with parchment. Avoid silicone mats if you want sharper edges.
- Fit a piping bag with a large open star tip (Ateco 827/829 or Wilton 1M).
- Preheat oven to 350°F (175°C). Check with an oven thermometer for accuracy.
Make the Dough
- Cream the butter and sugar: Beat butter and confectioners’ sugar on medium speed 2–3 minutes until pale and fluffy. Scrape the bowl.
- Add egg and extracts: Mix in the egg, vanilla, and optional almond extract until smooth. Add salt. Beat just to combine.
- Combine dry ingredients: Whisk flour and cornstarch together. Add to the mixer in two additions. Mix on low until a soft, thick, pipeable dough forms. Do not overmix.
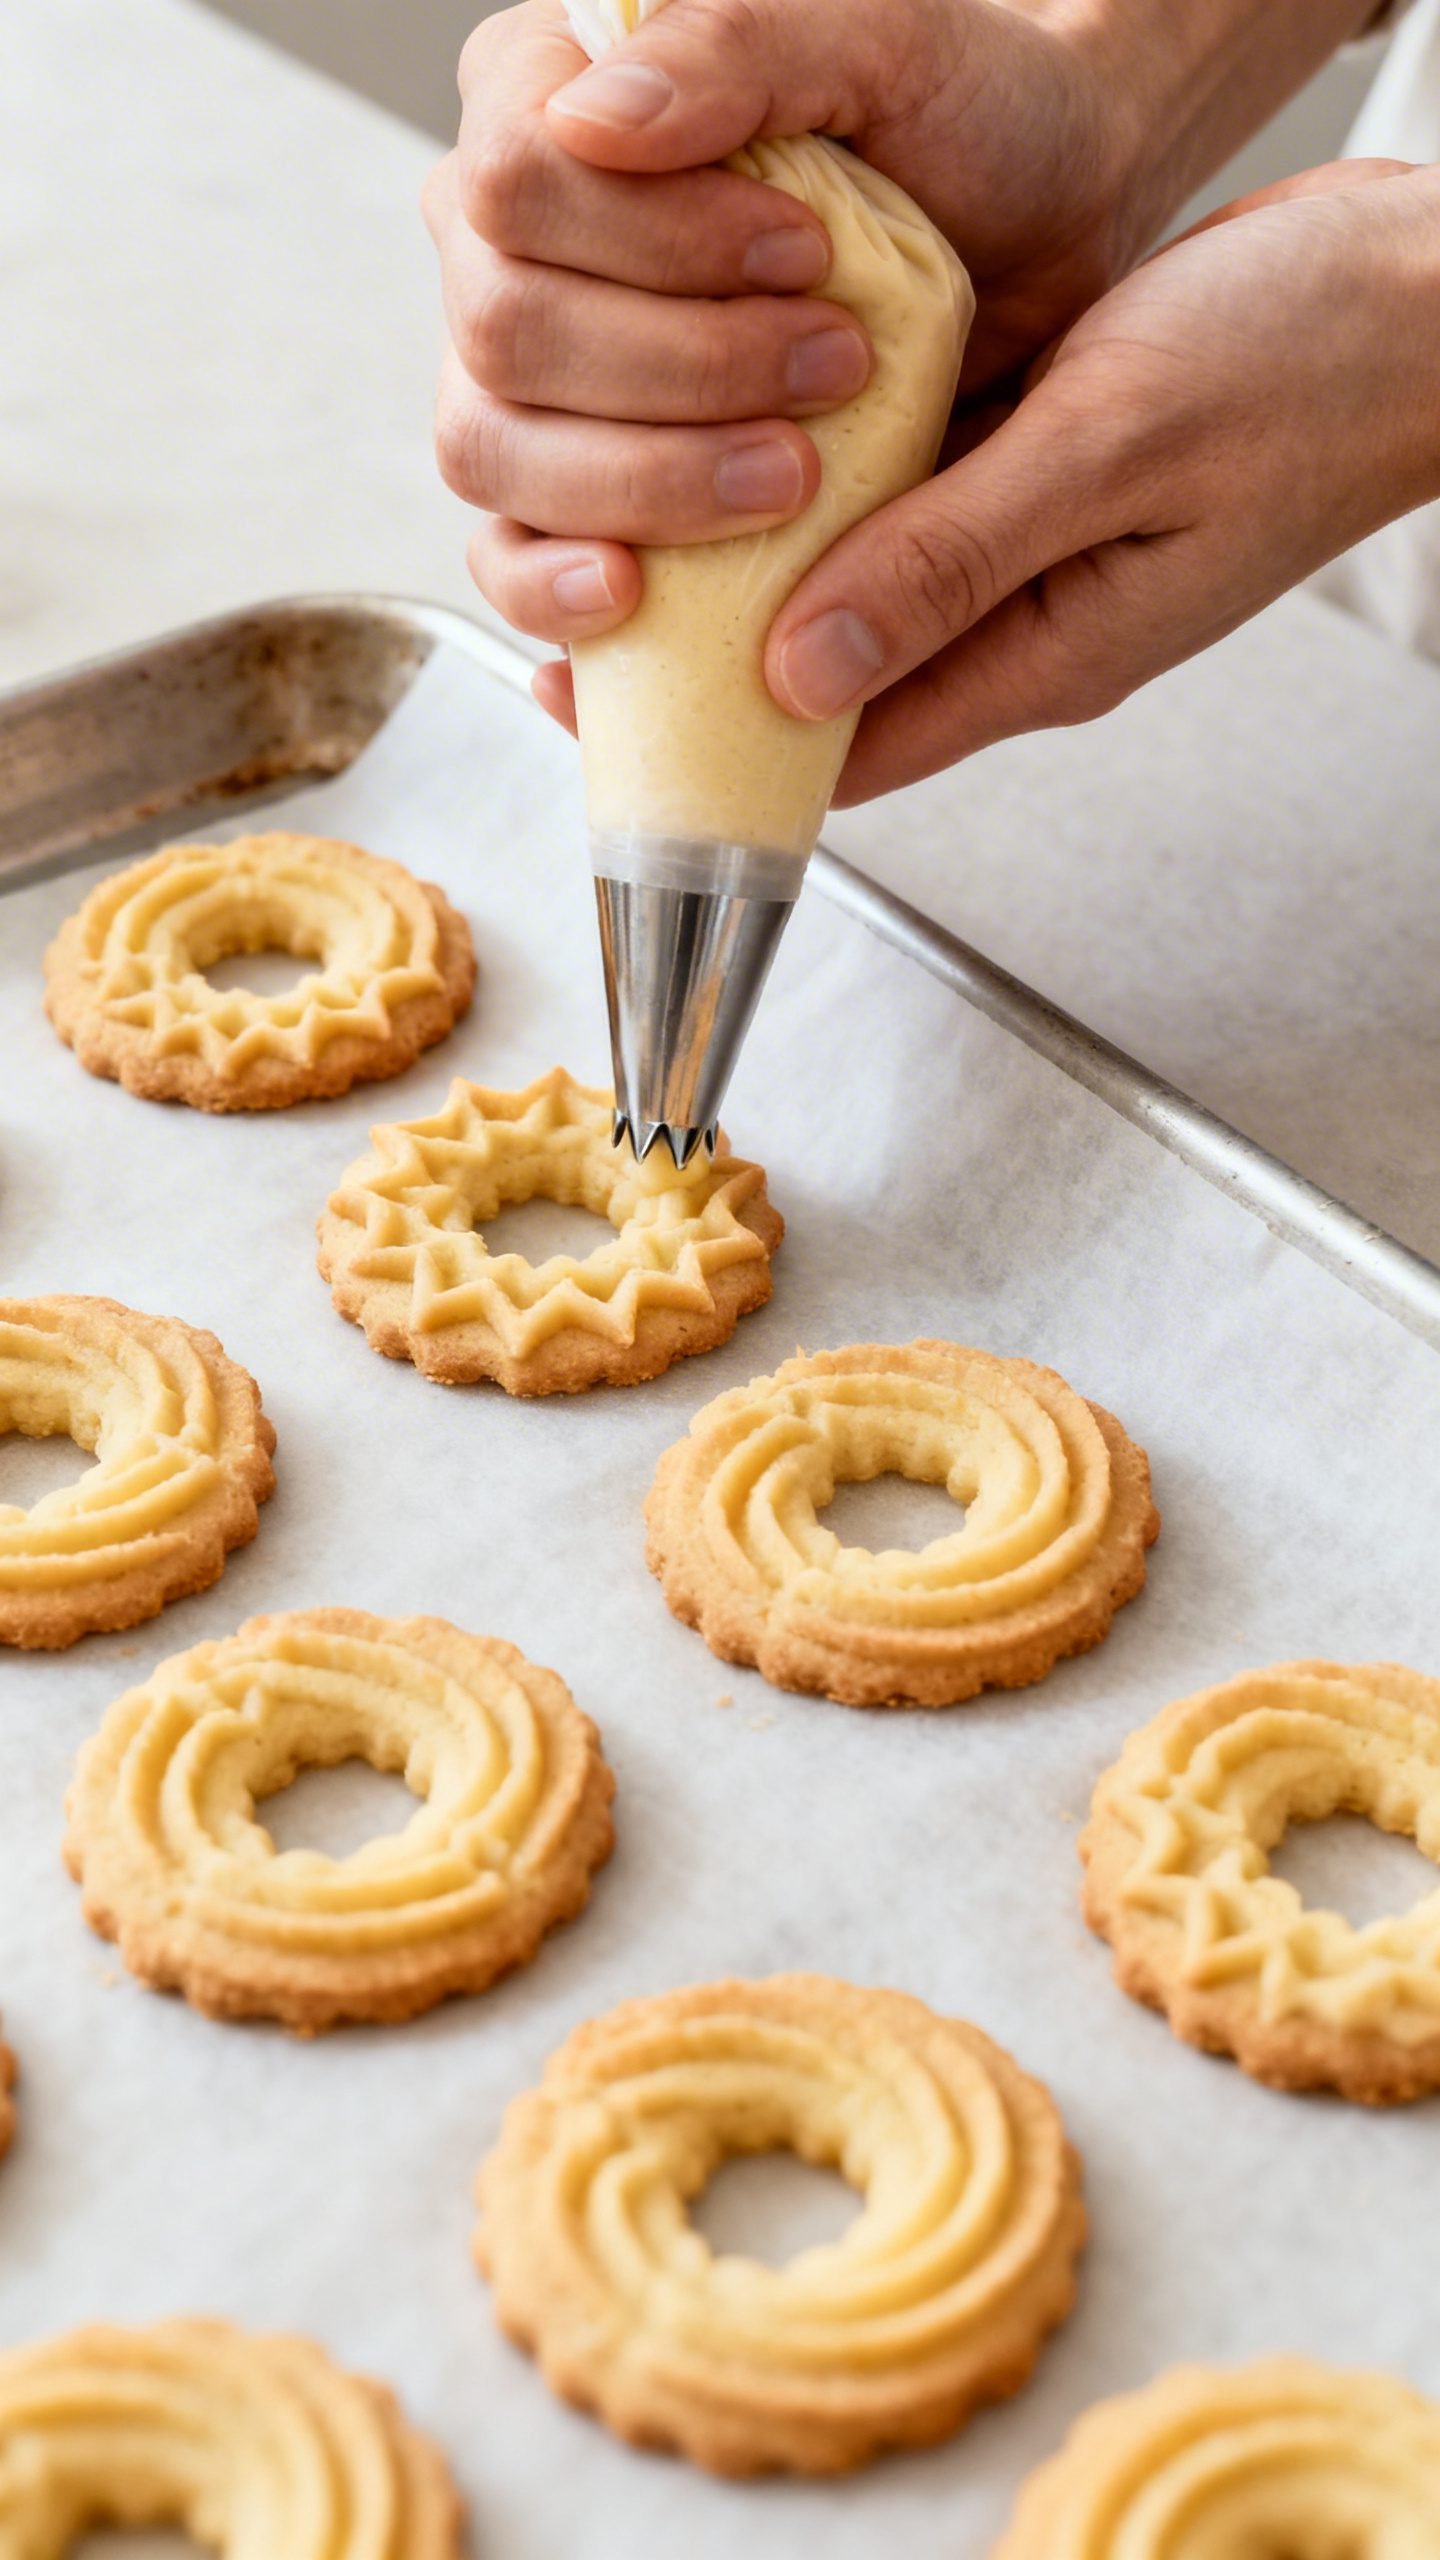
Pipe the Cookies
- Fill the bag: Transfer dough to the piping bag. Press dough down to remove air pockets.
- Shape: Pipe 2-inch wreaths or rosettes, spacing 2 inches apart. For a clean finish, stop pressure before lifting the tip.
- Chill: Refrigerate the trays 15–20 minutes to help the cookies retain their ridges.
Bake
- Optional sugar: Sprinkle with coarse sugar for sparkle before baking.
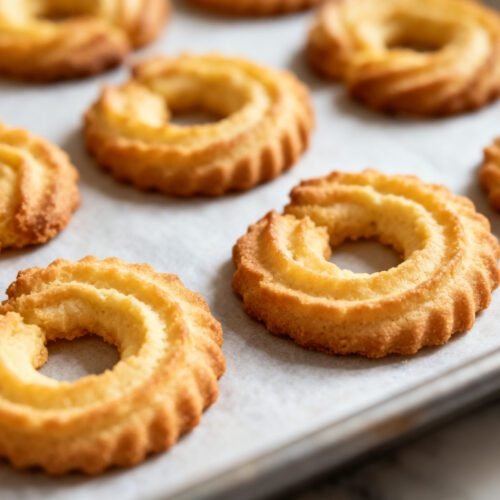
- Bake: Bake 10–13 minutes, rotating the tray halfway, until edges turn light golden and centers look set.
- Cool: Let cookies rest on the tray 5 minutes, then move to a rack to cool completely. They crisp as they cool.
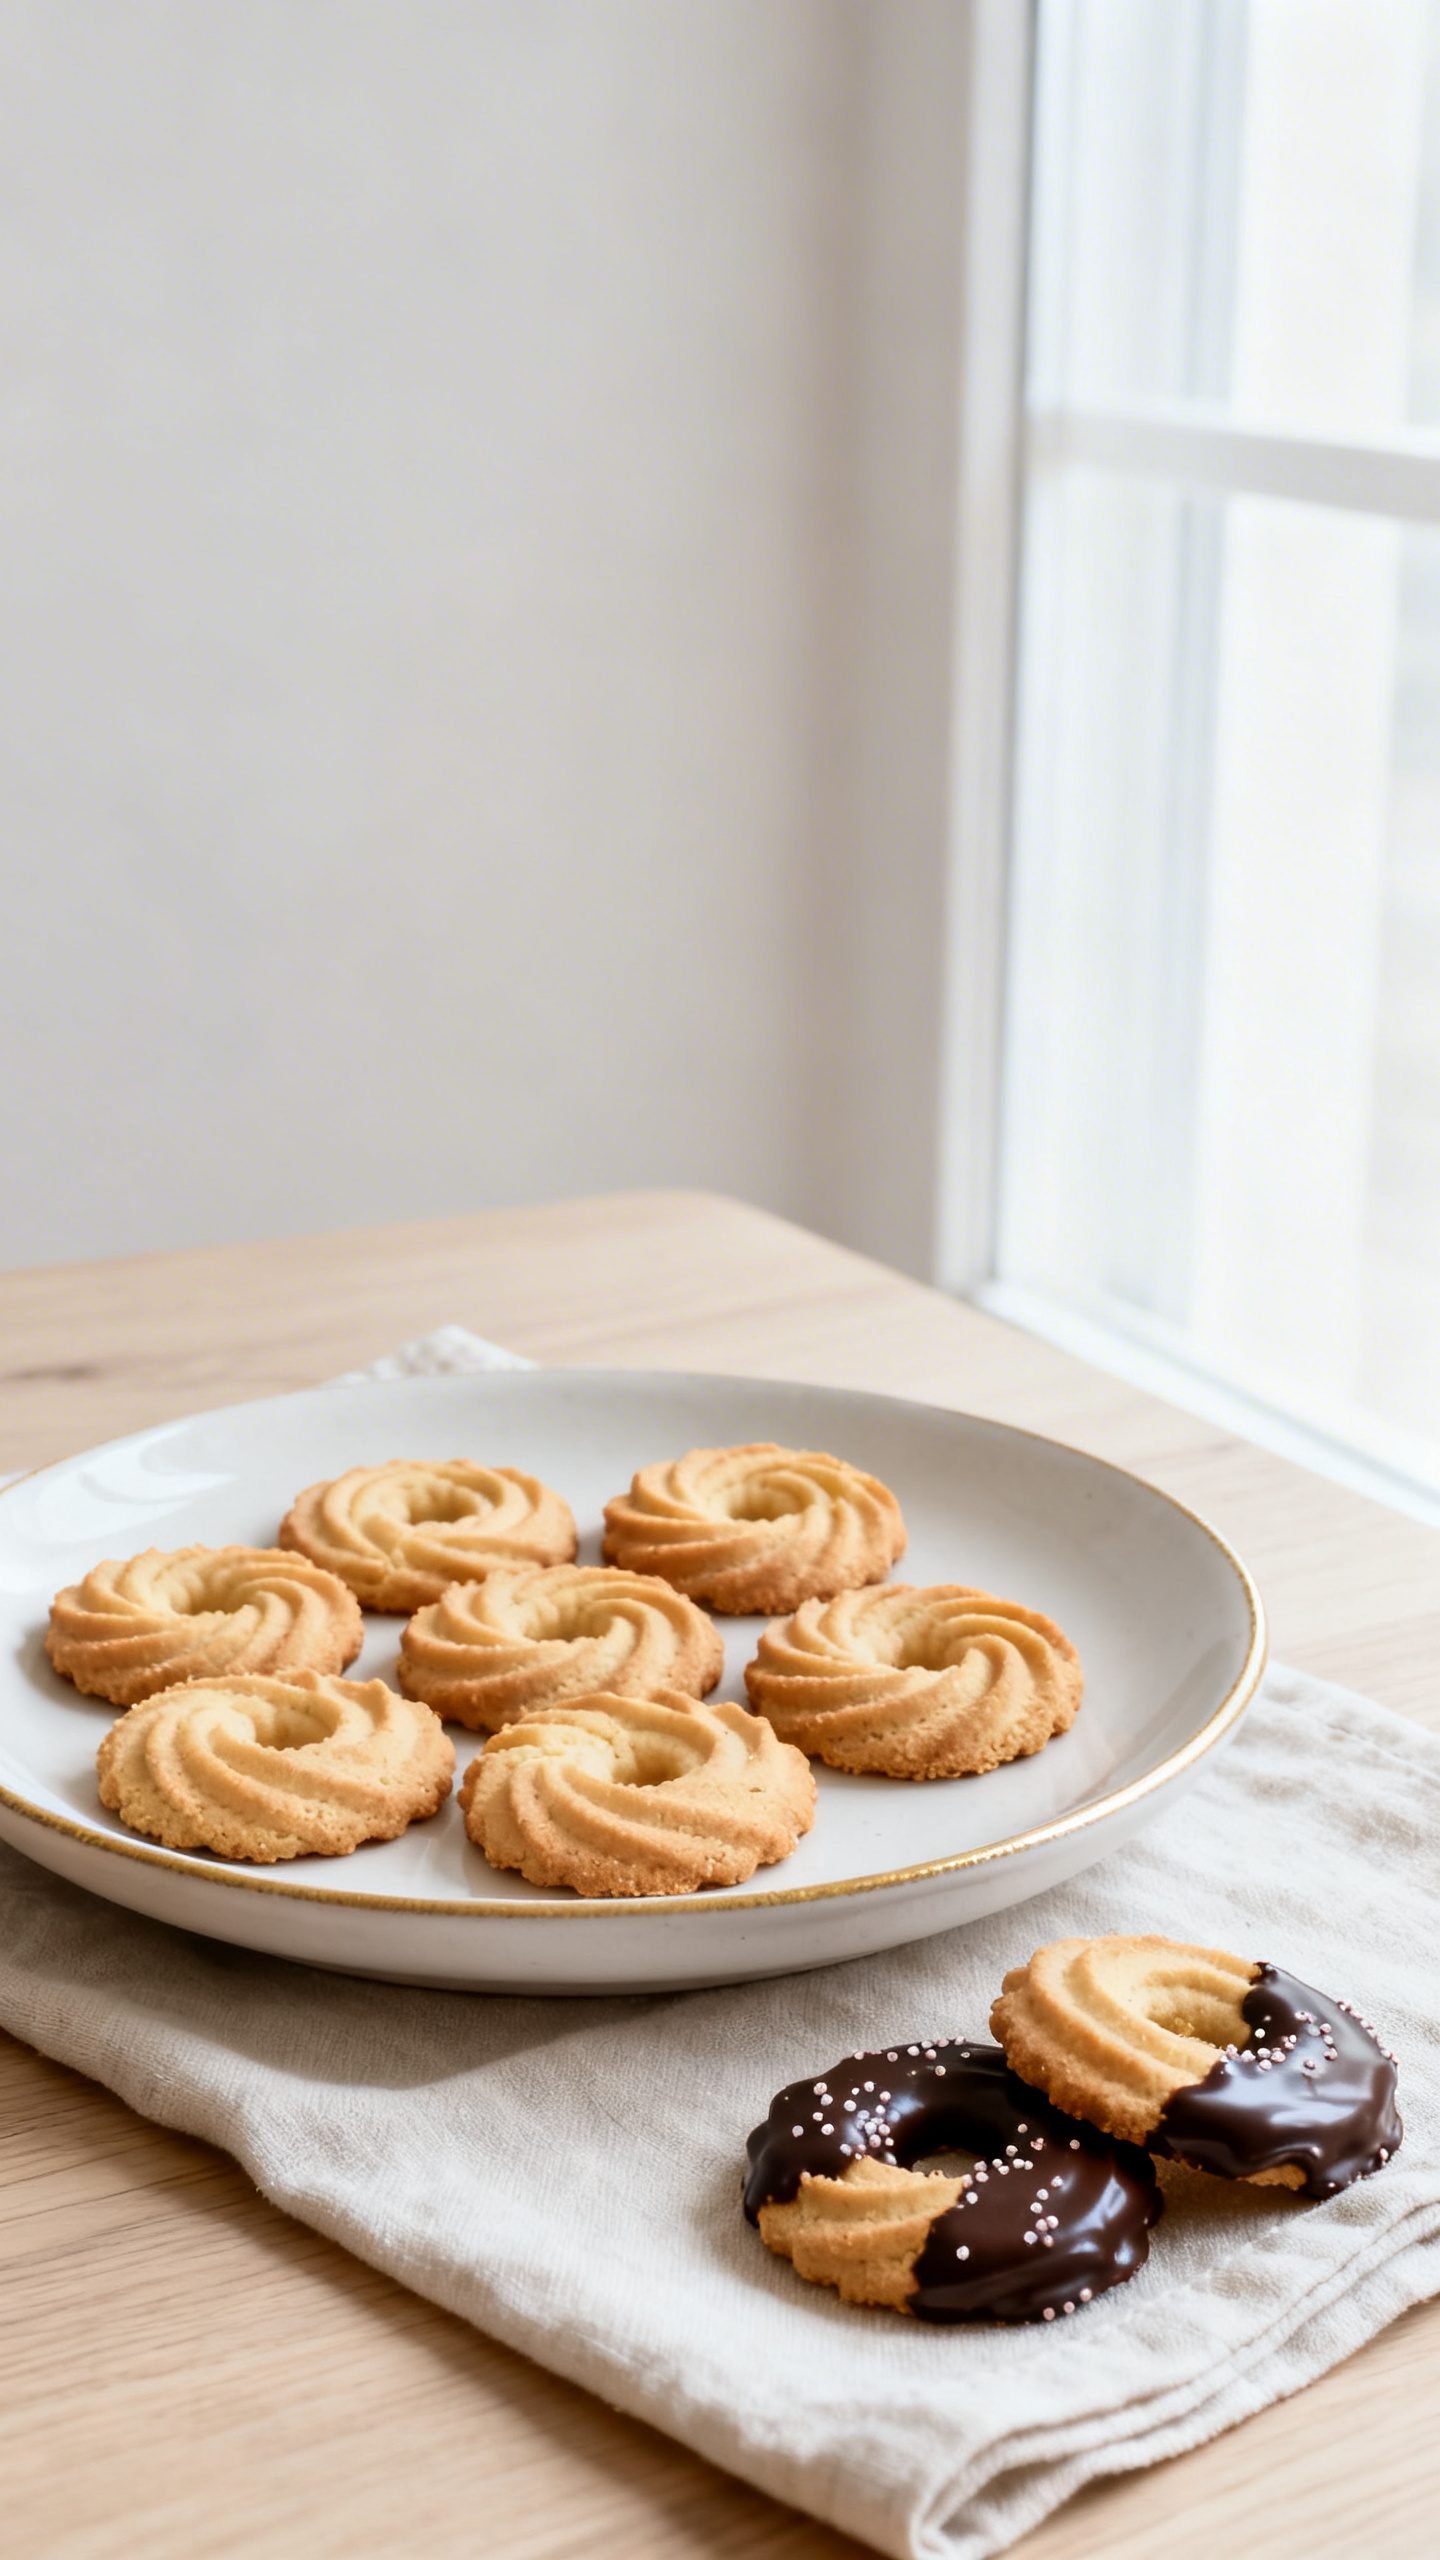
- Optional chocolate dip: Once cool, dip half of each cookie in melted dark or milk chocolate and add sprinkles. Set until firm.
Timing Tips
- Large shapes may need 1–2 extra minutes; watch color rather than the clock.
- Pale gold edges mean tender centers. Deep brown means too crisp.
How to Store Danish Butter Cookies
- Room temperature: Store in an airtight tin up to 2 weeks. Separate layers with parchment to protect the ridges.
- Freezer (baked): Freeze fully cooled cookies up to 2 months. Thaw uncovered at room temp to preserve crispness.
- Freezer (unbaked): Pipe onto a tray, freeze solid, then bag. Bake from frozen at 350°F (175°C) adding 1–2 minutes.
- Moisture control: Add a small piece of parchment to absorb condensation; avoid the fridge, which softens texture.
Benefits of Making These Cookies at Home
- Fresher flavor: Real butter and vanilla shine without artificial notes.
- Custom shapes and finishes: Wreaths, S-shapes, or sticks; sugar-crusted or chocolate-dipped.
- Perfect for gifting: They stack neatly, travel well, and look impressive in tins.
- Simple pantry ingredients: No specialty items required, so you can bake anytime.
- Make-ahead friendly: The dough pipes easily and freezes like a dream.
What to Avoid When Baking Danish Butter Cookies
- Don’t use cold butter: It won’t cream properly and yields dense cookies.
- Don’t skip the chill: Warm dough spreads and loses the signature ridges.
- Don’t overbake: Aim for light gold edges; dark color means dry texture.
- Don’t pack the flour: Spoon-and-level to avoid tough, stiff dough.
- Don’t use a tiny piping tip: The dough is firm; a large star tip makes piping manageable and defined.
- Don’t overload the mixer: Mix just until combined to prevent gluten development.
Flavor Variations to Try
- Almond twist: Replace 1/2 teaspoon vanilla with 1/2 teaspoon almond extract and top with sliced almonds.
- Lemon vanilla: Add 1 teaspoon finely grated lemon zest to the dough.
- Chocolate stripe: Melt chocolate and drizzle over cooled cookies in a zigzag.
- Coconut crunch: Roll the edges of piped dough in finely shredded unsweetened coconut before baking.
- Cardamom spice: Mix 1/2 teaspoon ground cardamom into the dry ingredients for a Scandinavian hint.
- Hazelnut dip: Dip in chocolate and sprinkle with crushed toasted hazelnuts.
FAQ
Can I make the dough without a piping bag?
Yes. Use a cookie press with the star disk, or scoop and gently flatten with a fork. The texture stays delicious, though the ridges look softer.
Why is my dough too stiff to pipe?
Butter too cold or too much flour usually causes stiffness. Let the dough sit 5–10 minutes at room temp and beat briefly. If still firm, add 1–2 teaspoons milk and mix just until pipeable.
Can I use granulated sugar instead of confectioners’ sugar?
You can, but confectioners’ sugar creates a finer crumb. If using granulated, cream longer (3–4 minutes) and expect slightly more spread and crunch.
Salted or unsalted butter?
Use unsalted butter for control. If using salted, reduce added salt to a tiny pinch.
How do I keep the shapes sharp?
Chill piped dough, use parchment (not greased pans), and bake on the middle rack. Avoid warm kitchens—pipe one tray at a time and keep the rest chilled.
What tip gives the best wreath shape?
A large open star tip like Ateco 827/829 or Wilton 1M gives defined ridges and easy piping.
Conclusion
With buttery richness, delicate crunch, and those pretty piped edges, Danish butter cookies earn a permanent spot in every holiday tin. Keep the ingredients simple, mind the chill, and bake just to pale gold. You’ll taste the difference in every bite—and so will everyone lucky enough to snag a cookie from your tin. Happy baking!
Traditional Danish Butter Cookies Recipe | Classic Holiday Treat
Ingredients
Ingredients
- 1 cup (226 g) unsalted butter, softened
- 3/4 cup (90 g) confectioners’ sugar
- 1 large egg, room temperature
- 1 1/2 teaspoons pure vanilla extract
- 1/4 teaspoon almond extract (optional)
- 1/4 teaspoon fine sea salt
- 2 cups (240 g) all-purpose flour
- 1/4 cup (30 g) cornstarch
- Coarse sanding sugar (optional, for topping)
- Chocolate for dipping (optional)
- Festive sprinkles (optional)
Instructions
Instructions
- Preheat the oven to 350°F (175°C) and line two baking sheets with parchment paper.
- Soften the butter until it yields easily to a gentle press but is not greasy.
- Beat the softened butter and confectioners’ sugar on medium speed for 2 to 3 minutes until pale and fluffy, then scrape down the bowl.
- Mix in the egg, vanilla, and optional almond extract until smooth, then add the salt and mix just to combine.
- Whisk the flour and cornstarch together, then add to the mixer in two additions and mix on low until a soft, thick, pipeable dough forms without overmixing.
- Fit a piping bag with a large open star tip and fill it with the dough, pressing to remove any air pockets.
- Pipe 2-inch wreaths or rosettes on the prepared sheets, spacing them about 2 inches apart.
- Refrigerate the trays for 15 to 20 minutes to help the cookies retain their ridges.
- If desired, sprinkle the piped cookies with coarse sanding sugar.
- Bake for 10 to 13 minutes, rotating the tray halfway, until the edges are light golden and the centers look set.
- Let the cookies cool on the tray for 5 minutes, then transfer to a rack to cool completely; they will crisp as they cool.
- Once fully cool, optionally dip half of each cookie in melted chocolate and add sprinkles, then let set until firm.


