
Snow Ice Cream Recipe | Fun Homemade Winter Dessert Idea
Fresh snow turns into the creamiest, fluffiest dessert with just a few pantry staples. If you’ve never made snow ice cream, you’re in for a treat. It’s fast, fun, and tastes like a cross between soft serve and a milkshake. Kids love it. Grown-ups do, too.
I make this every time we get a good snowfall. You need clean, fresh snow, a splash of milk or cream, sugar, and vanilla. That’s it. Customize it with cocoa, sprinkles, or crushed cookies, and you’ve got a winter dessert that tastes like pure nostalgia.
Why This Snow Ice Cream Recipe Delivers
- Fast and fuss-free: You’ll go from snow to dessert in under 10 minutes.
- Simple ingredients: Pantry staples transform the snow into creamy scoops.
- Perfect texture: The right ratio keeps it fluffy, not icy or slushy.
- Kid-friendly activity: Everyone can help collect snow and mix in toppings.
- Customizable flavor: Vanilla base pairs with cocoa, fruit, or candy.
Ingredients You’ll Need
- 8–10 cups very fresh, clean snow (lightly packed; collect from a clean surface during or right after snowfall)
- 1 cup whole milk (or half-and-half for extra creaminess; dairy-free options work, too)
- 1/3–1/2 cup granulated sugar (adjust to taste)
- 2 teaspoons pure vanilla extract
- Pinch of fine sea salt (balances sweetness and boosts flavor)
- Optional mix-ins: mini chocolate chips, sprinkles, crushed cookies, cocoa powder, maple syrup
How to Make Easy Snow Ice Cream
1) Prep your base
- In a large mixing bowl, whisk milk, sugar, vanilla, and salt until the sugar dissolves. Taste it. You want it slightly sweeter than you think, because snow will dilute it a bit.
- Chill the bowl and mixture in the freezer for 5–10 minutes while you grab the snow. Cold equipment keeps the texture fluffy.
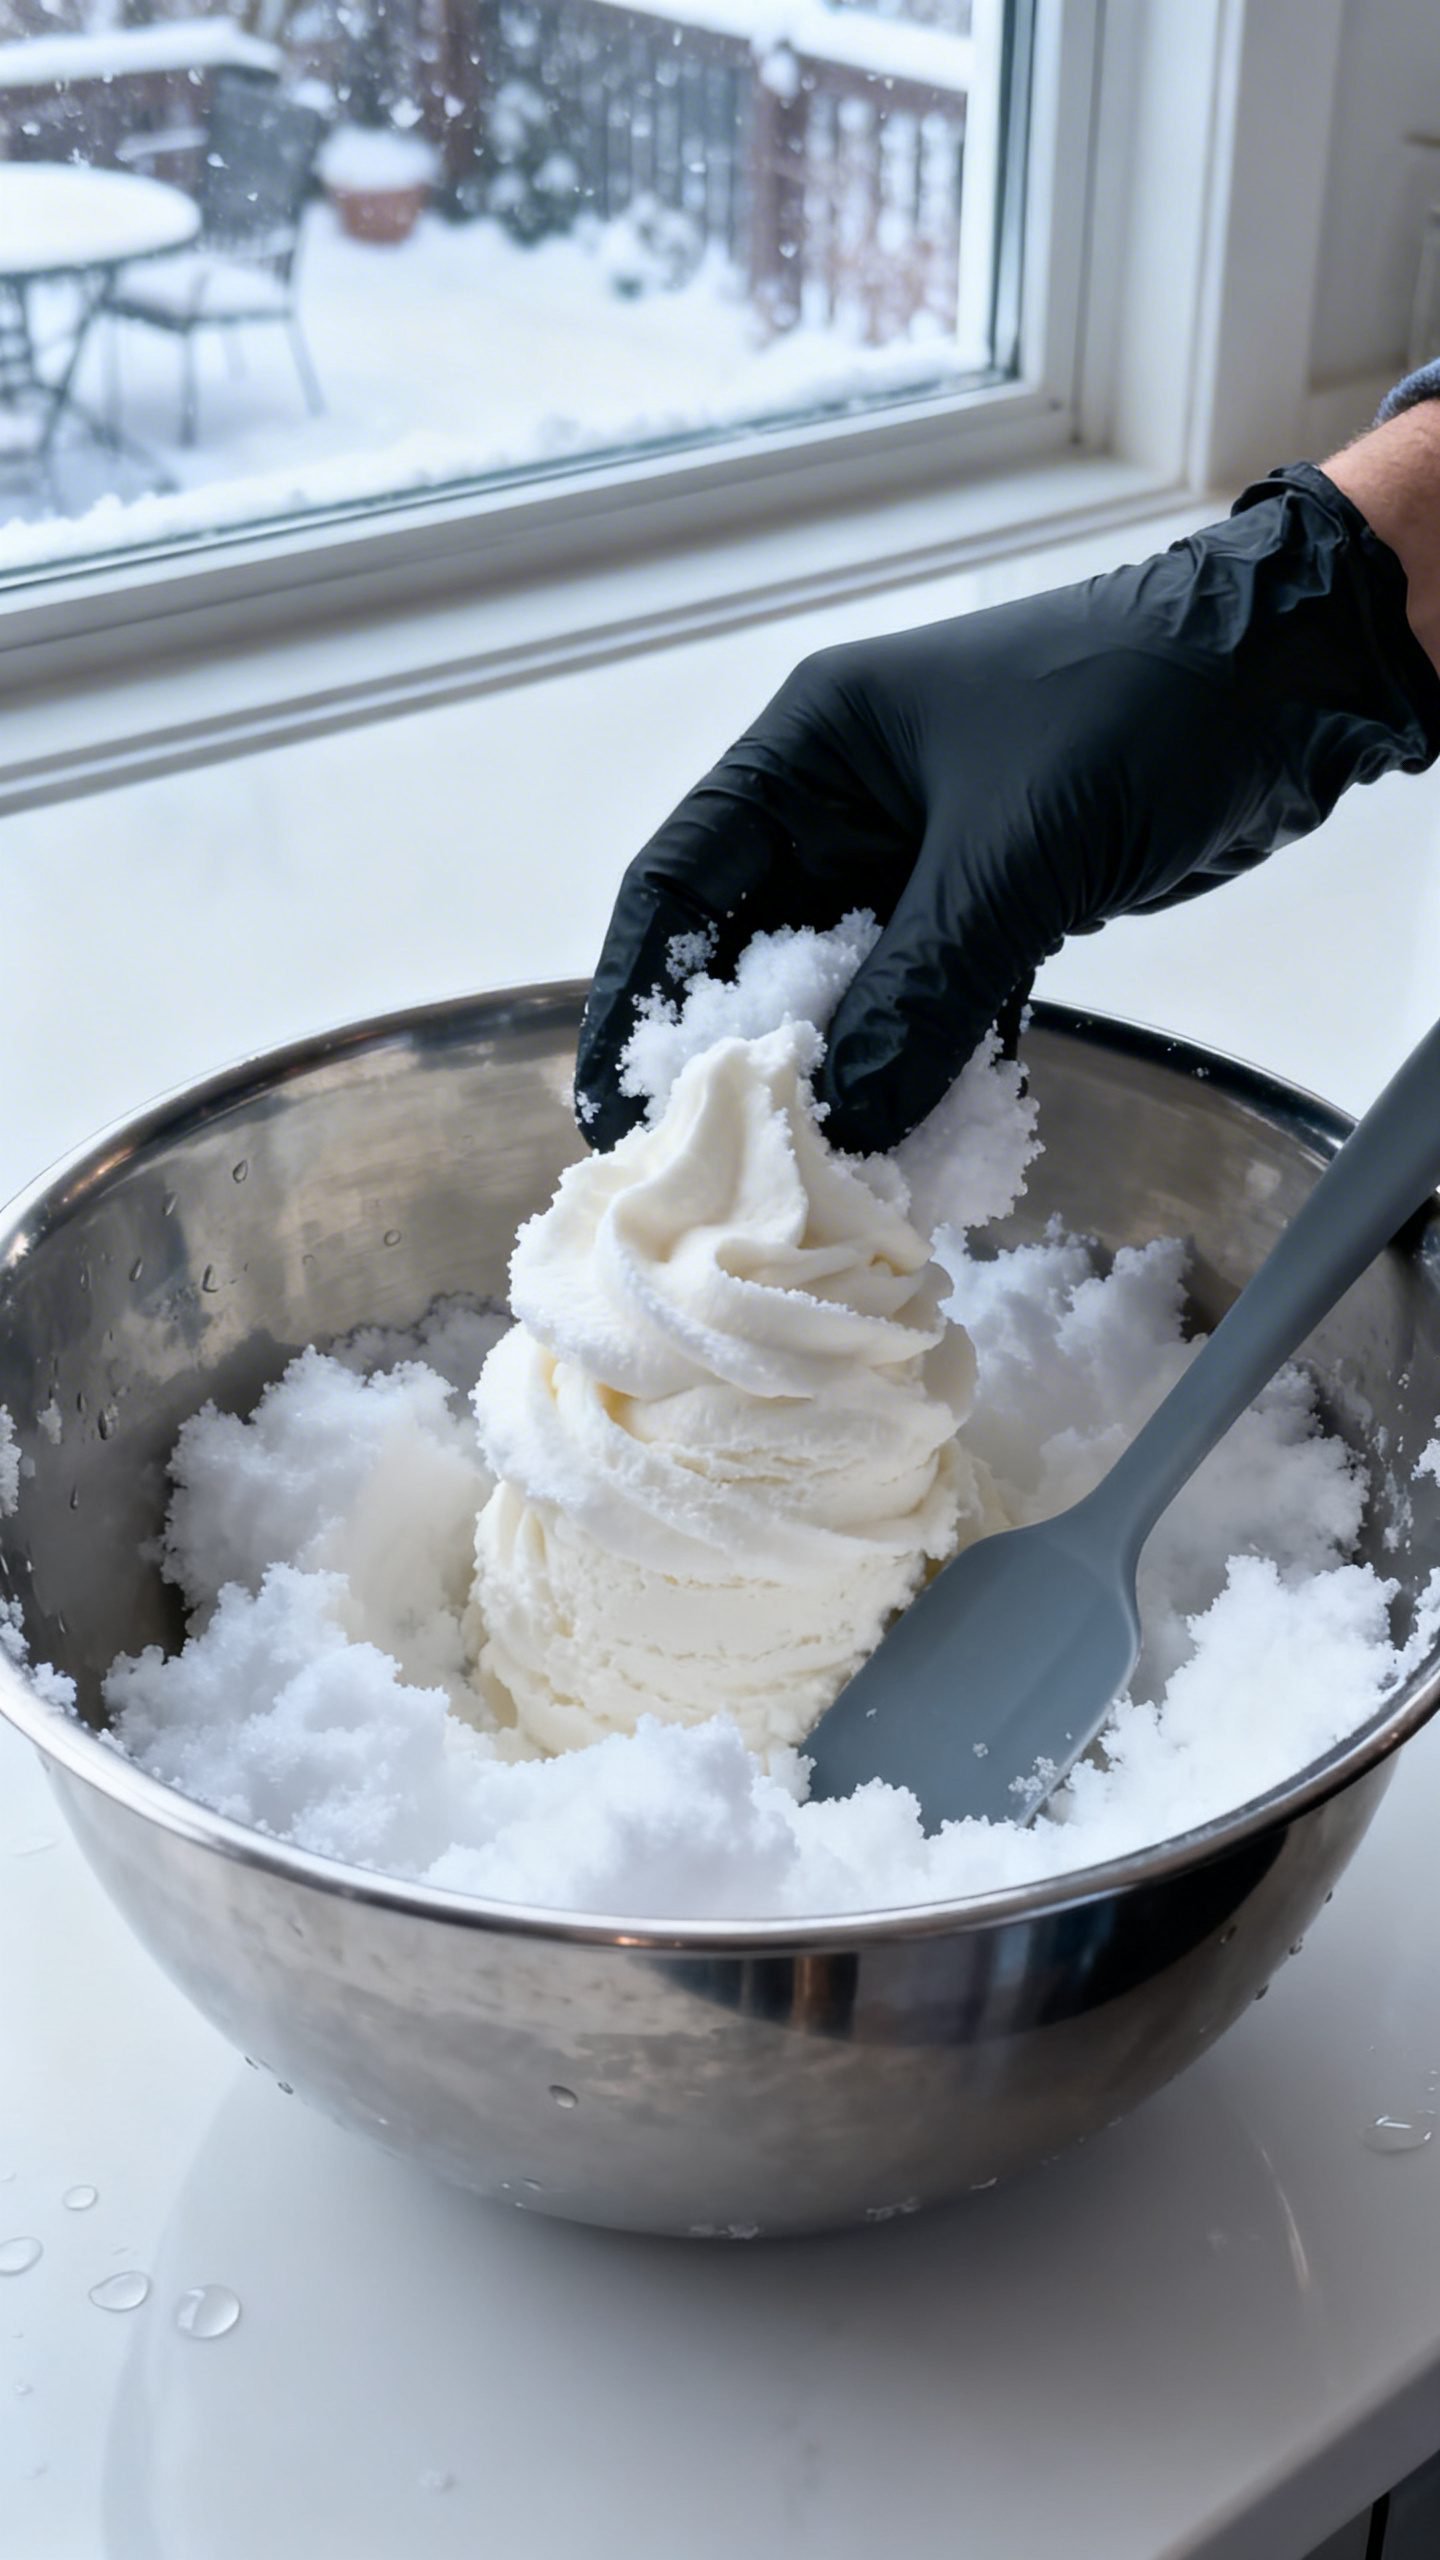
2) Collect the snow
- Use a clean container to scoop fresh, powdery snow from a safe, uncontaminated area. Avoid snow that’s discolored, packed, or near roads and roofs.
- Work quickly so the snow doesn’t melt. Aim for 8–10 cups.
3) Mix it together
- Remove the chilled bowl and add about 6 cups of snow to the sweet milk mixture.
- Fold gently with a spatula. Add more snow, 1 cup at a time, until the texture looks like soft serve. You’ll likely use the full 8–10 cups.
- Adjust sweetness to taste. If needed, sprinkle in a little extra sugar and fold again.
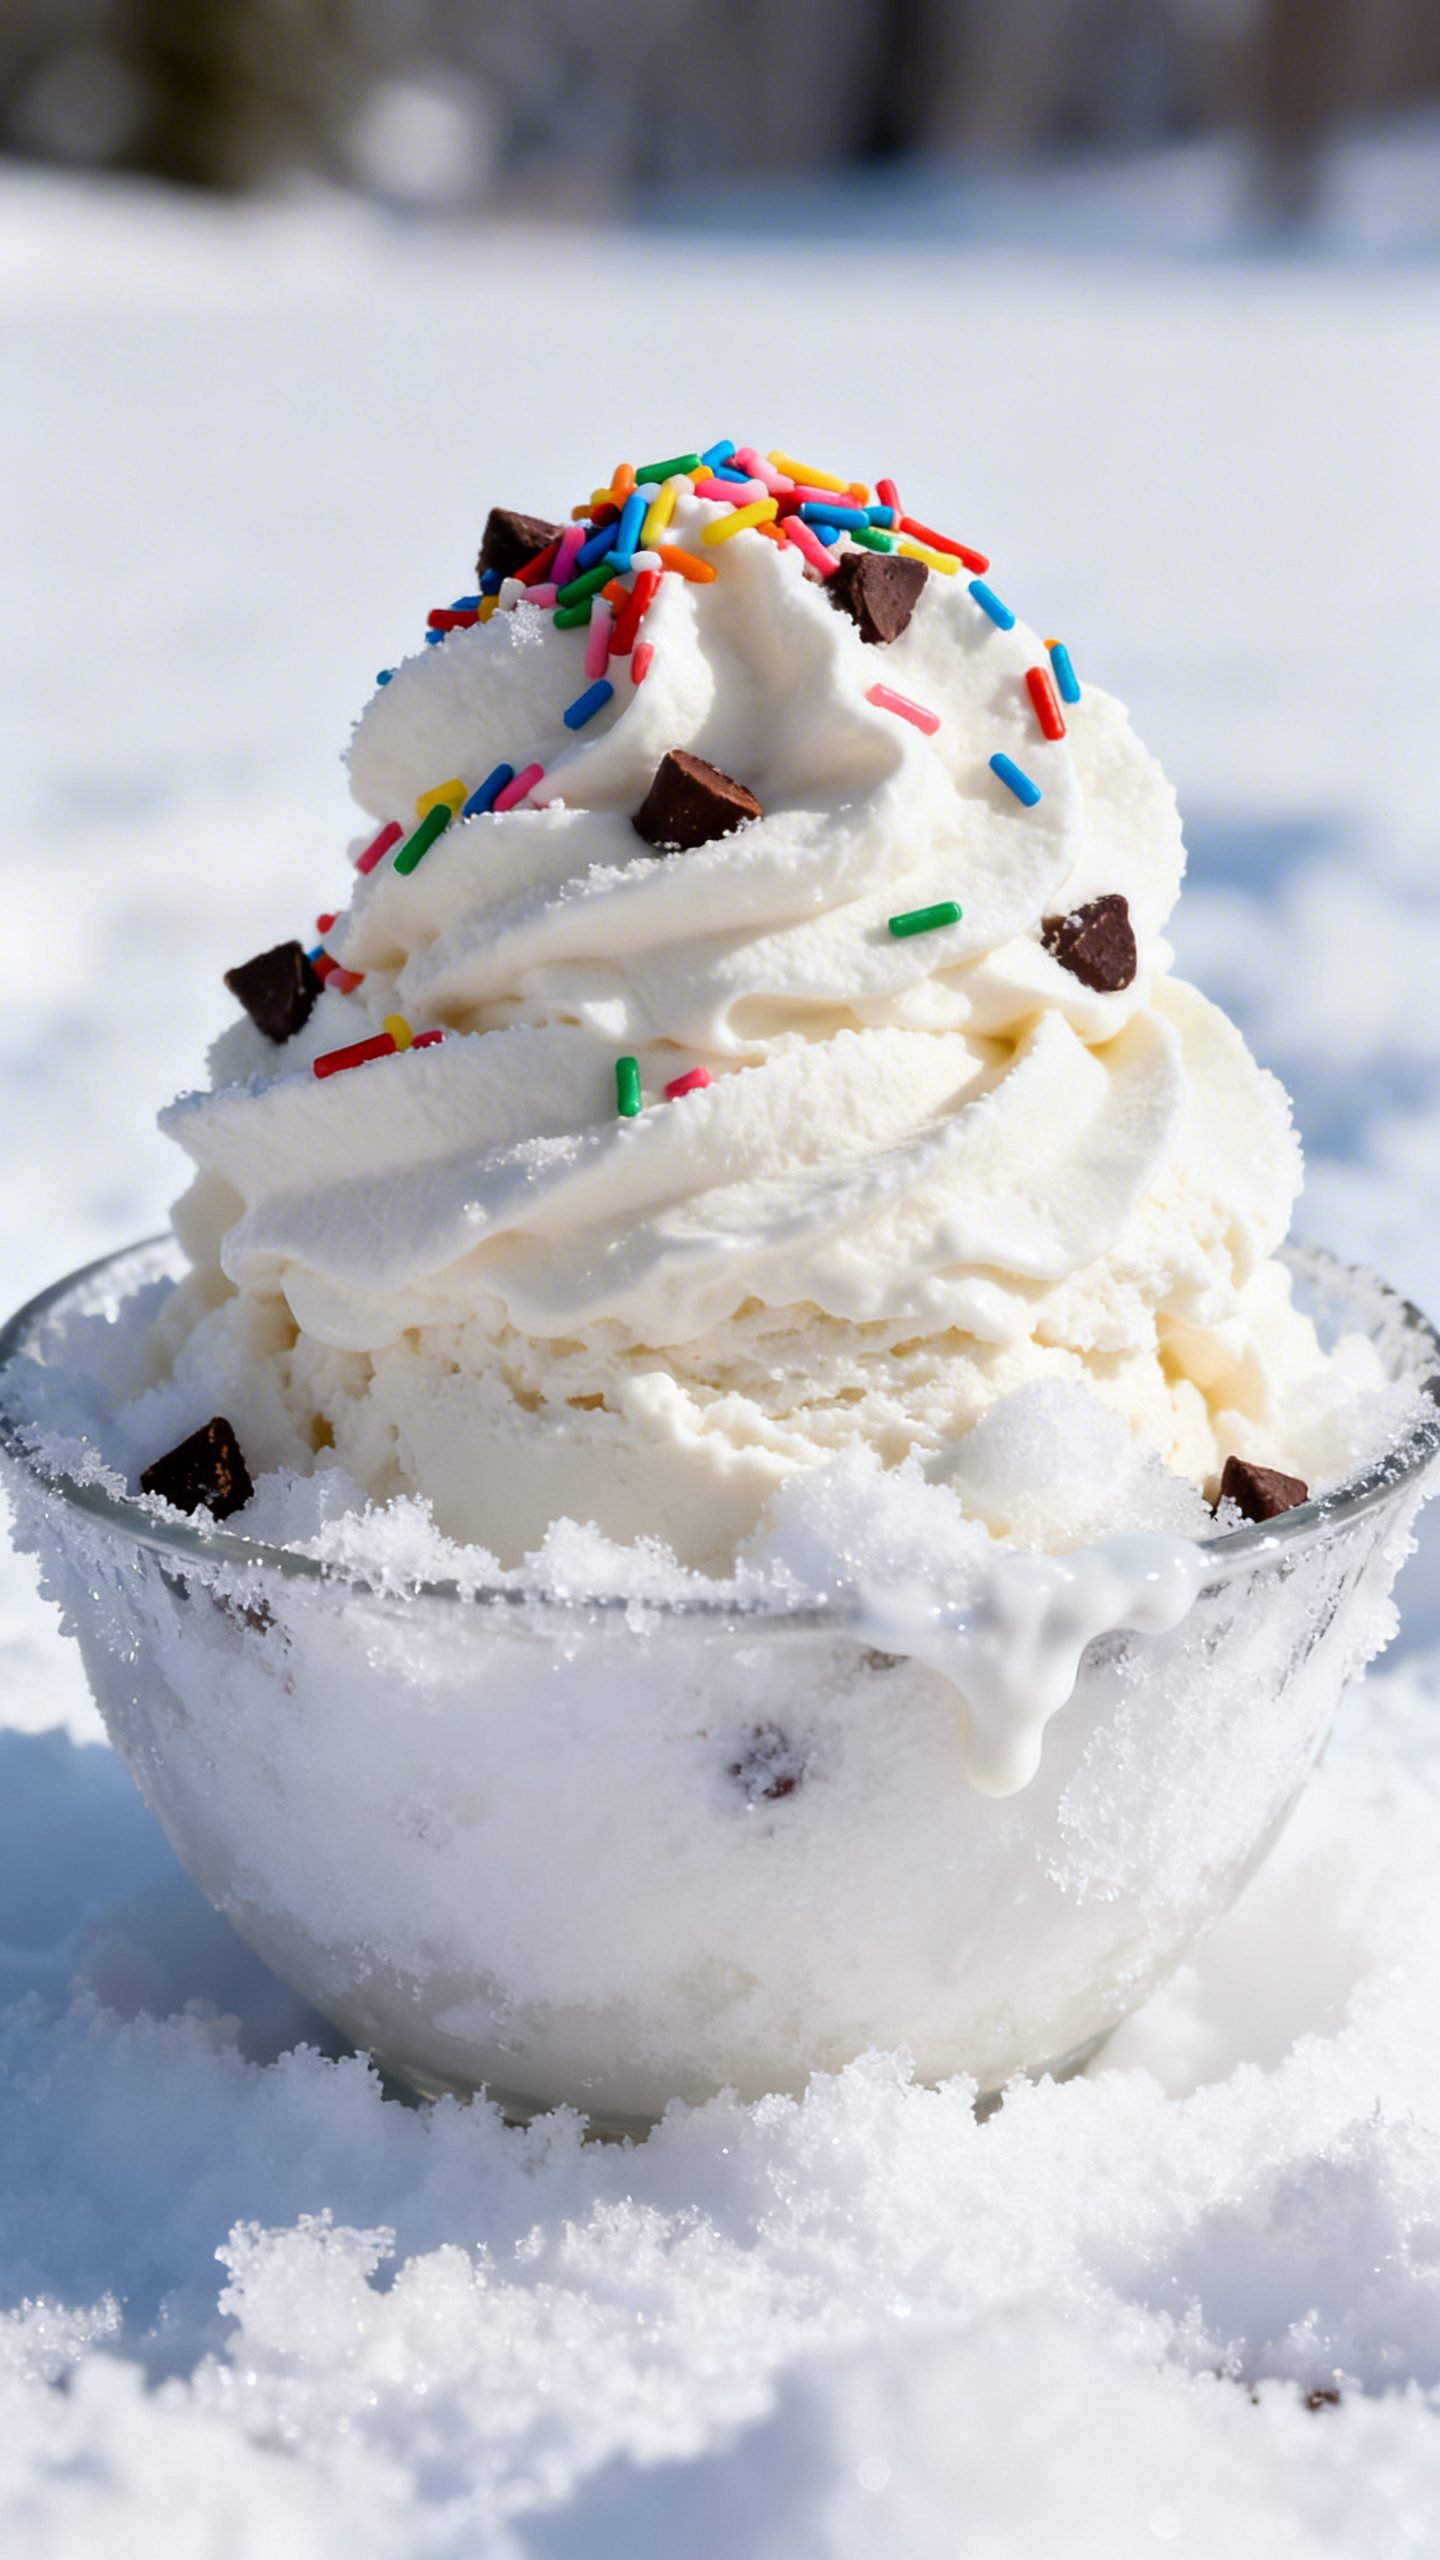
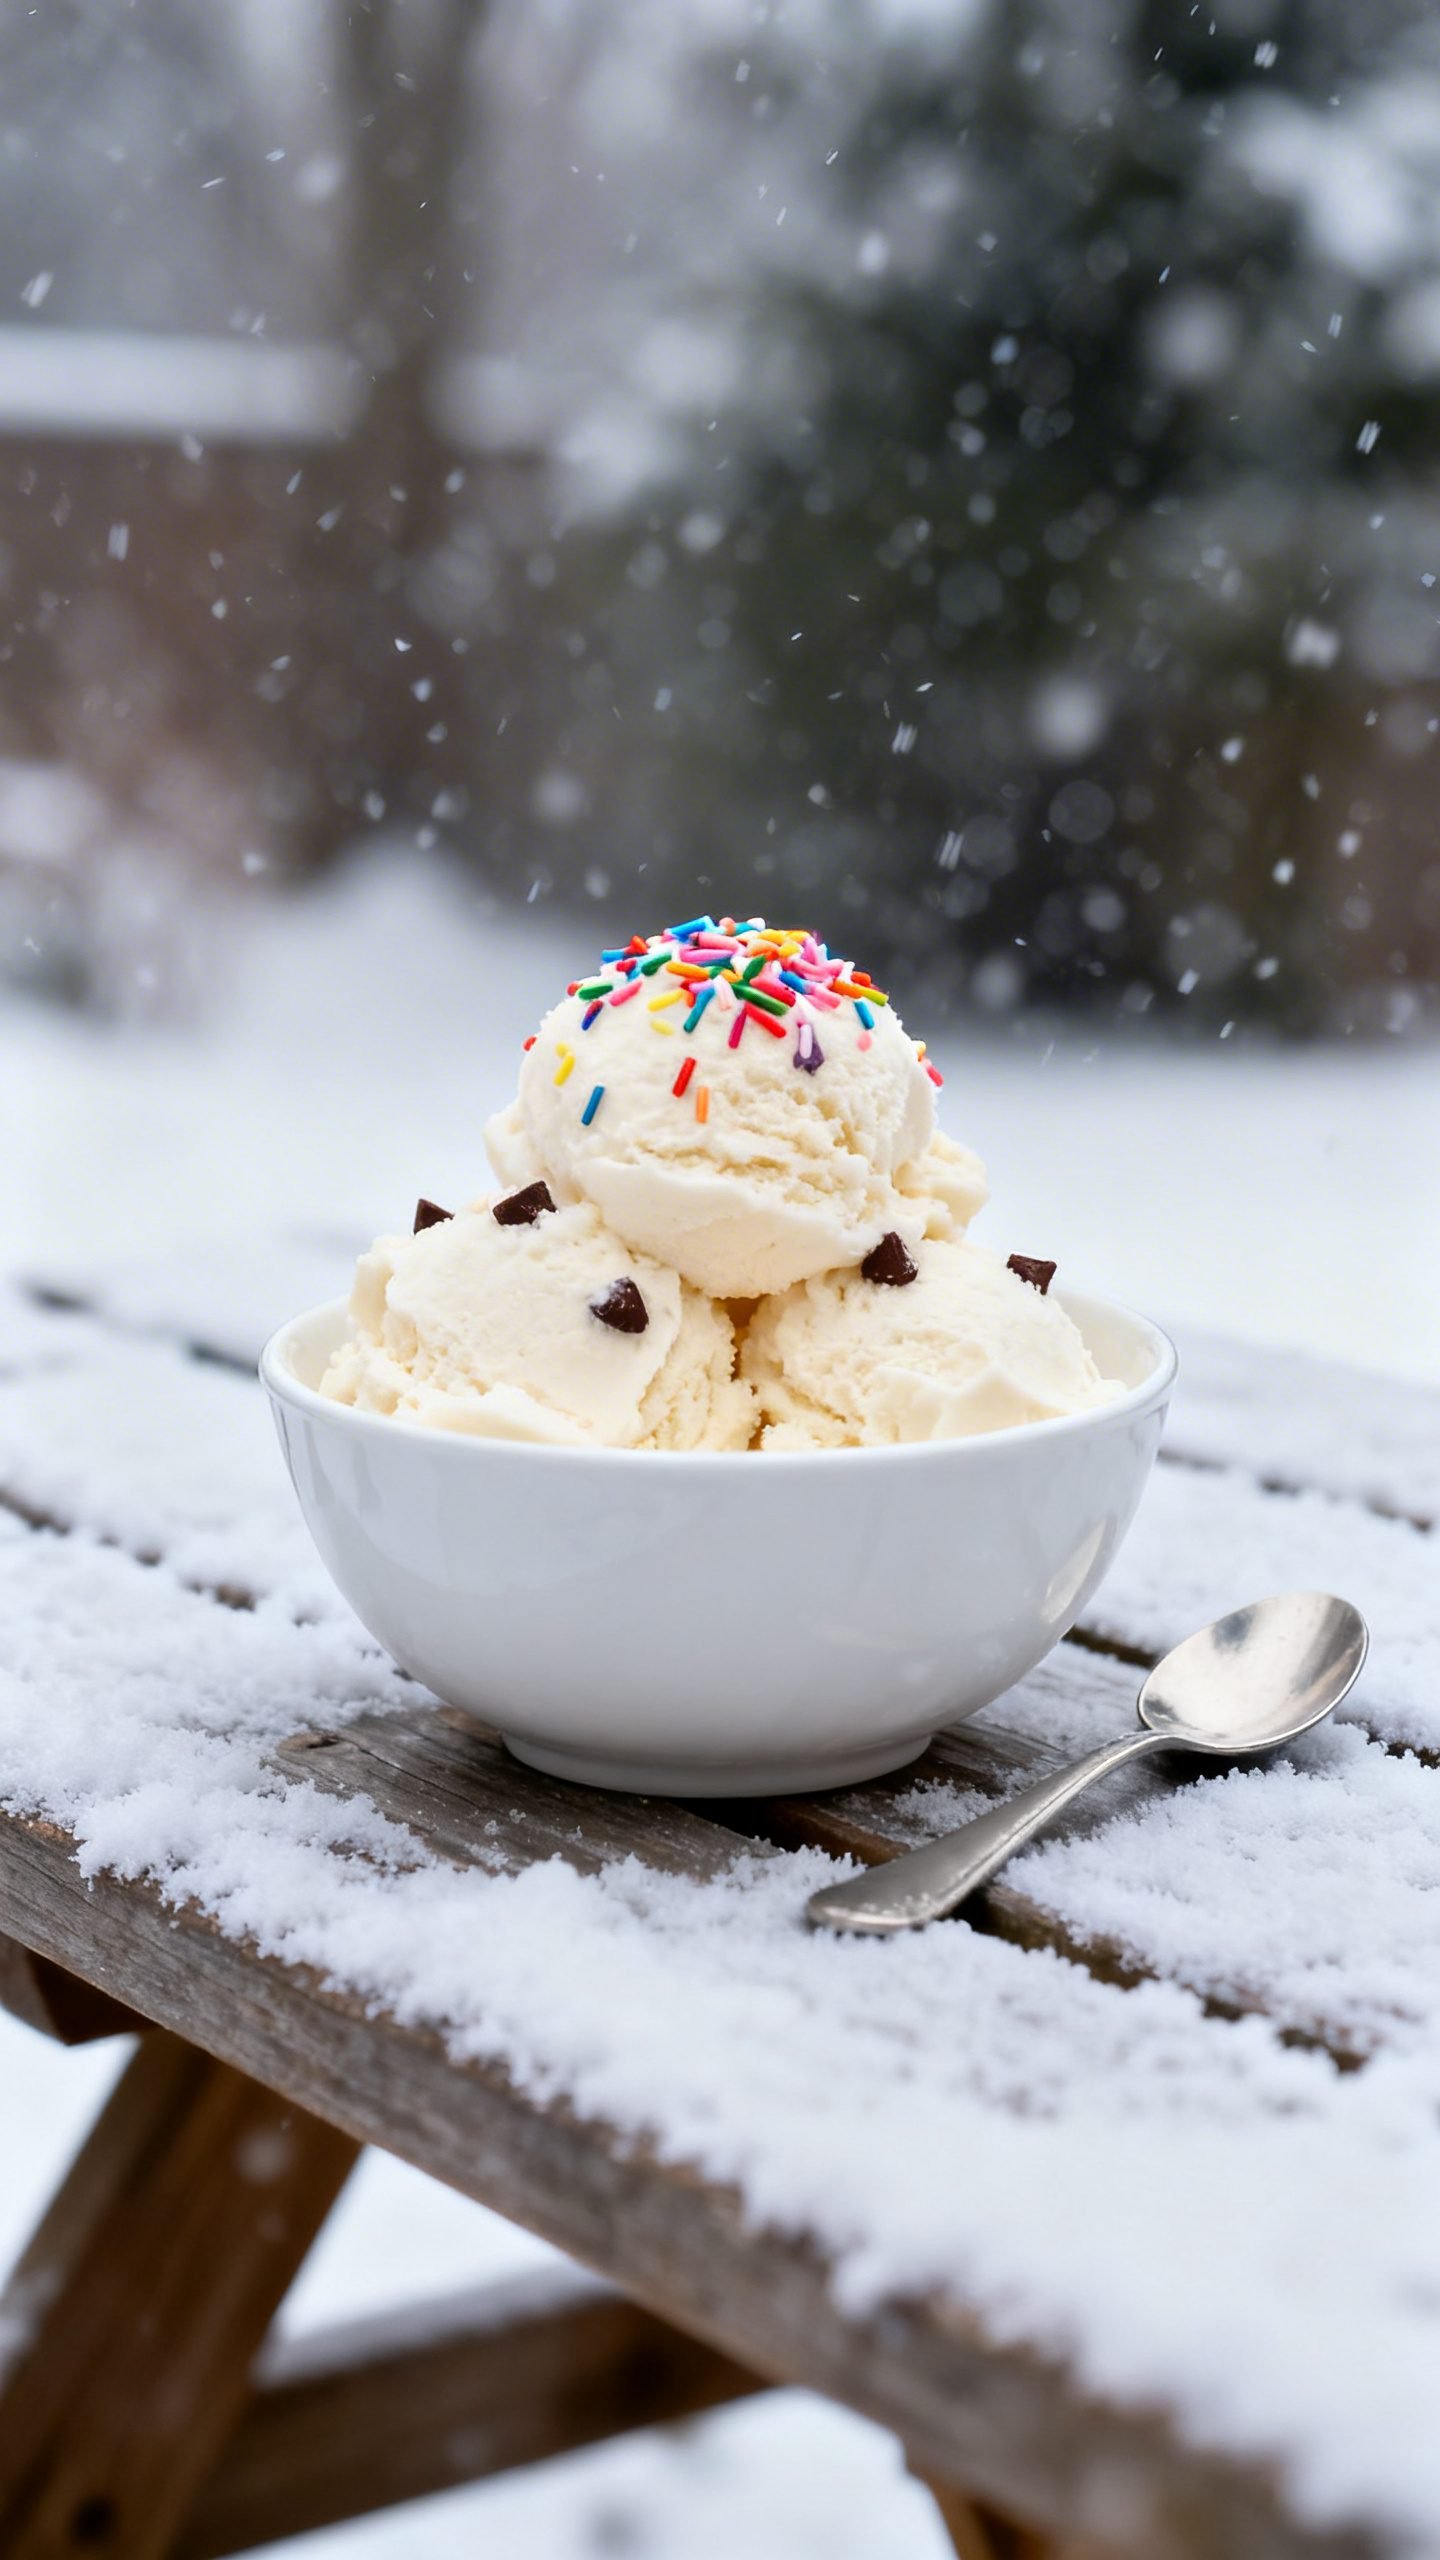
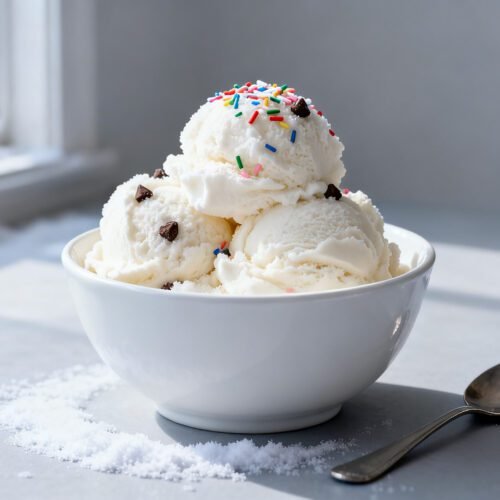
4) Add toppings and serve
- Fold in mix-ins like sprinkles, mini chips, or crushed cookies.
- Scoop immediately into bowls or cones. Snow ice cream melts fast, so enjoy it right away.
How to Store Leftover Snow Ice Cream
- Short-term: Transfer to a shallow, airtight container and freeze up to 24 hours. Press parchment onto the surface to reduce ice crystals.
- To serve later: Let it sit at room temp for 5–10 minutes, then stir to restore creaminess. The texture softens and becomes more icy as it sits.
- Best practice: Make only what you’ll eat now. Fresh always tastes best.
Why Make Snow Ice Cream at Home
- Fun family tradition: Turn a snow day into a sweet ritual everyone looks forward to.
- Budget-friendly treat: You already have most ingredients on hand.
- Custom sweetness and flavor: You control the sugar, vanilla, and mix-ins.
- No churning needed: Snow creates the texture—no machine required.
- Teachable kitchen moment: Kids learn about texture, temperature, and measuring.
Mistakes to Avoid
- Using old or dirty snow: Only collect clean, fresh snowfall from safe spots.
- Adding too much liquid: Extra milk turns it slushy. Add snow gradually until thick and scoopable.
- Skipping the salt: A small pinch wakes up the vanilla and balances the sweetness.
- Stirring too aggressively: Gentle folding keeps the snow fluffy and light.
- Waiting too long to serve: Snow ice cream melts quickly; enjoy it immediately.
- Warm bowl and ingredients: Warmth melts snow fast. Chill your bowl and base first.
Tasty Variations to Try
- Chocolate Snow Cream: Whisk 2–3 tablespoons cocoa powder into the milk base. Add mini chips to finish.
- Maple Vanilla: Replace half the sugar with pure maple syrup and add extra vanilla.
- Strawberry Swirl: Fold in strawberry jam or a quick mash of thawed frozen berries and sugar.
- Cookies and Cream: Crush chocolate sandwich cookies and fold in before serving.
- Peppermint Crunch: Add peppermint extract (go light!) and sprinkle in crushed candy canes.
- Dairy-Free Delight: Use full-fat coconut milk and coconut sugar. Add toasted coconut on top.
- Cinnamon Toast: Mix in 1 teaspoon ground cinnamon and a drizzle of honey.
FAQ
Is snow safe to eat?
Use fresh, clean snow that fell recently and avoid areas near roads, rooftops, and high-traffic spots. If you don’t feel good about your snow source, skip it and make a shaved ice version with crushed ice instead.
Can I make it without dairy?
Yes. Use almond, oat, or coconut milk. For the creamiest result, choose full-fat coconut milk or a barista-style oat milk.
Why did mine turn icy?
You probably added too much liquid or stirred too hard. Start with less liquid, fold gently, and keep everything cold.
How sweet should it be?
Make the base slightly sweeter than you want the final dessert. The snow dilutes sweetness as you fold it in.
Can I prep the base ahead?
Yes. Mix the milk, sugar, vanilla, and salt and chill it for up to 24 hours. When the snow starts falling, you’re ready to mix.
What if I don’t have vanilla?
Use almond extract, maple syrup, or a splash of flavored coffee syrup. Adjust sugar to taste.
Can I refreeze leftovers?
You can, but the texture changes. Freeze in a shallow container and expect a more granita-like scoop later.
Final Thoughts
Snow ice cream makes winter feel magical. Keep your base cold, fold in clean fresh snow, and serve right away for the best texture. Set out toppings, let everyone build a bowl, and enjoy a cozy, low-effort dessert that turns a snowy day into something special.
Snow Ice Cream Recipe | Fun Homemade Winter Dessert Idea
Ingredients
Ingredients
- 8–10 cups very fresh, clean snow (lightly packed; collected during or right after snowfall)
- 1 cup whole milk (or half-and-half; dairy-free options such as almond, oat, or coconut milk work)
- 1/3–1/2 cup granulated sugar (to taste)
- 2 teaspoons pure vanilla extract
- Pinch of fine sea salt
- Optional mix-ins: mini chocolate chips, sprinkles, crushed cookies, cocoa powder, maple syrup
Instructions
Instructions
- In a large mixing bowl, whisk the milk, sugar, vanilla, and salt until the sugar dissolves, then taste for sweetness.
- Chill the bowl and base in the freezer for 5–10 minutes to keep everything very cold.
- Scoop fresh, clean snow from a safe area using a clean container, aiming for 8–10 cups.
- Remove the chilled bowl and fold about 6 cups of snow into the sweet milk mixture until combined.
- Add more snow 1 cup at a time, gently folding, until the texture resembles soft serve and is scoopable.
- Adjust sweetness if needed by sprinkling in a little more sugar and folding gently.
- Fold in any desired mix-ins such as sprinkles, mini chocolate chips, or crushed cookies.
- Serve immediately in bowls or cones, as snow ice cream melts quickly.


