
Pierogi Dough Recipe | Authentic Polish Pierogi Dough Made From Scratch
Nothing beats a plate of homemade pierogi, and it all starts with the dough. If you’ve struggled with tough edges or sticky sheets, you’re in the right place. This is my go-to pierogi dough recipe—soft, stretchy, and easy to seal—just like my Polish grandmother taught me.
You only need a few pantry staples and a gentle hand. I’ll walk you through exactly how to make authentic pierogi dough from scratch, with clear steps, practical tips, and fix-it advice. By the end, you’ll roll, fill, and shape pierogi like a pro.
Why This Pierogi Dough Recipe Works
- Balanced hydration: The flour-to-liquid ratio keeps the dough soft but not sticky, so you can roll it thin without tearing.
- Egg for structure: A single egg adds tenderness and strength without making the dough tough.
- Warm water for elasticity: Warm (not hot) water helps the gluten relax and keeps the dough pliable.
- Resting time: A short rest lets the dough relax, which makes rolling easier and prevents spring-back.
- Neutral fat: A touch of oil or melted butter lends flexibility and that classic, supple bite.
Ingredients
- 3 cups (360 g) all-purpose flour, plus extra for dusting
- 1 teaspoon fine sea salt
- 1 large egg, room temperature
- 1 cup (240 ml) warm water (about 110°F/43°C), plus 1–2 tablespoons more as needed
- 2 tablespoons neutral oil or melted unsalted butter
Helpful Equipment
- Large mixing bowl
- Wooden spoon or dough whisk
- Rolling pin
- 2.5–3 inch (6–7.5 cm) round cutter or glass
- Clean kitchen towel or plastic wrap
How to Make Authentic Pierogi Dough from Scratch
- Mix dry ingredients: In a large bowl, whisk together the flour and salt.
- Combine wet ingredients: In a measuring cup, whisk the egg with warm water and oil (or butter) until smooth.
- Bring it together: Make a well in the flour. Pour in most of the wet mixture. Stir with a spoon until shaggy. Add the remaining liquid as needed until no dry pockets remain. The dough should feel soft and slightly tacky, not sticky.
- Knead briefly: Turn the dough onto a lightly floured surface. Knead for 2–4 minutes until smooth and elastic. If the dough sticks, dust sparingly with flour. If it feels tight, wet your hands and continue kneading.
- Rest the dough: Shape into a ball. Cover with plastic wrap or a damp towel. Rest 20–30 minutes at room temperature. This rest makes the dough easy to roll thin.
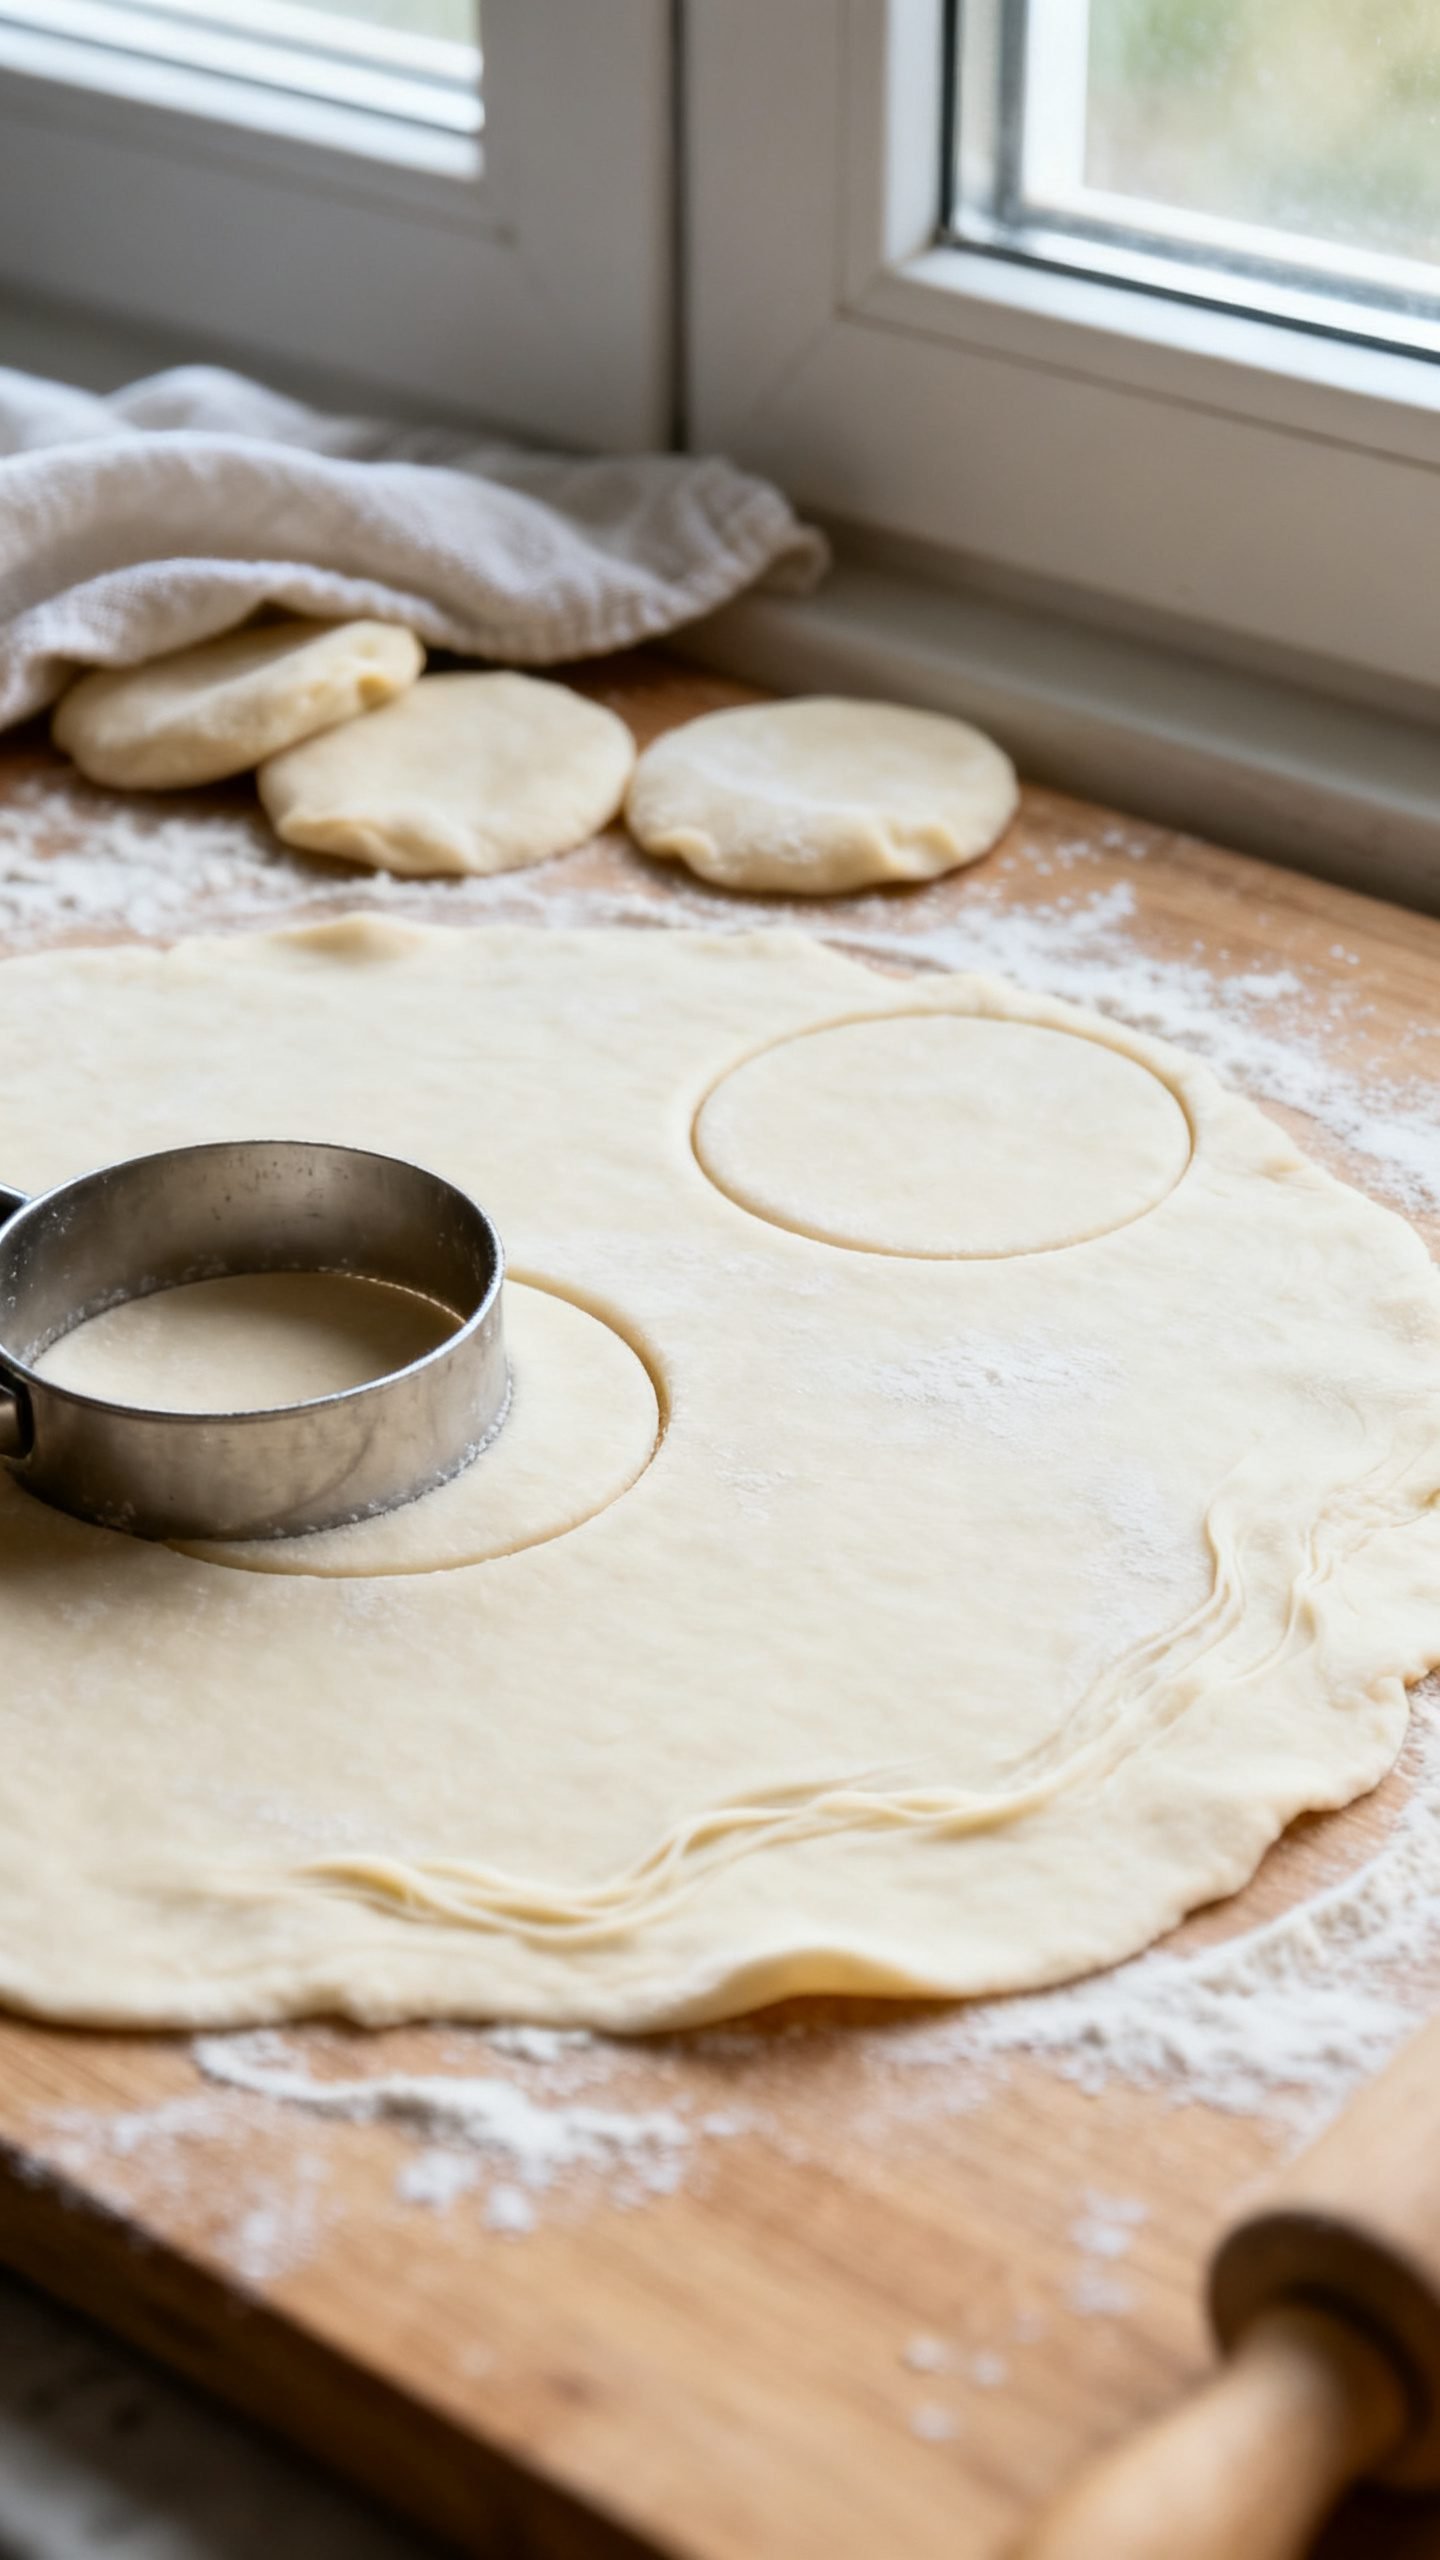
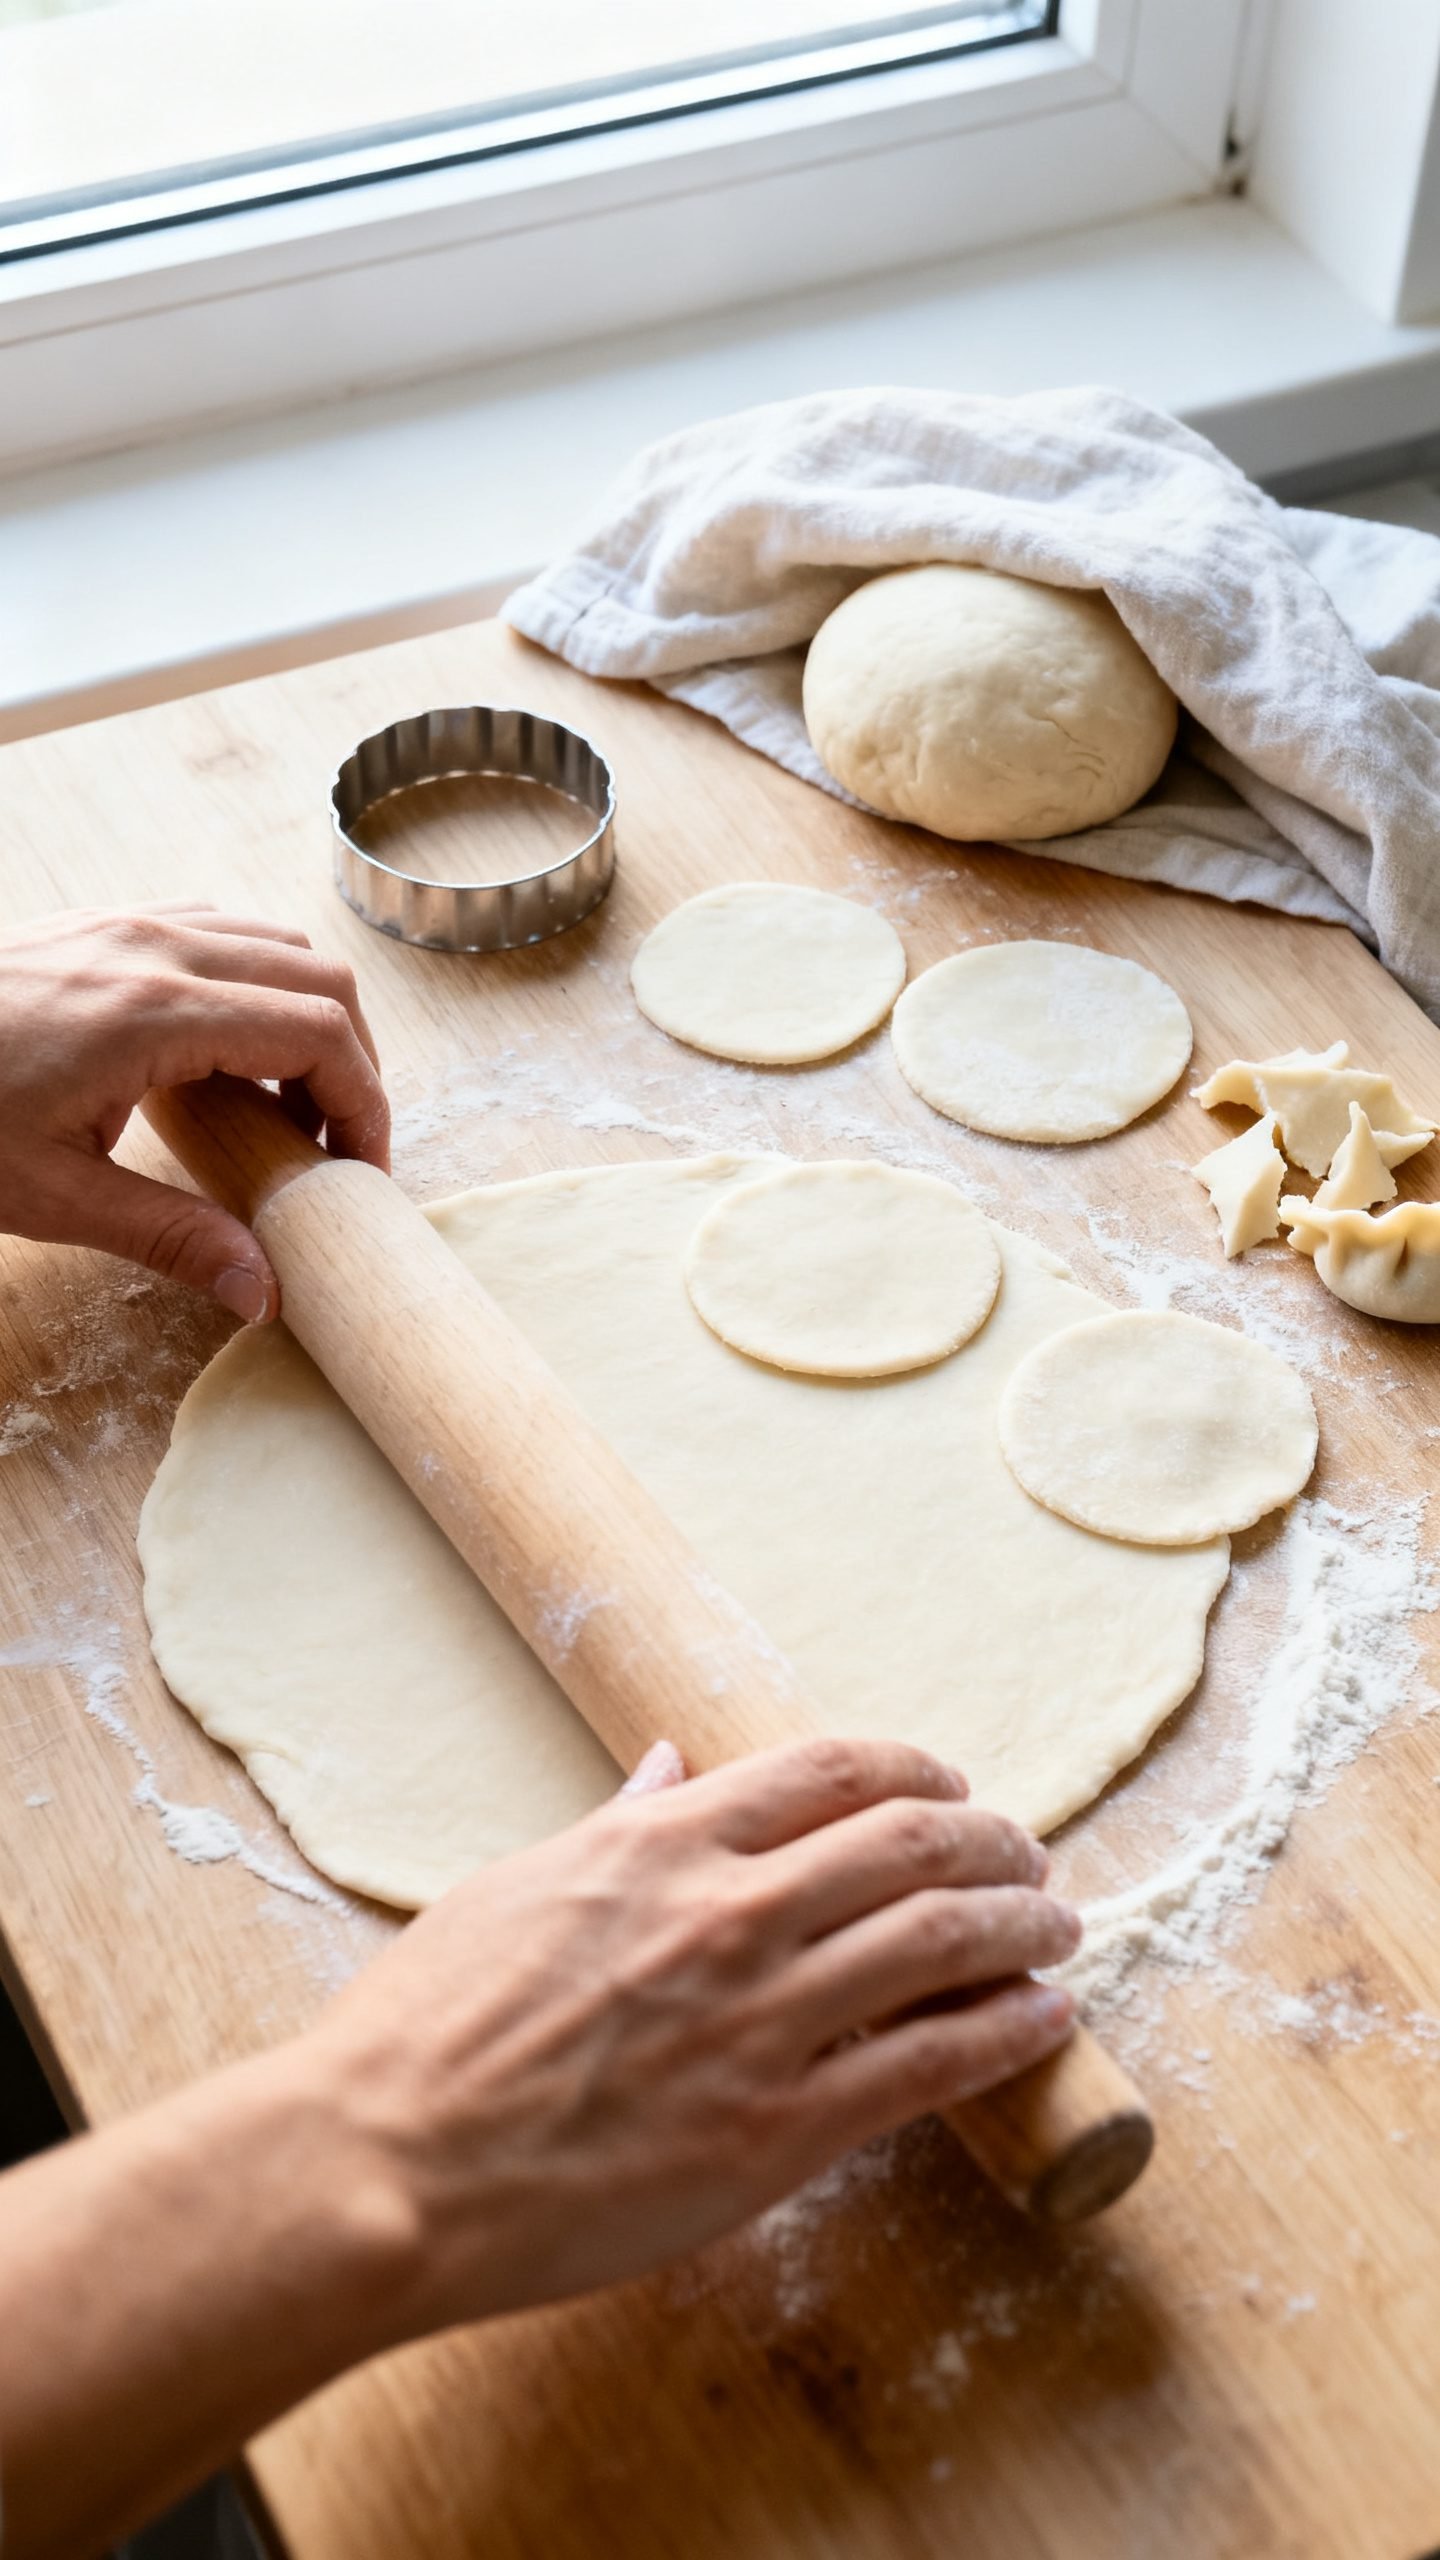
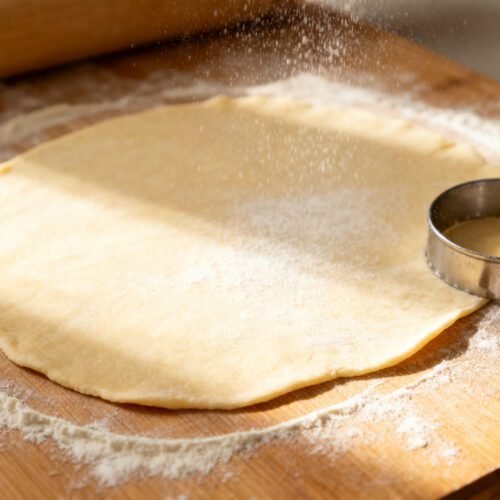
- Roll in batches: Cut the dough into 2–4 pieces. Keep pieces covered. Roll one piece on a lightly floured surface to about 1/16–1/8 inch (1.5–3 mm) thick. Thinner dough means more delicate pierogi.
- Cut rounds: Use a round cutter or glass to cut circles. Gather scraps, cover, and re-roll once. Avoid repeated re-rolling, which can toughen the dough.
- Fill and seal: Place a small spoonful of filling in the center (about 1–1.5 teaspoons, depending on circle size). Fold into a half-moon. Pinch edges firmly to seal, then crimp with fingertips for a decorative finish.
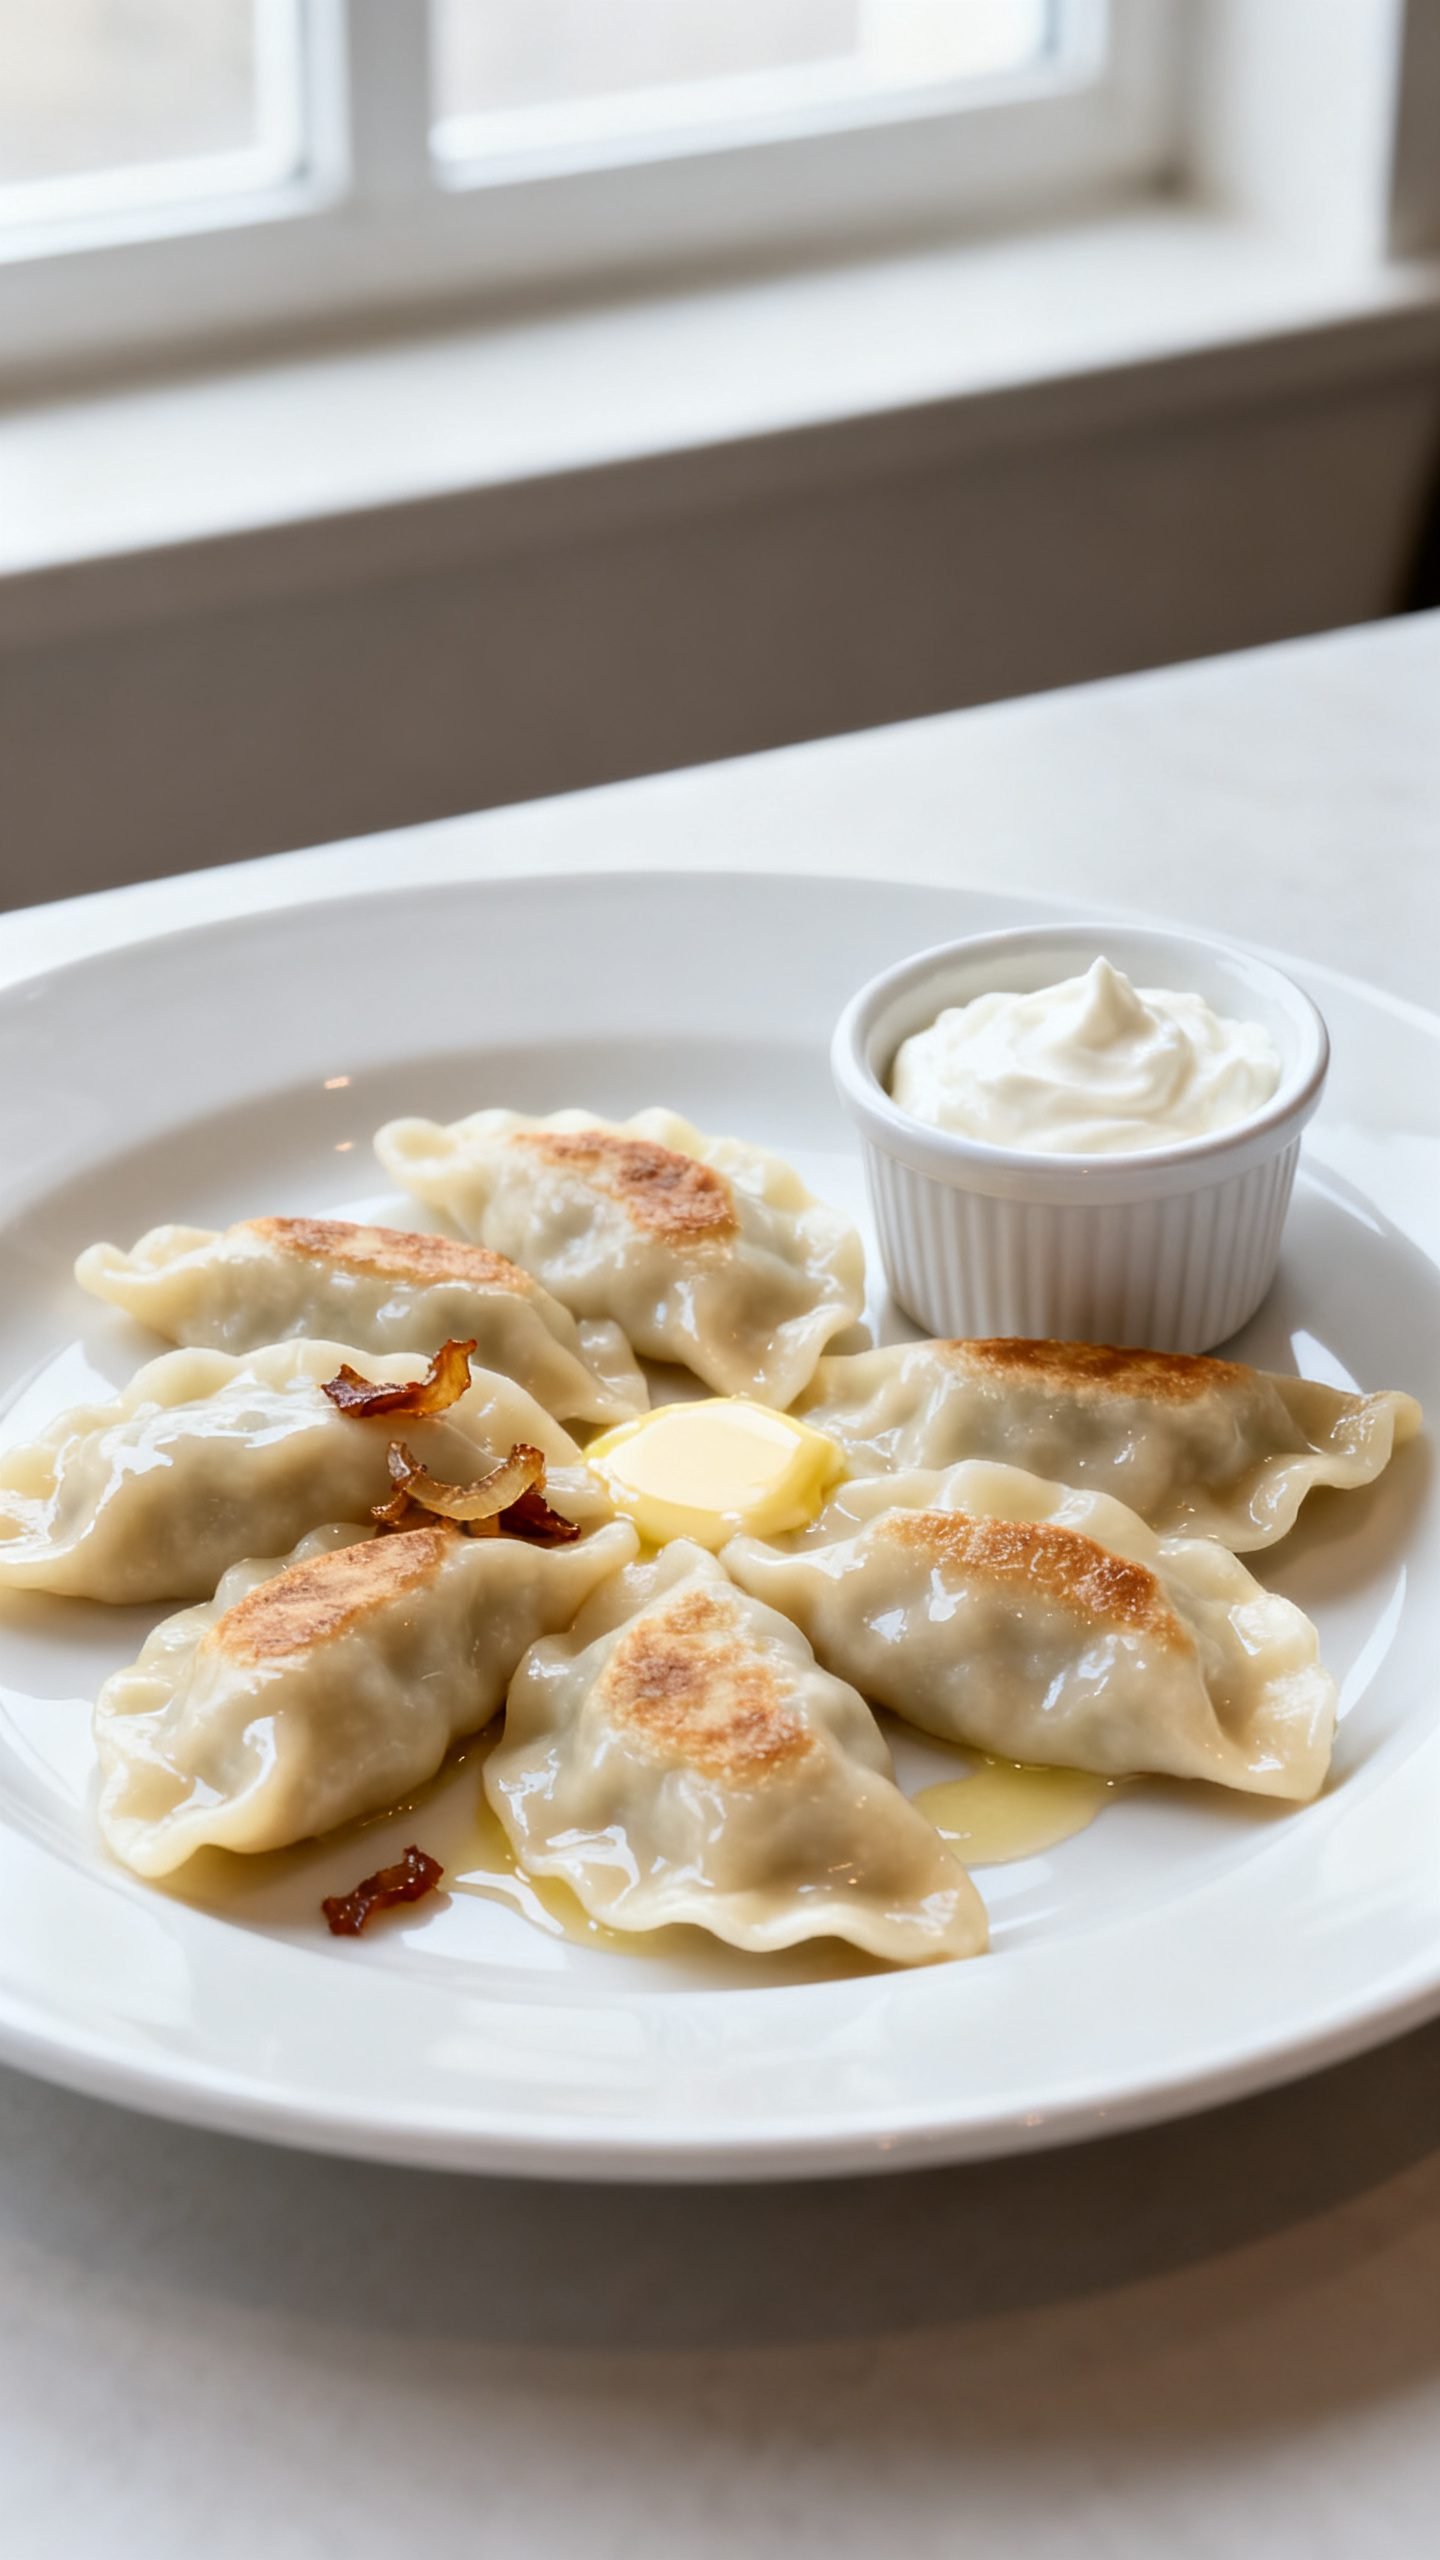
- Cook: Bring a large pot of salted water to a gentle boil. Drop pierogi in batches. Stir once to prevent sticking. When they float, cook 1–2 minutes more. Remove with a slotted spoon. Serve as is or pan-fry in butter until golden.
Pro Tips
- Temperature matters: Use warm water—too hot can cook the egg, too cool won’t relax the gluten.
- Soft dough wins: Err on the side of softer dough. It rolls thin and seals better.
- Seal insurance: If edges don’t stick, lightly dab with water. Press firmly to remove any air pockets.
- Work covered: Keep unused dough and cut rounds covered so they don’t dry out.
How to Store Homemade Pierogi Dough
- Short-term (unrolled dough): Wrap tightly and refrigerate up to 24 hours. Let it warm slightly before rolling.
- Longer storage (formed pierogi): Place uncooked, filled pierogi on a floured or parchment-lined tray. Freeze until solid, then transfer to freezer bags. Freeze up to 2 months.
- Cooking from frozen: Boil directly from frozen. Add an extra 1–2 minutes after they float.
- Cooked leftovers: Refrigerate cooked pierogi up to 3 days. Reheat by pan-frying in butter for the best texture.
Benefits of Making Pierogi Dough from Scratch
- Texture control: You decide how soft or chewy you want it.
- Better sealing: Fresh dough grips and seals around filling without splitting.
- Flavor upgrade: A touch of butter or oil adds richness you won’t get from store-bought wrappers.
- Tradition and pride: Rolling, filling, and shaping turns dinner into a family ritual.
- Versatility: This dough works with potato-cheese, sauerkraut-mushroom, meat, or sweet fruit fillings.
What Not to Do
- Don’t skip the rest: Unrested dough fights back and tears when you roll it.
- Don’t over-flour: Too much dusting makes the dough dry and hard to seal.
- Don’t overfill: Too much filling leads to leaks and burst pierogi.
- Don’t boil too aggressively: A raging boil can split seals. Keep it at a gentle simmer.
- Don’t re-roll scraps repeatedly: Overworked dough turns tough. Re-roll once and make mini pierogi with the rest.
Variations You Can Try
- Butter-enriched dough: Swap the oil for melted butter for a tender, slightly richer bite.
- Sour cream dough: Replace 2–3 tablespoons of water with full-fat sour cream for extra softness and tang.
- Egg-free version: Omit the egg and add 1–2 tablespoons more water or sour cream for a supple, vegan-friendly dough (use oil, not butter).
- Whole-wheat blend: Replace up to 25% of the flour with fine whole-wheat flour for a nuttier flavor; add a splash more water as needed.
- Herb-scented: For savory fillings, knead in a pinch of dried dill or chives to the dough.
FAQ
Why is my pierogi dough tough?
Too much flour or over-kneading usually causes toughness. Keep the dough soft, knead just until smooth, and rest it before rolling.
How thin should I roll the dough?
Roll to about 1/16–1/8 inch (1.5–3 mm). Thinner gives a delicate bite, but make sure it can hold your filling without tearing.
Can I make the dough ahead?
Yes. Refrigerate up to 24 hours, well wrapped. Let it warm slightly and knead once or twice to refresh before rolling.
What’s the best flour for pierogi?
Use all-purpose flour for dependable results. If your flour is high-protein, add a teaspoon more oil and a splash more water to keep it soft.
My pierogi open while boiling—help!
Seal firmly, remove air pockets, and simmer gently. If needed, dab the edge with water before pinching. Avoid overfilling.
Can I pan-fry without boiling first?
You can, but boil first for the best texture. After boiling, drain well and fry in butter until golden and crisp on the outside.
Conclusion
Great pierogi start with dough that feels alive in your hands—soft, warm, and easy to shape. With a few simple ingredients and the right technique, you’ll turn out tender, authentic pierogi every time. Make a batch today, stash some in the freezer, and enjoy a taste of Polish comfort whenever the craving hits.
Pierogi Dough Recipe | Authentic Polish Pierogi Dough Made From Scratch
Ingredients
Ingredients
- 3 cups (360 g) all-purpose flour, plus extra for dusting
- 1 teaspoon fine sea salt
- 1 large egg, room temperature
- 1 cup (240 ml) warm water (about 110°F/43°C), plus 1–2 tablespoons more as needed
- 2 tablespoons neutral oil or melted unsalted butter
Instructions
Instructions
- Whisk the flour and salt together in a large mixing bowl.
- In a measuring cup, whisk the egg with the warm water and the oil or melted butter until smooth.
- Make a well in the flour and pour in most of the wet mixture, stirring until a shaggy dough forms; add the remaining liquid as needed until no dry pockets remain and the dough is soft and slightly tacky.
- Turn the dough onto a lightly floured surface and knead for 2–4 minutes until smooth and elastic, dusting sparingly with flour if sticky or wetting hands if tight.
- Shape the dough into a ball, cover with plastic wrap or a damp towel, and rest at room temperature for 20–30 minutes.
- Cut the dough into 2–4 pieces, keeping unused pieces covered, and roll one piece at a time on a lightly floured surface to 1/16–1/8 inch (1.5–3 mm) thickness.
- Cut rounds with a 2.5–3 inch (6–7.5 cm) cutter, gather scraps, cover, and re-roll once.
- Place about 1–1.5 teaspoons of filling in the center of each round, fold into a half-moon, pinch firmly to seal, and crimp the edges.
- Bring a large pot of salted water to a gentle boil, add pierogi in batches, stir once to prevent sticking, cook until they float plus 1–2 minutes, then remove with a slotted spoon.
- Serve immediately or pan-fry the boiled pierogi in butter until golden.


