
Easy Homemade Greek Yogurt Recipe | Simple No-Starter Yogurt Method – Thick, Tangy, and Foolproof
Making your own Greek yogurt at home is simpler than it sounds, and you don’t need a store-bought starter to get creamy, tangy results. With just milk and a little lemon juice or vinegar, you can coax natural cultures to do their job. The process is hands-off, budget-friendly, and surprisingly consistent.
Once it sets, strain it for that classic thick Greek-style texture. You’ll end up with a bowl of rich yogurt that tastes fresh and clean, with no fillers or mystery ingredients.
Why This Recipe Works
This method uses the natural bacteria present in milk and a gentle acid to create the right environment for fermentation. The milk is heated to help denature proteins so your yogurt sets thick and smooth.
A steady warm spot lets the cultures multiply and thicken the milk over several hours. Straining removes whey, concentrating the yogurt into a lush, Greek-style consistency. It’s a simple, low-risk method that delivers reliable results without buying a starter.
Ingredients
- Whole milk (1/2 gallon or 2 liters) – Whole milk makes the creamiest yogurt, but 2% works too.
- Lemon juice or white vinegar (2 tablespoons) – Provides the gentle acidity to help kickstart fermentation.
- Optional: pinch of salt – Enhances flavor without making it salty.
How to Make It
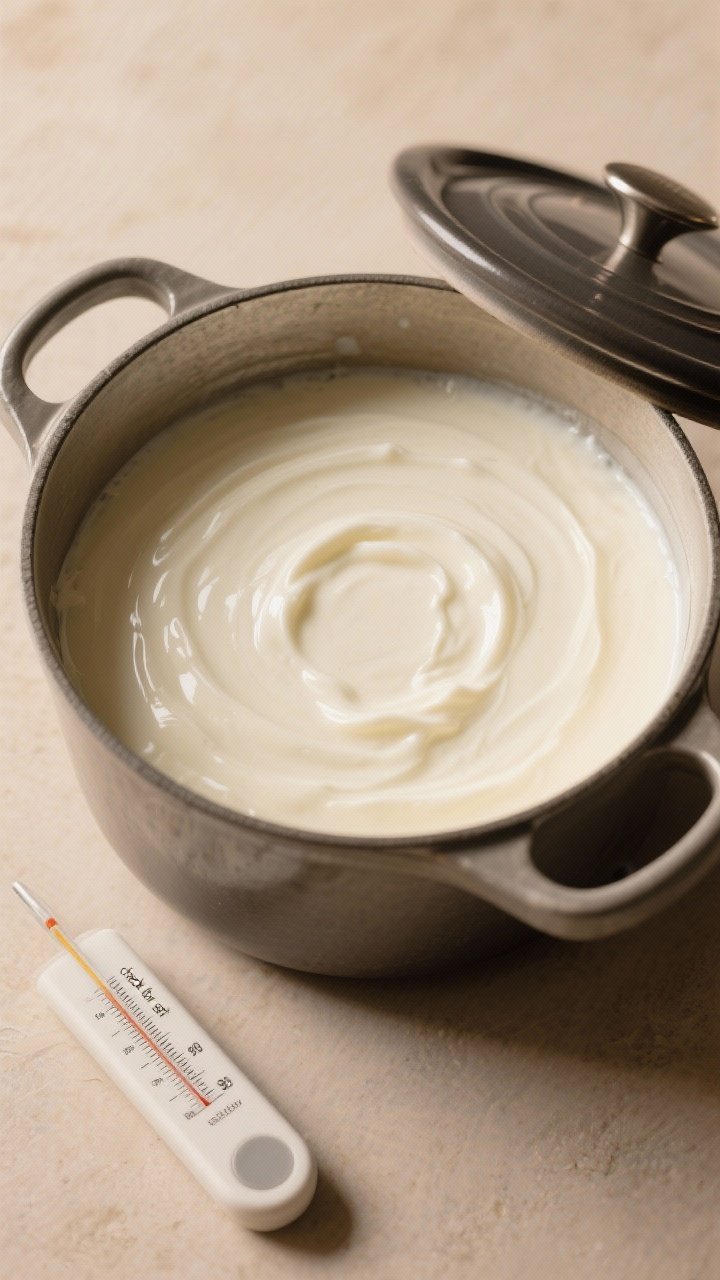
- Heat the milk. Pour the milk into a heavy pot and warm it over medium heat until it reaches about 180°F/82°C, just below a boil.
Stir now and then to prevent scorching. This step helps your yogurt thicken later.
- Cool it down. Take the pot off the heat and let the milk cool to about 110–115°F/43–46°C. If you don’t have a thermometer, it should feel warm but comfortable to the touch—like a hot bath.
- Add the acid. Stir in the lemon juice or vinegar.
You won’t see curds form like cheese; you’re just creating the right pH for fermentation.
- Keep it warm. Cover the pot with a lid. Place it somewhere consistently warm for 8–12 hours. Good spots: an oven with the light on, an insulated cooler with a warm towel, or a yogurt setting on an Instant Pot (no pressure).
- Check for set. After 8 hours, gently tilt the pot.
If it looks thickened and jiggles as one mass with a little whey on top, it’s ready. If it’s still very liquid, give it a few more hours.
- Stir and chill. Once set, stir gently for a smooth texture. Refrigerate for at least 2 hours to cool and firm up.
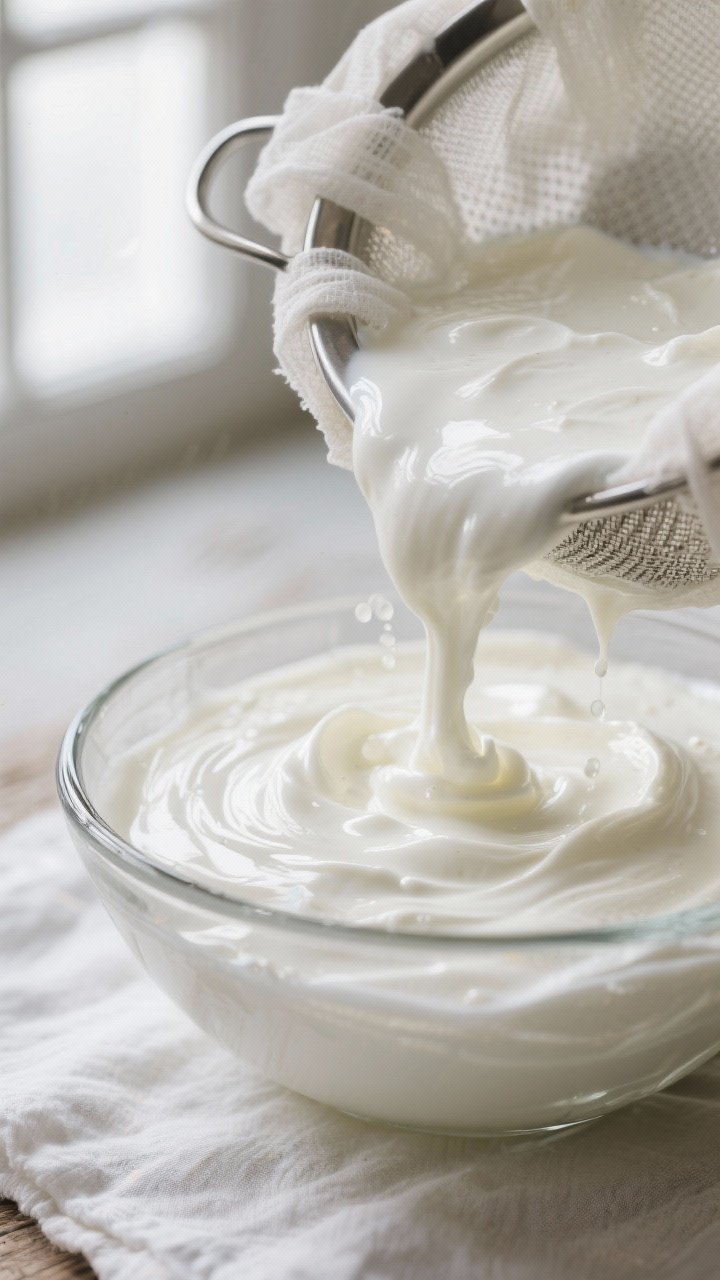
- Strain for Greek-style. Line a fine-mesh sieve with a clean cotton towel, cheesecloth, or coffee filters.
Set over a bowl and pour in the yogurt. Refrigerate and strain for 1–3 hours, depending on how thick you like it. The longer it strains, the thicker it gets.
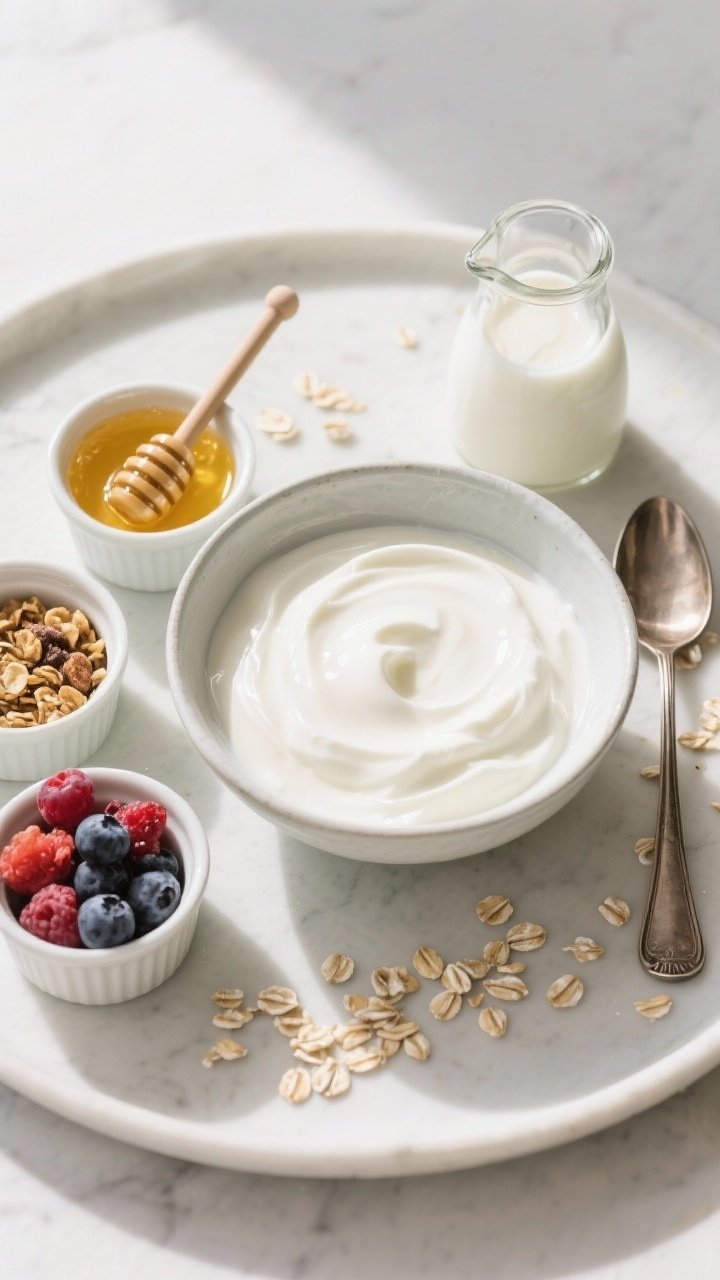
- Finish and flavor. Stir in a pinch of salt if you like.
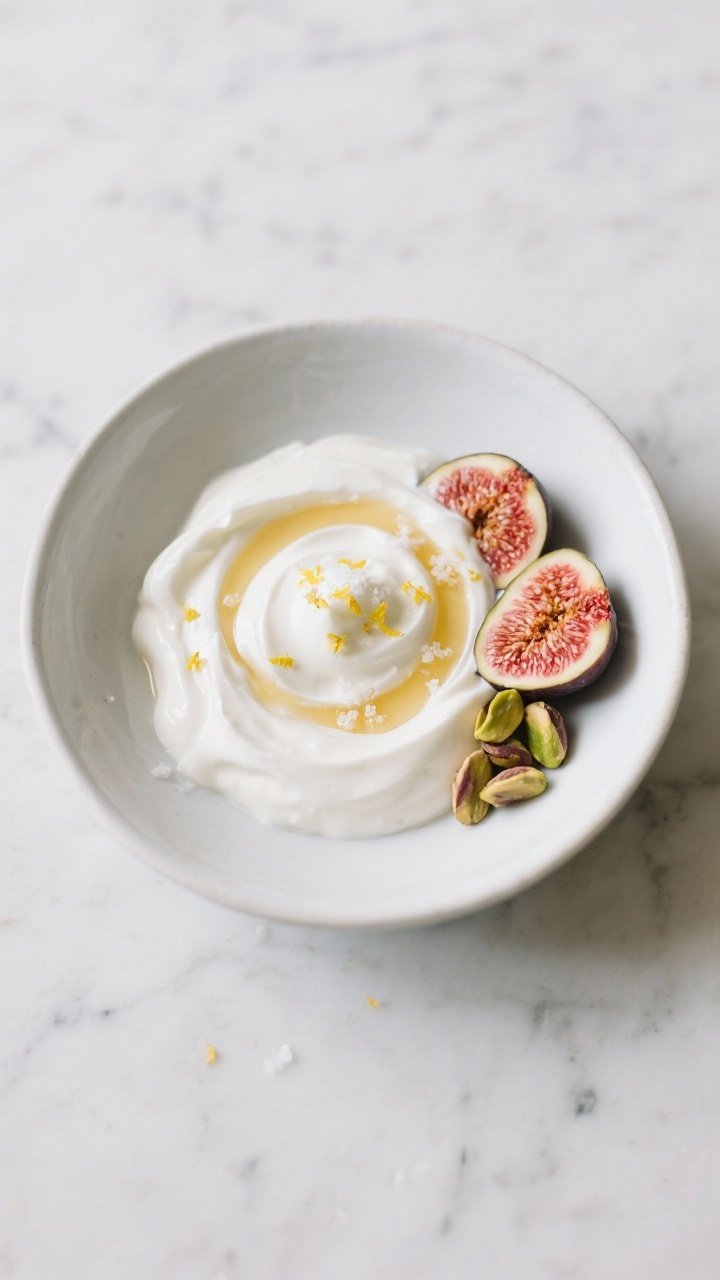
Keep plain for versatility, or add honey, fruit, or vanilla right before serving.
Keeping It Fresh
- Storage: Transfer the yogurt to a clean, airtight container and refrigerate. It keeps well for 7–10 days.
- Whey: Don’t throw out the strained whey. Use it in smoothies, pancakes, soups, or for soaking grains.
- Batching: Make a big batch and strain only what you need.
The base yogurt can be kept thinner for sauces and dressings.
Why This is Good for You
- Protein-rich: Straining concentrates protein, making Greek yogurt a filling snack or breakfast base.
- Probiotics: Naturally fermented yogurt may contain beneficial bacteria that can support gut health.
- Low in additives: You control what goes in—no thickeners, stabilizers, or excess sugar.
- Calcium and B vitamins: A solid source of bone-friendly nutrients.
What Not to Do
- Don’t skip the heating step. Heating helps proteins set properly; cold-start won’t thicken the same way with this method.
- Don’t ferment too hot. High heat can kill helpful bacteria. Aim for a warm, steady environment, not hot.
- Don’t use ultra-fresh lemon juice with pulp and seeds. Strain it first or use clean white vinegar. Pulp can affect texture.
- Don’t stir during fermentation. Let it sit undisturbed so it sets evenly.
- Don’t overstrain unless you want labneh. Past 4–6 hours, you’ll get a spreadable yogurt cheese—delicious but very thick.
Variations You Can Try
- Extra creamy: Add 1/2 cup of heavy cream to the milk before heating for a richer result.
- Vanilla bean: Split a vanilla bean and steep it in the milk while heating.
Remove before cooling.
- Honey-lemon: Stir in 1–2 tablespoons of honey and a little lemon zest after straining.
- Savory: Add a pinch of salt and a drizzle of olive oil, then top with cucumbers and herbs for a quick dip.
- Dairy-free: Use full-fat canned coconut milk. Heat, cool, add lemon juice, and ferment as above. It won’t be identical to dairy Greek yogurt, but it becomes thick and tangy when strained.
FAQ
Can I use skim milk?
You can, but the yogurt will be thinner and less creamy.
For best results, use 2% or whole milk. If you use skim, strain longer to improve texture.
Do I need a thermometer?
No, but it helps. Without one, aim for just-below-boiling when heating and a warm-bath feel for cooling.
Consistency improves with a thermometer.
How do I keep it warm without special equipment?
Place the covered pot in an oven with the light on, wrap it in a towel, or set it in a cooler with a warm (not hot) water bottle beside it. Steady warmth is the goal.
Why is my yogurt runny?
It likely fermented too cool or not long enough. Next time, ensure a warmer spot or give it more time.
Straining also thickens it significantly.
Is the lemon or vinegar flavor noticeable?
Not once it ferments and chills. The tang comes from the yogurt itself. If you’re sensitive, use white vinegar, which is very neutral after fermentation.
How long should I ferment?
Most batches set in 8–12 hours.
A longer ferment typically makes a tangier yogurt. Avoid going past 16 hours to prevent an overly sour taste.
Can I use this yogurt as a starter for my next batch?
Yes. Reserve 2 tablespoons from a successful batch and whisk it into cooled milk next time.
That will speed up fermentation and increase reliability.
What can I do with the whey?
Use it in smoothies, soak oats, cook rice, or add to breads and pancakes. It brings a light tang and extra protein.
Why does the top look watery?
That’s whey separation and it’s normal. You can pour it off for thicker yogurt or stir it back in for a looser texture.
Is this safe?
When you heat the milk properly and ferment in a clean container at warm—not hot—temperatures, homemade yogurt is generally safe.
Always use clean tools and refrigerate promptly once set.
Final Thoughts
This no-starter method is a simple way to make real, thick Greek-style yogurt at home with basic ingredients. Once you learn your kitchen’s warm spot, you’ll get consistent results and a flavor that beats store-bought. Make a plain batch on the weekend, strain to your liking, and enjoy it all week with fruit, granola, or savory toppings.
It’s fresh, flexible, and easy to make part of your routine.
Easy Homemade Greek Yogurt Recipe | Simple No-Starter Yogurt Method - Thick, Tangy, and Foolproof
Ingredients
- Whole milk (1/2 gallon or 2 liters) – Whole milk makes the creamiest yogurt, but 2% works too.
- Lemon juice or white vinegar (2 tablespoons) – Provides the gentle acidity to help kickstart fermentation.
- Optional: pinch of salt – Enhances flavor without making it salty.
Instructions
- Heat the milk. Pour the milk into a heavy pot and warm it over medium heat until it reaches about 180°F/82°C, just below a boil.Stir now and then to prevent scorching. This step helps your yogurt thicken later.
- Cool it down. Take the pot off the heat and let the milk cool to about 110–115°F/43–46°C. If you don’t have a thermometer, it should feel warm but comfortable to the touch—like a hot bath.
- Add the acid. Stir in the lemon juice or vinegar.You won’t see curds form like cheese; you’re just creating the right pH for fermentation.
- Keep it warm. Cover the pot with a lid. Place it somewhere consistently warm for 8–12 hours. Good spots: an oven with the light on, an insulated cooler with a warm towel, or a yogurt setting on an Instant Pot (no pressure).
- Check for set. After 8 hours, gently tilt the pot.If it looks thickened and jiggles as one mass with a little whey on top, it’s ready. If it’s still very liquid, give it a few more hours.
- Stir and chill. Once set, stir gently for a smooth texture. Refrigerate for at least 2 hours to cool and firm up.
- Strain for Greek-style. Line a fine-mesh sieve with a clean cotton towel, cheesecloth, or coffee filters.Set over a bowl and pour in the yogurt. Refrigerate and strain for 1–3 hours, depending on how thick you like it. The longer it strains, the thicker it gets.
- Finish and flavor. Stir in a pinch of salt if you like.Keep plain for versatility, or add honey, fruit, or vanilla right before serving.


