
Neer Dosa Recipe | Soft Mangalore Style Rice Dosa at Home
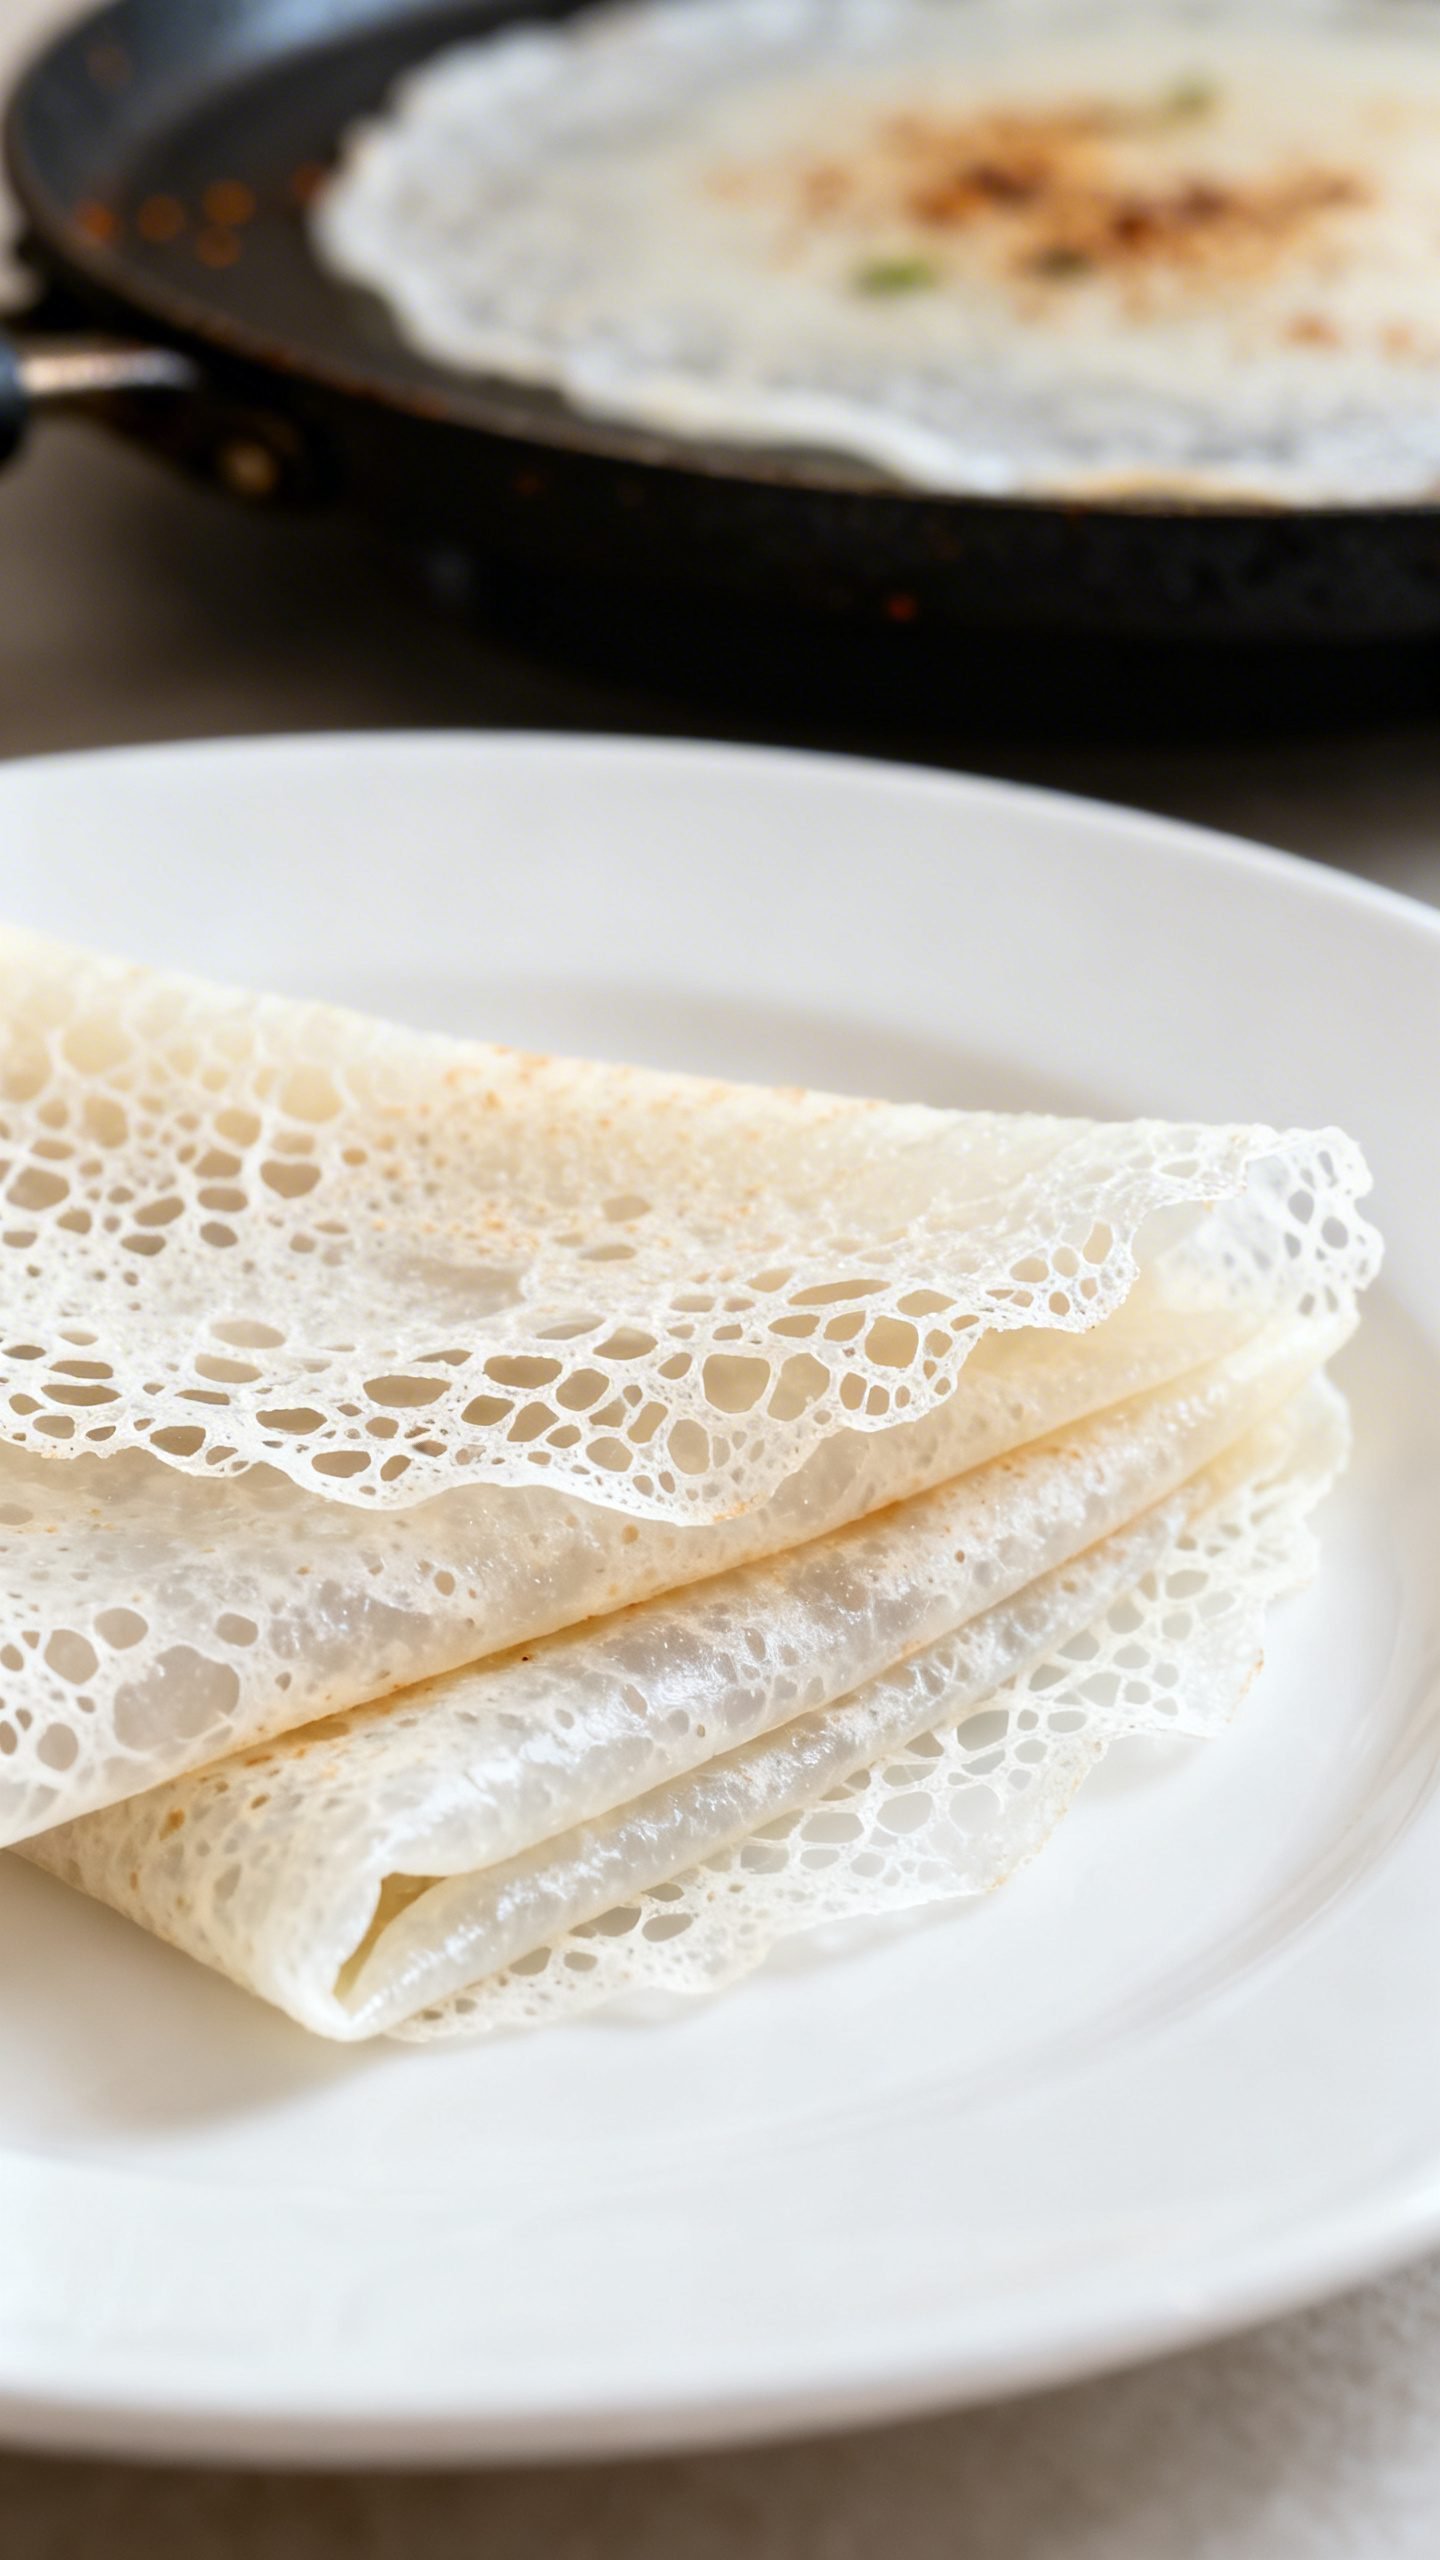
Neer dosa is a soft, lacy, melt-in-the-mouth rice crepe from coastal Karnataka, especially loved in Mangalore homes. It needs no fermentation, comes together with just soaked rice and water, and pairs beautifully with chutneys, coconut-based curries, or a simple jaggery-coconut mix.
If you want a light, naturally gluten-free breakfast or a delicate side to serve with spicy gravies, this neer dosa recipe walks you through every step. I’ll show you how to get that ultra-thin batter, the right pan heat, and the signature net-like texture—without stress.
Why This Neer Dosa Recipe Works
- No fermentation needed: You only soak and blend, then cook right away. Great for busy mornings.
- Three-ingredient simplicity: Rice, water, and salt. Optional coconut for extra softness.
- Feather-light texture: The batter’s water-like consistency gives that classic lacy, soft finish.
- Beginner-friendly method: Clear visual cues and tips make the first dosa just as good as the last.
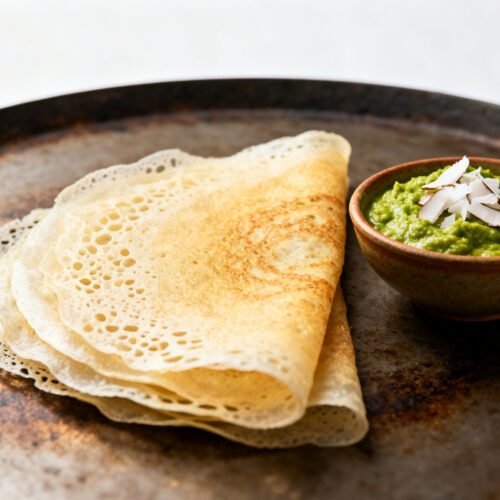
- Versatile pairing: Serve with coconut chutney, vegetable sagu, chicken gassi, or sweetened coconut.
Ingredients
- Raw rice: 1 cup (preferably dosa rice or short-grain raw rice)
- Water: About 2 to 2.5 cups for blending (plus more to adjust)
- Salt: 1/2 teaspoon, or to taste
- Optional fresh grated coconut: 2 to 3 tablespoons for a softer, richer dosa
- Oil or ghee: A few drops to grease the pan as needed
Equipment:
- Blender: To grind rice to a very fine, smooth slurry
- Well-seasoned cast iron or nonstick tawa/skillet: 9–10 inches works well
- Ladle and measuring cup: For portioning and pouring the thin batter
- Fine-mesh strainer (optional): For an ultra-smooth batter
How to Make Soft Mangalorean Neer Dosa
1) Soak the Rice
- Rinse 1 cup raw rice until the water runs clearer.
- Soak in plenty of water for 3 to 4 hours (or overnight if that’s easier).
2) Blend to a Silky Batter
- Drain the soaked rice completely.
- Blend rice with 1 cup water first. Add more water gradually until you get a very smooth, thin slurry.
- If using, add 2–3 tablespoons grated coconut during blending for extra softness.
- Strain the batter through a fine-mesh sieve if you want a super-smooth finish.
- Add salt and more water until the batter turns as thin as buttermilk. When you lift the ladle, it should coat very lightly and run off quickly.
3) Heat and Prep the Pan
- Heat a well-seasoned tawa on medium. The surface should feel hot but not smoking.
- Sprinkle a few drops of water—if they sizzle and vanish in 1–2 seconds, the pan is ready.
- Lightly grease with a few drops of oil or a swipe of cut onion dipped in oil. Wipe excess off; you want a thin film only.
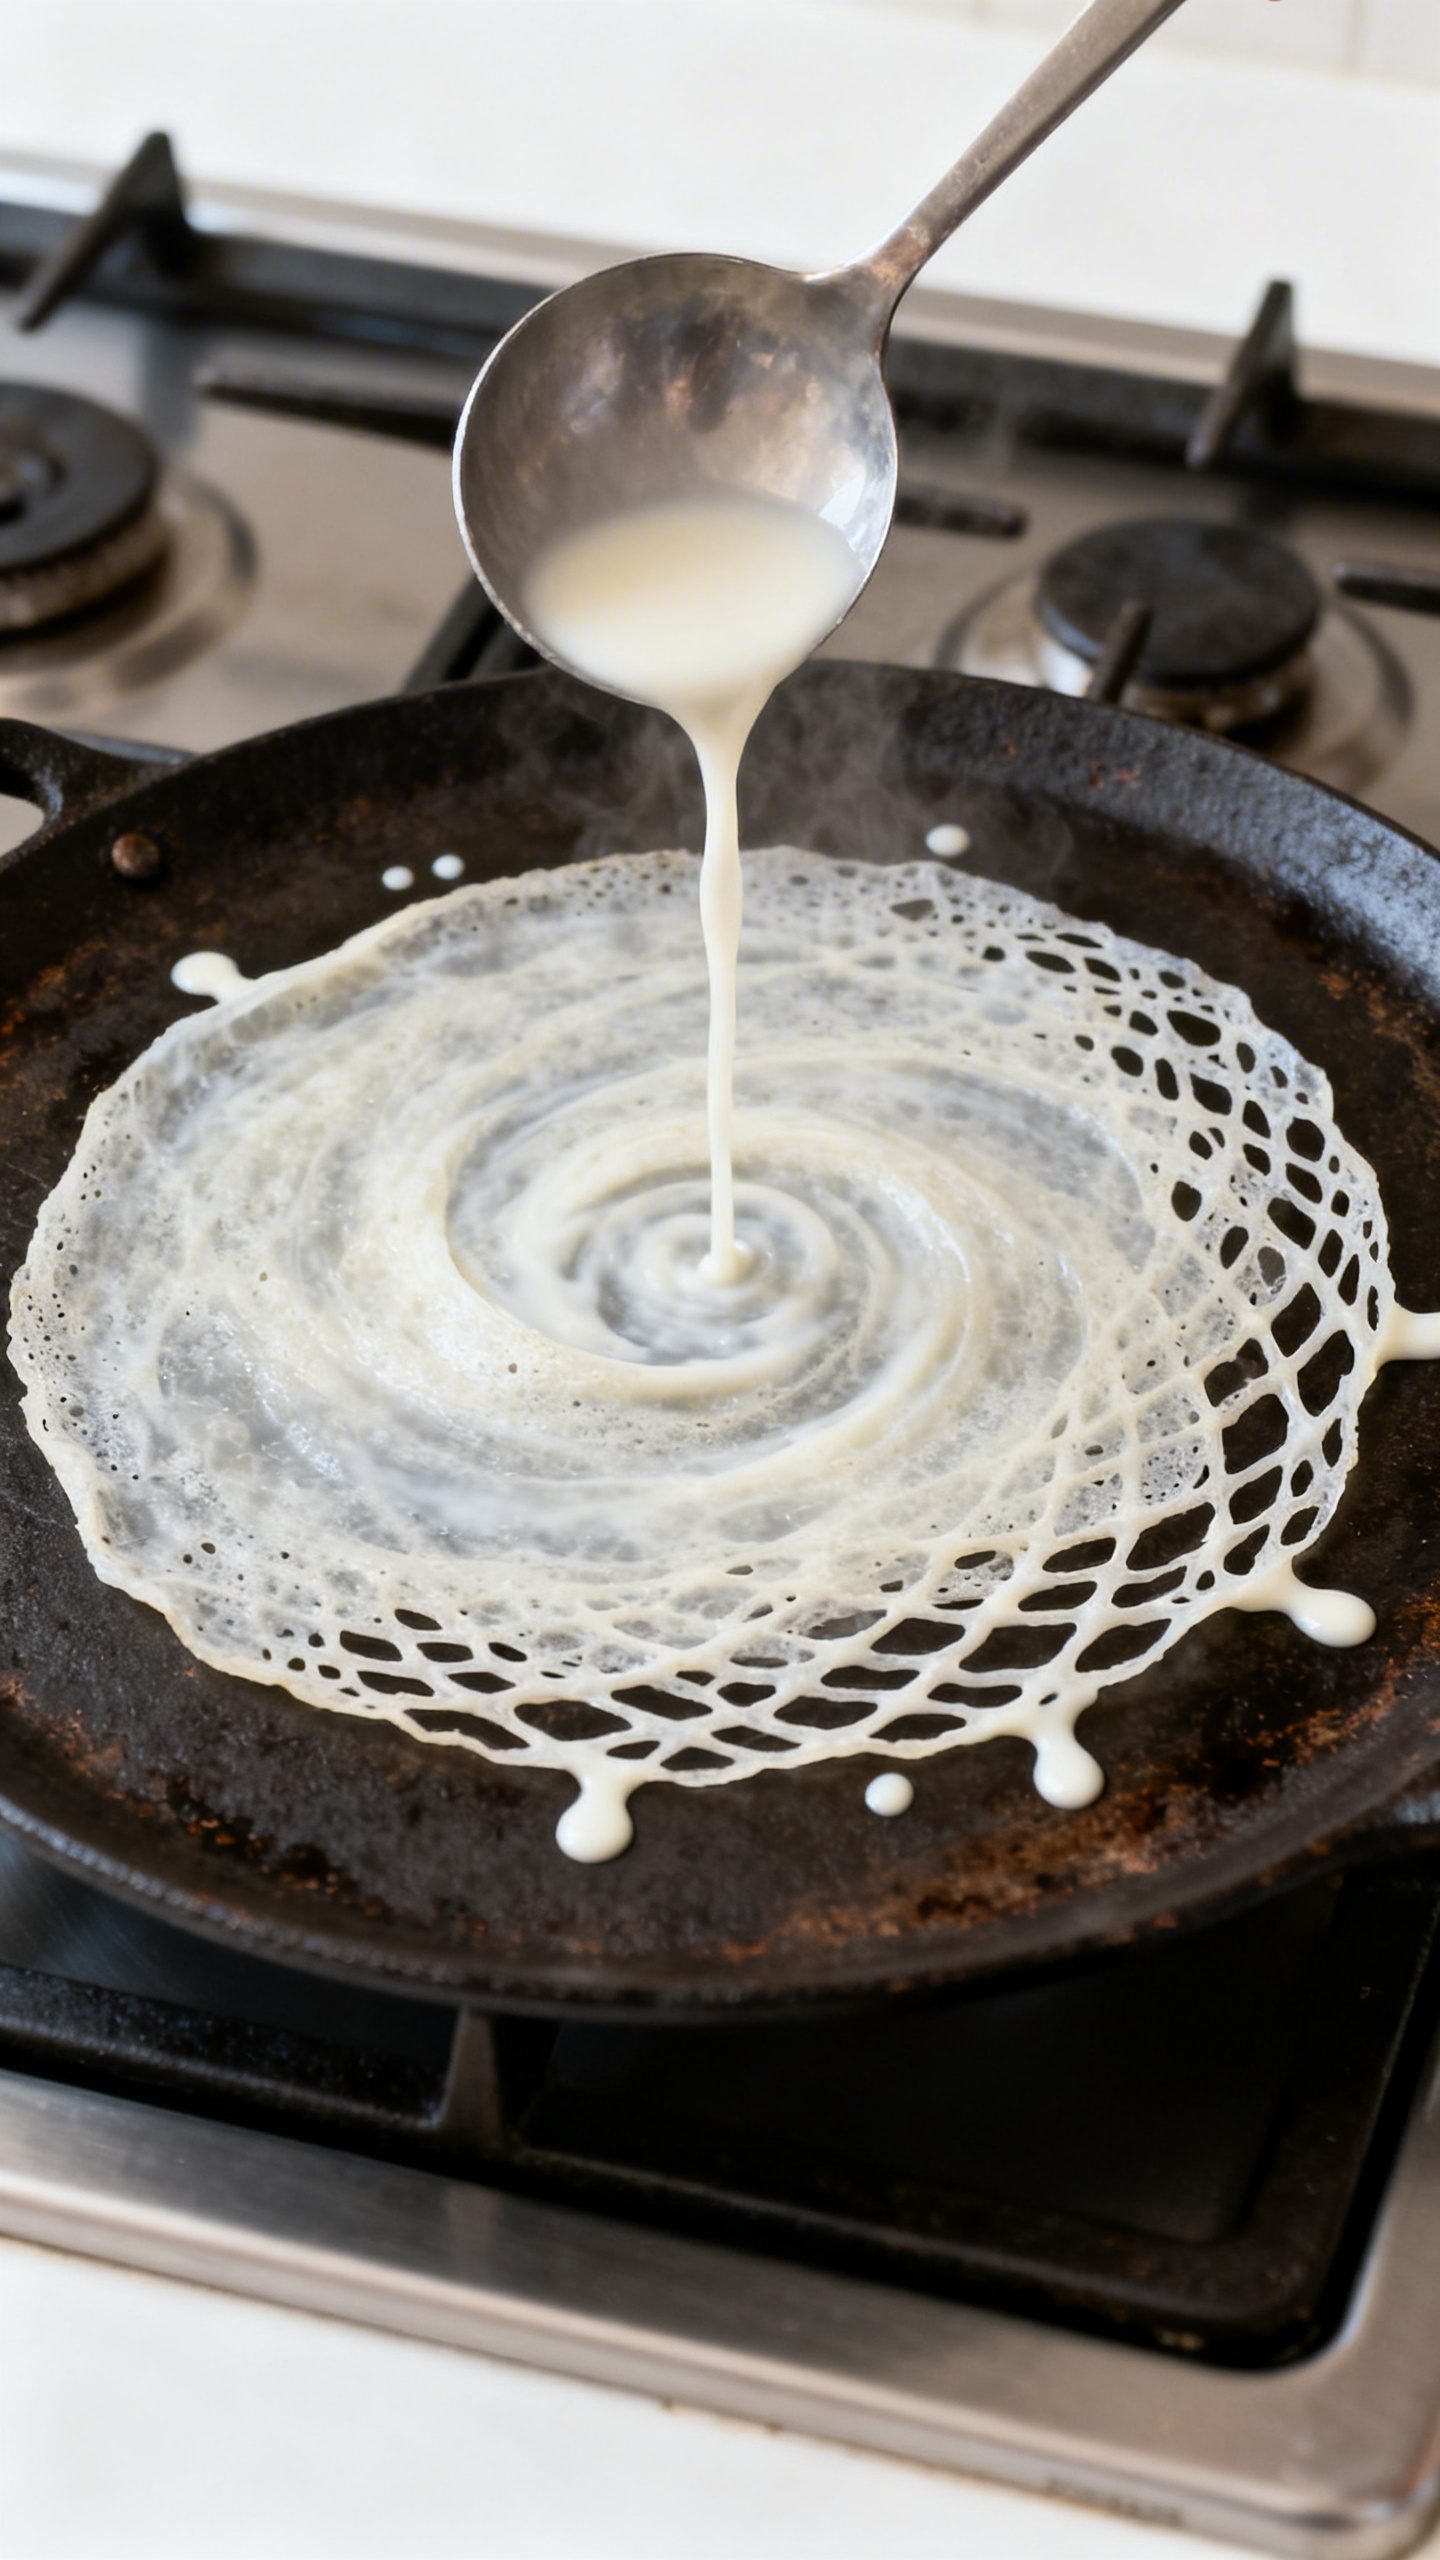
4) Pour and Swirl
- Stir the batter each time before pouring. It settles quickly.
- Pour a ladleful from a slight height onto the hot tawa and immediately rotate your wrist to spread it. Neer dosa spreads by pouring, not by a spiral motion like regular dosa.
- Fill gaps by drizzling a few more drops of batter around the edges for that classic lace pattern.
- Cover and cook for 30–45 seconds on medium heat until it turns opaque and edges lift.
- Do not flip. Gently fold into halves or thirds using a thin spatula.
5) Keep Them Soft
- Stack dosas in a cloth-lined plate or a warm casserole. The steam keeps them soft.
- Stir the batter between dosas and adjust water as needed to keep it ultra-thin.
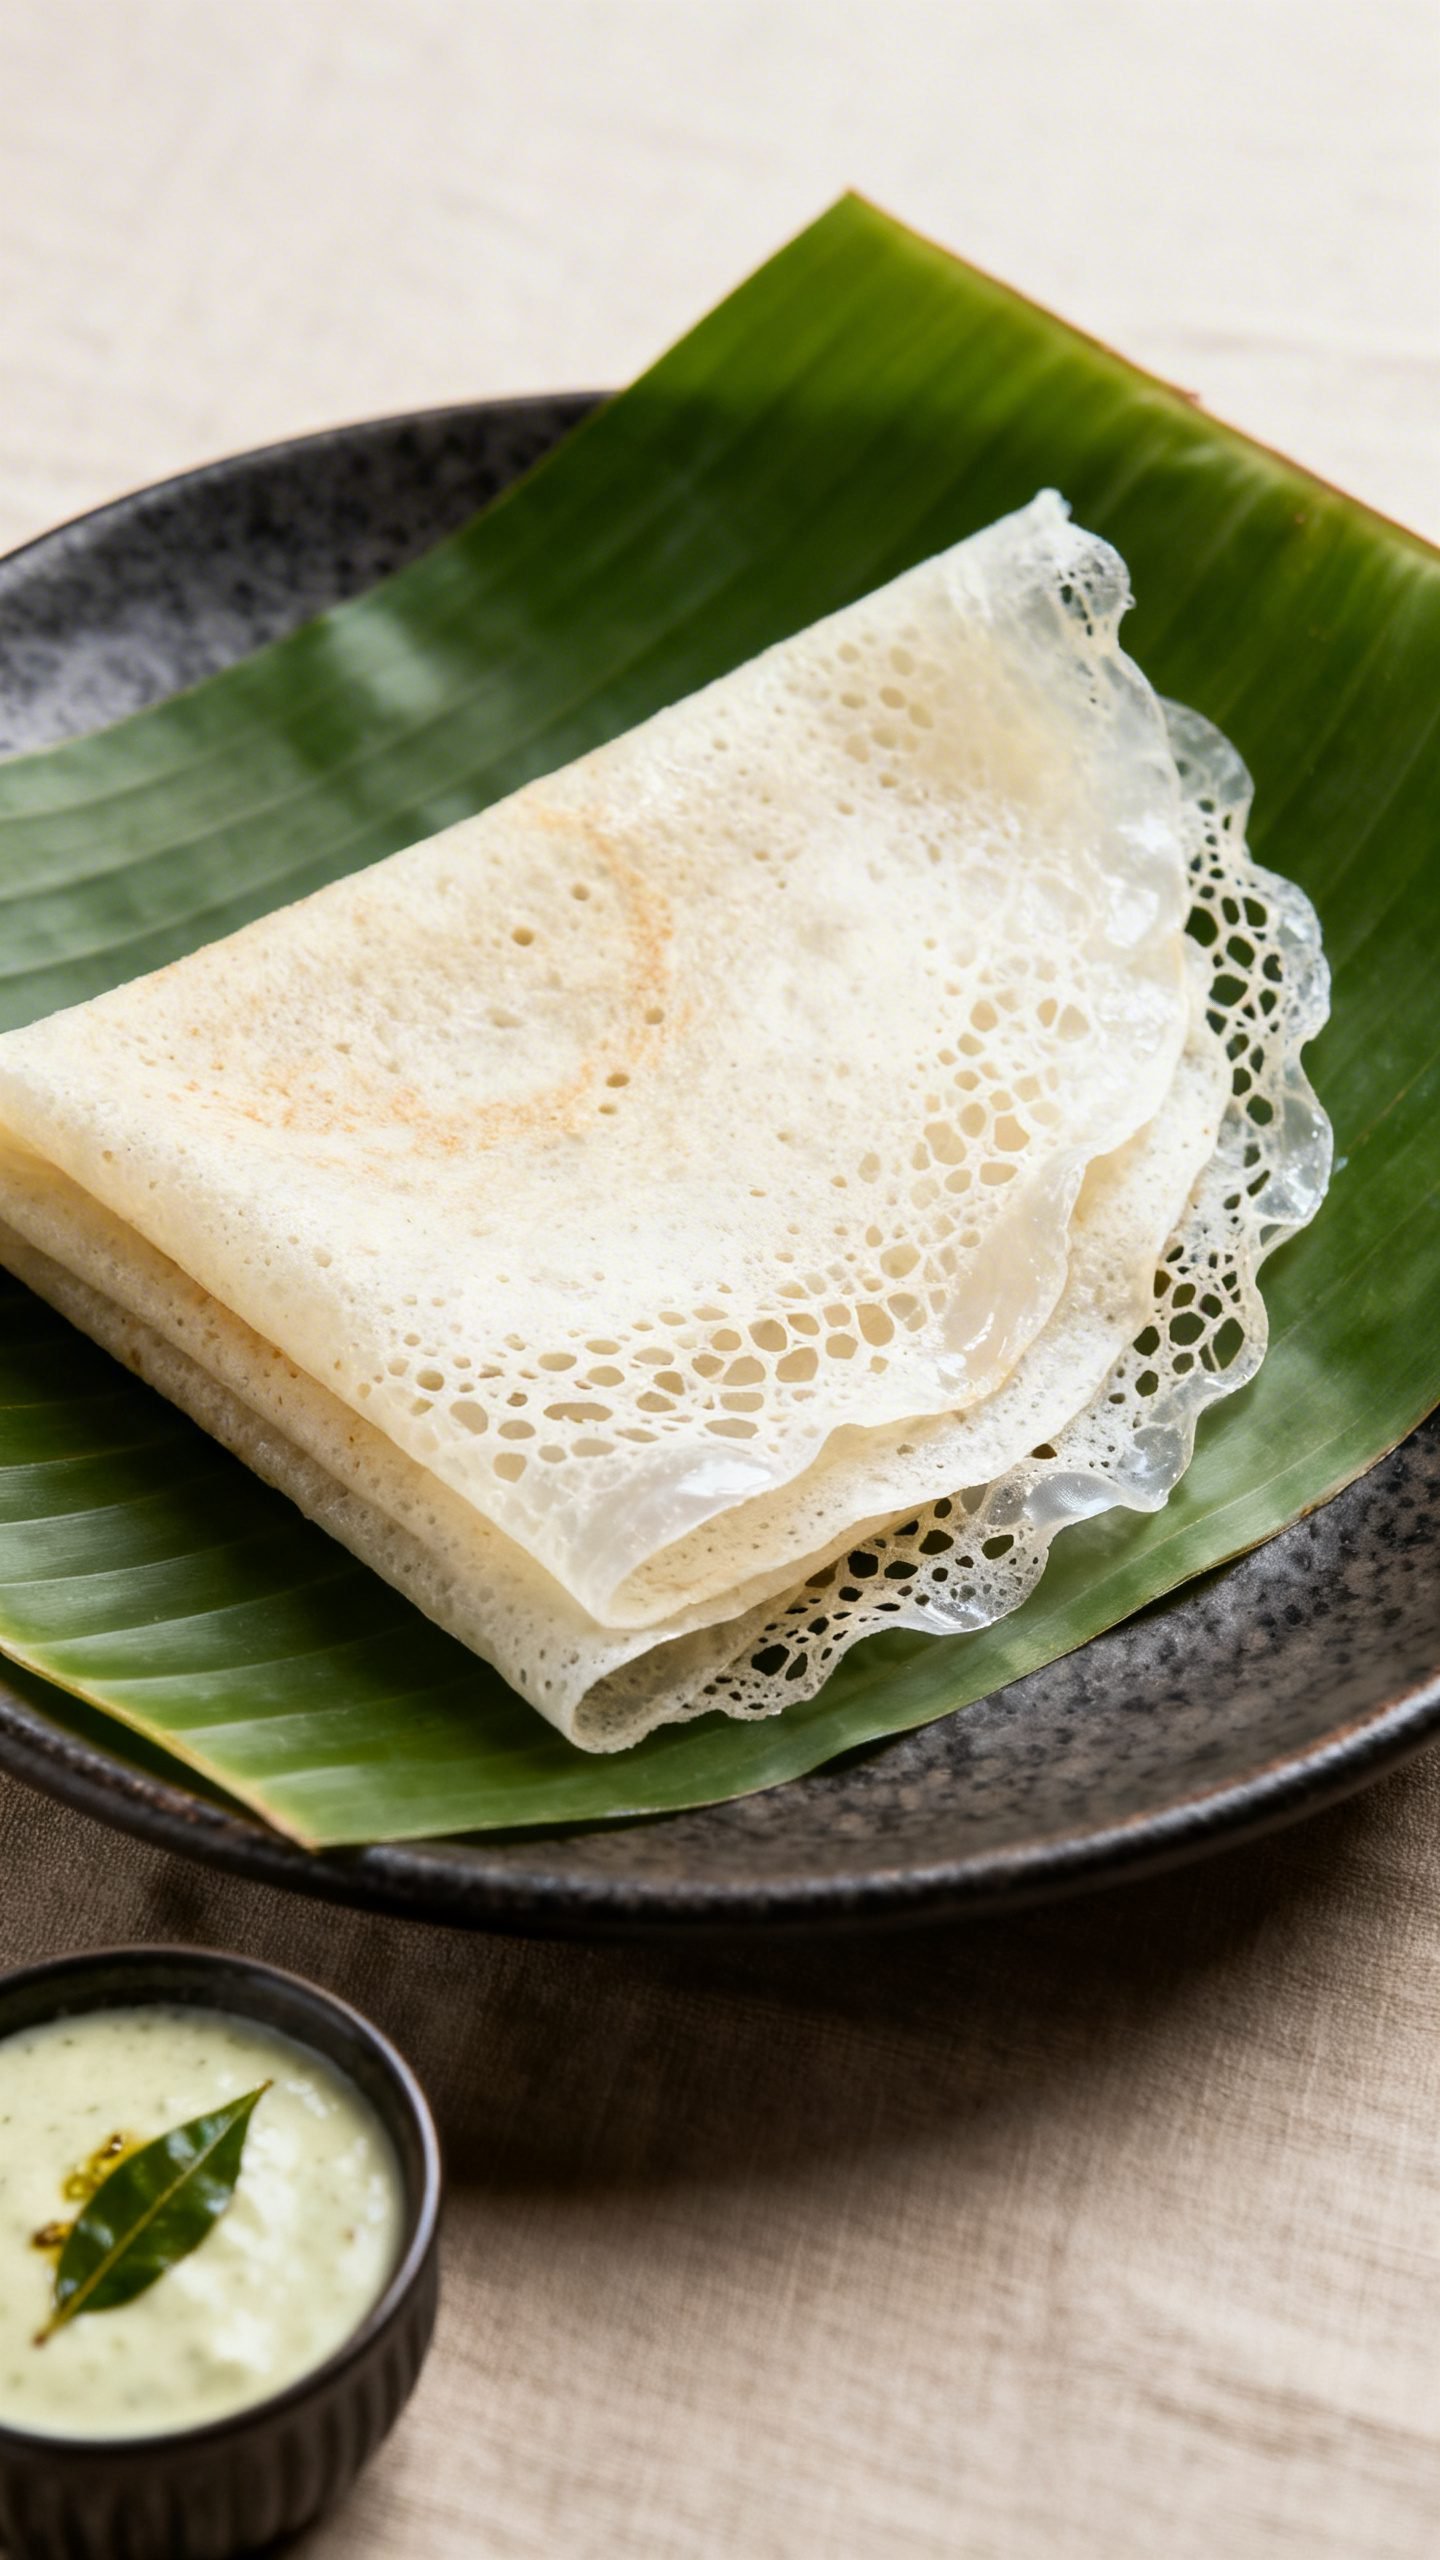
Serving Ideas
- Coconut chutney: Classic and refreshing.
- Mangalorean chicken gassi or vegetable gassi: Rich coconut-based curries love these dosas.
- Jaggery-coconut mix: Sweet, simple, and nostalgic.
- Mixed veg sagu or potato bhaji: Comforting and mildly spiced.
How to Store Neer Dosa
- Short-term (same day): Keep cooked dosas covered in a casserole for up to 4–5 hours.
- Refrigerate cooked dosas: Cool completely, place parchment between layers, store in an airtight box for 1–2 days. Reheat in a covered pan with a few drops of water to steam and soften.
- Refrigerate batter: Store in a lidded container for up to 24 hours. Stir well and re-thin with water before cooking.
- Freezing: Freeze cooked, cooled dosas with parchment between each. Thaw covered at room temp, then warm on a low flame with a quick steam.
Benefits of Making Neer Dosa at Home
- Clean ingredients: Only rice, water, and salt—no additives.
- Light and gluten-free: Easy on the stomach and perfect with bold curries.
- Quick breakfast option: No overnight fermenting, so you can plan last-minute.
- Budget-friendly: Pantry staples turn into a restaurant-quality dish.
- Customizable: Adjust thickness, salt, and pairings to your taste.
What to Avoid for Best Results
- Don’t make the batter thick: If it coats the pan heavily, you won’t get the lacy texture.
- Don’t pour on a cold pan: The batter will clump and stick. Heat matters.
- Don’t over-grease: Excess oil prevents even spreading.
- Don’t skip stirring: Rice starch settles fast; stir before every pour.
- Don’t flip: Neer dosa cooks on one side only; flipping can tear it.
Variations You Can Try
- Coconut-rich: Blend in extra grated coconut or a splash of thin coconut milk for more flavor.
- Seasoned neer dosa: Add crushed cumin, a pinch of black pepper, or finely chopped curry leaves.
- Brown rice version: Use brown rice for a nuttier taste; soak longer (6–8 hours) and blend very smooth.
- Stuffed folds: Tuck in spiced grated coconut, egg bhurji, or a dry potato masala.
- Millet twist: Swap part of the rice with foxtail or little millet; keep the batter very thin.
FAQ
Why does my neer dosa stick to the pan?
The pan likely isn’t hot enough or well-seasoned. Heat it properly, wipe on a thin film of oil, and avoid pouring too soon after greasing.
How thin should the batter be?
Think buttermilk-thin. When you swirl it on the pan, it should spread instantly and leave tiny lacy holes.
Can I use idli rice?
Yes. Idli rice works well if you blend very smooth and thin the batter adequately.
Do I need to ferment the batter?
No fermentation required. Soak, blend, season, and cook right away.
How do I reheat neer dosa without drying it out?
Steam lightly. Place on a warm tawa, sprinkle a few drops of water, cover for 20–30 seconds.
What’s the best pan for neer dosa?
A well-seasoned cast iron tawa gives great texture and edges. Nonstick also works for beginners.
Conclusion
Neer dosa rewards you with soft, lacy crepes using just rice, water, and a few minutes on the stove. Once you nail the ultra-thin batter and the right pan heat, you’ll turn out stack after stack with zero stress. Pair them with coconut chutney or a hearty curry, and you’ve got a comforting coastal classic any day of the week.
Soak the rice, blend it silky, keep that batter whisper-thin, and pour with confidence—your perfect Mangalore-style neer dosa is ready to flip your breakfast routine, no fermentation required.
Neer Dosa Recipe | Soft Mangalore Style Rice Dosa at Home
Ingredients
Ingredients
- Raw rice: 1 cup (preferably dosa rice or short-grain raw rice)
- Water: about 2 to 2.5 cups for blending, plus more to adjust
- Salt: 1/2 teaspoon, or to taste
- Fresh grated coconut (optional): 2 to 3 tablespoons
- Oil or ghee: a few drops to grease the pan as needed
Instructions
Instructions
- Rinse the raw rice until the water runs clearer, then soak in plenty of water for 3 to 4 hours or overnight.
- Drain the soaked rice completely and blend with about 1 cup water, adding more gradually to make a very smooth, thin slurry.
- If using, add grated coconut while blending until fully smooth; strain the batter through a fine-mesh sieve for an ultra-smooth finish.
- Stir in salt and thin the batter with water until it is buttermilk-like, very thin and pourable.
- Heat a well-seasoned cast iron or nonstick tawa over medium until drops of water sizzle and vanish in 1–2 seconds; lightly grease and wipe off excess.
- Stir the batter, then pour a ladleful from a slight height and quickly swirl the pan to spread; drizzle a little more batter to fill gaps for a lacy pattern.
- Cover and cook for 30–45 seconds on medium until the dosa turns opaque and the edges lift; do not flip.
- Gently fold the dosa into halves or thirds and remove; repeat, stirring and thinning the batter with water as needed to keep it ultra-thin.
- Stack cooked dosas in a cloth-lined plate or warm casserole to keep them soft.


