
Beautiful Fresh Fruit Tart Recipe | Easy Summer Dessert with Fresh Fruit
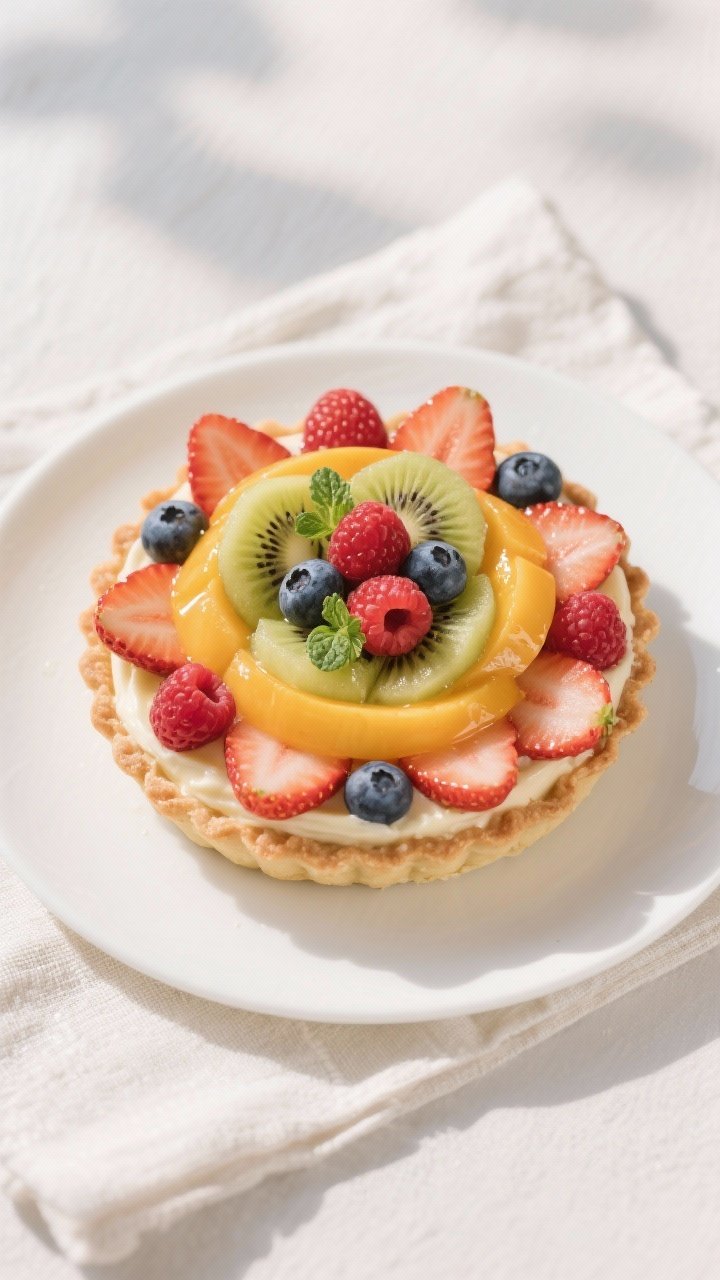
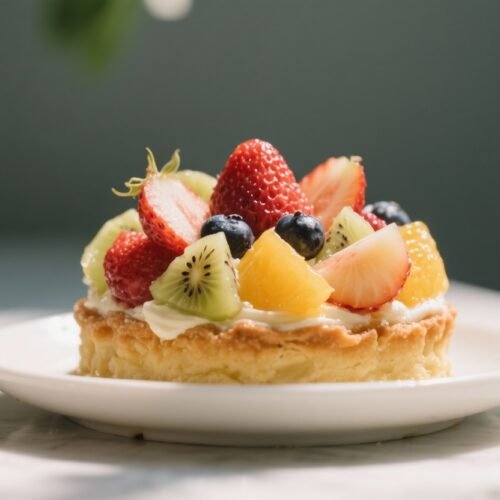
A fresh fruit tart looks impressive, tastes bright and creamy, and comes together more easily than you might think. With a crisp, buttery crust, a smooth vanilla pastry cream, and a colorful crown of juicy fruit, it’s a dessert that feels special without being fussy. This version uses simple techniques and pantry-friendly ingredients you likely already have.
Serve it for brunch, holidays, or anytime you want a showstopping treat that’s light and refreshing. It’s as fun to assemble as it is to eat.
What Makes This Special
- Fresh, vibrant flavor: Seasonal fruit adds natural sweetness, color, and a juicy bite that balances the creamy filling.
- Foolproof crust: A classic tart shell that stays crisp and doesn’t get soggy, even under pastry cream.
- Make-ahead friendly: You can prepare the crust and pastry cream in advance and assemble later.
- Customizable: Use whatever fruit you love—berries, stone fruit, kiwi, mango—this tart adapts to your tastes.
- Light but satisfying: It’s sweet without being heavy, perfect for warm weather and summer gatherings.
Ingredients
For the Tart Crust (Pâte Sucrée)
- 1 1/2 cups (190 g) all-purpose flour
- 1/2 cup (65 g) powdered sugar
- 1/4 tsp fine sea salt
- 1/2 cup (113 g) unsalted butter, cold and cubed
- 1 large egg yolk
- 1–2 tbsp ice water, as needed
- 1 tsp vanilla extract (optional)
For the Vanilla Pastry Cream
- 2 cups (480 ml) whole milk
- 1/2 cup (100 g) granulated sugar
- 3 tbsp cornstarch
- 1/8 tsp fine sea salt
- 4 large egg yolks
- 2 tbsp unsalted butter
- 2 tsp pure vanilla extract (or 1/2 vanilla bean, seeds scraped)
For the Topping
- 4–5 cups mixed fresh fruit (e.g., strawberries, blueberries, raspberries, blackberries, kiwi, mango, peaches, nectarines)
- 1/4 cup apricot jam or apple jelly (for glaze)
- 1–2 tsp water (to loosen glaze)
- Fresh mint leaves (optional, for garnish)
How to Make It
- Make the crust dough: In a bowl, whisk the flour, powdered sugar, and salt. Cut in the cold butter with a pastry cutter or your fingertips until the mixture looks like coarse crumbs.
Stir in the egg yolk, vanilla, and just enough ice water to bring the dough together without it getting sticky.
- Chill: Press the dough into a flat disk, wrap, and chill for 30–45 minutes. Chilled dough rolls cleaner and shrinks less in the pan.
- Roll and fit: On a lightly floured surface, roll the dough into a 12-inch circle for a 9-inch tart pan with a removable bottom. Ease it into the pan, pressing into the edges.
Trim the top flush with the rim. Prick the base with a fork.
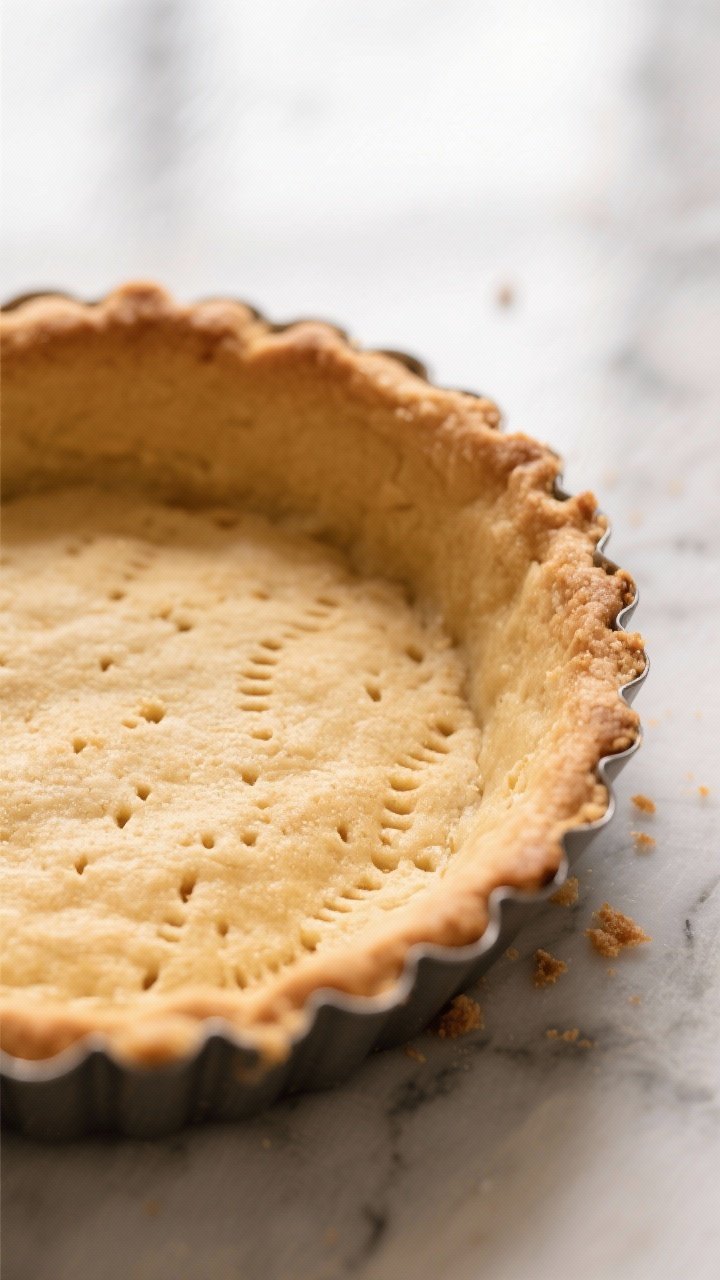
- Blind-bake: Freeze the lined pan for 10–15 minutes. Line with parchment and fill with pie weights or dried beans.
Bake at 375°F (190°C) for 15 minutes. Remove weights and parchment, then bake 10–12 minutes more, until golden and crisp. Cool completely.
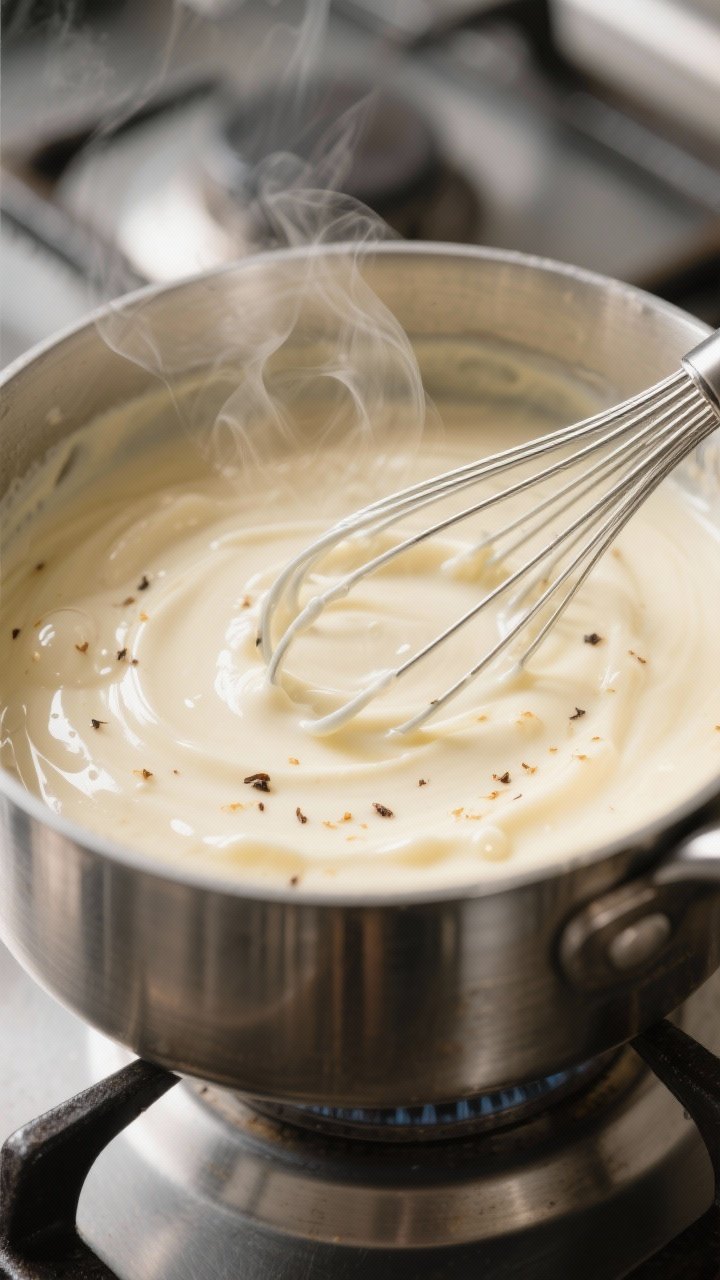
- Cook the pastry cream: In a saucepan, warm the milk until steaming.
In a bowl, whisk sugar, cornstarch, salt, and egg yolks until smooth. Slowly whisk in the hot milk. Return mixture to the saucepan and cook over medium heat, whisking constantly, until thick and bubbling, 1–3 minutes.
- Finish the cream: Remove from heat.
Whisk in butter and vanilla until silky. Press plastic wrap directly on the surface to prevent a skin. Cool to room temperature, then chill until cold.
- Prep the fruit: Wash and dry fruit gently.
Slice larger fruits like strawberries, kiwi, peaches, and mango. Keep berries mostly whole for a tidy look.
- Fill and smooth: Stir the chilled pastry cream to loosen. Spread it evenly in the cooled crust, smoothing the top with an offset spatula.
- Arrange the fruit: Start from the outside and work inwards, creating circles or patterns.
Alternate colors and shapes for a balanced, beautiful top.
- Glaze: Warm the apricot jam with 1–2 teaspoons of water until thin and glossy. Strain if needed. Lightly brush over the fruit to add shine and help preserve freshness.
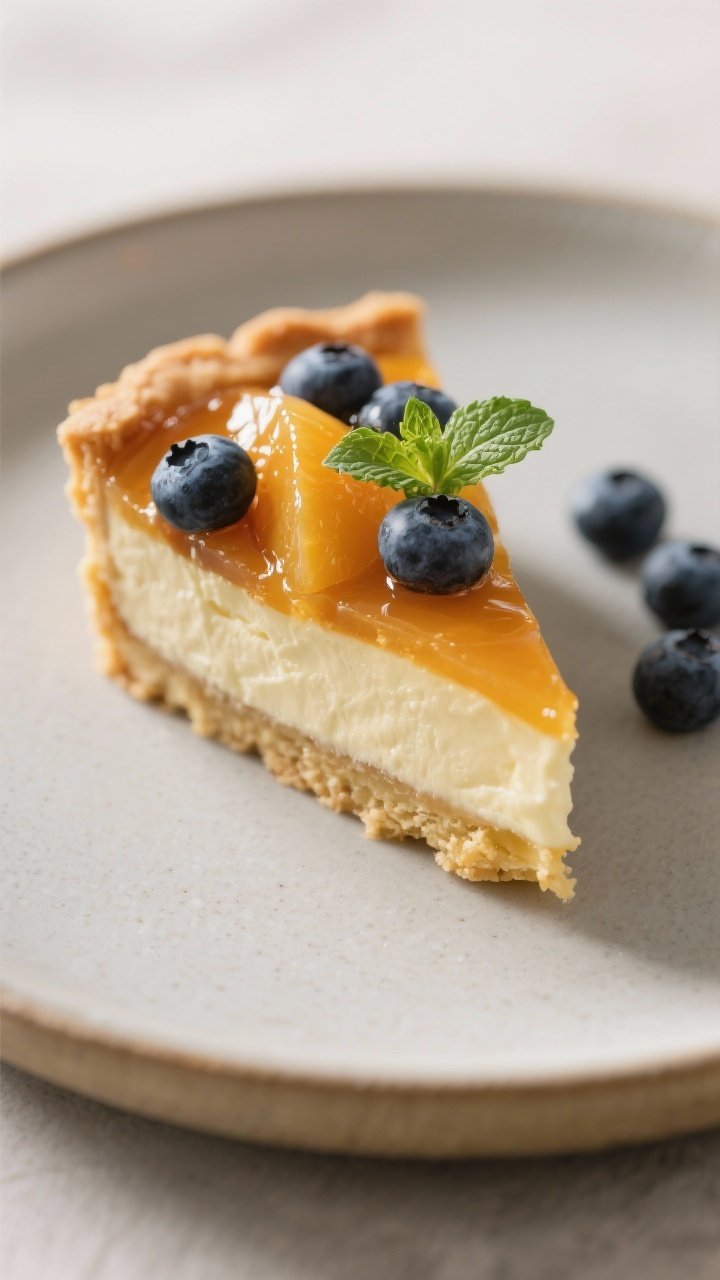
- Chill briefly and serve: Refrigerate 30–60 minutes to set, then slice with a sharp knife.
Wipe the blade between cuts for clean slices.
Storage Instructions
- Assembled tart: Keep refrigerated, uncovered or loosely tented, for up to 24 hours. The fruit stays freshest on day one.
- Crust: Bake ahead and store at room temperature, well wrapped, up to 2 days. Or freeze the baked shell up to 2 months.
- Pastry cream: Refrigerate in an airtight container with plastic wrap pressed on the surface for up to 3 days.
Do not freeze.
- Fruit: Cut and pat dry right before assembling to avoid excess moisture.
Why This is Good for You
- Fruit-forward: Fresh fruit brings vitamins, fiber, and antioxidants. You’re getting natural sweetness and bright flavor.
- Reasonable sweetness: The pastry cream is moderately sweet, letting fruit shine without overloading on sugar.
- Portion-friendly: A thin slice satisfies thanks to its mix of textures—crisp, creamy, and juicy—so smaller portions feel complete.
- Seasonal flexibility: Using ripe, in-season fruit means better taste and potentially fewer added sugars or syrups.
Common Mistakes to Avoid
- Skipping the chill time: Warm dough shrinks and slumps. Always chill before rolling and bake from cold for crisp edges.
- Underbaking the crust: Pale crust equals soggy results.
Bake until deep golden on the edges and lightly golden across the base.
- Using wet fruit: Excess moisture softens the cream and crust. Pat fruit dry and avoid overly juicy slices.
- Overcooking pastry cream: Too high heat can curdle the eggs. Keep whisking and remove from heat as soon as it thickens and bubbles.
- Assembling too early: The glaze helps, but time softens the crust.
For the best texture, assemble the day you plan to serve.
Recipe Variations
- Lemon cream: Whisk 1–2 teaspoons lemon zest into the pastry cream and finish with 1 tablespoon lemon juice for tang.
- Chocolate twist: Add 3 oz melted dark chocolate to the pastry cream or brush the cooled crust with melted chocolate to create a moisture barrier and a chocolatey base.
- Mascarpone filling: Fold 1/2 cup mascarpone into the cooled pastry cream for a richer, cheesecake-like texture.
- Nutty crust: Replace 1/4 cup flour with finely ground almonds or pistachios for a subtle nut flavor.
- Tropical tart: Top with mango, pineapple, kiwi, and passionfruit pulp. Use a light honey or passionfruit glaze.
- Berry-only: Pile on strawberries, blueberries, and raspberries for a patriotic or summer picnic look.
FAQ
Can I use store-bought pie crust?
Yes, but a sweet tart crust holds up better than a standard pie crust. If using store-bought, blind-bake fully until crisp to avoid sogginess.
What if I don’t have a tart pan?
A 9-inch pie dish works in a pinch.
The sides won’t be as sharp, but the taste is the same. You can also make mini tarts using a muffin tin.
Can I make the pastry cream without eggs?
Yes. Use 2 1/4 cups milk with 1/3 cup sugar and 4 tablespoons cornstarch.
Cook until thick, then add butter and vanilla. The texture is slightly different but still smooth.
How do I keep fruit from browning?
Brush apples, pears, or bananas with a little lemon juice before arranging. The apricot glaze also helps slow oxidation.
What fruits should I avoid?
Very watery fruits like watermelon or very soft fruits can weep into the cream.
If using peaches or nectarines, slice and pat dry first.
Can I reduce the sugar?
You can cut the pastry cream sugar to 1/3 cup. Keep the glaze minimal or skip it, though the tart will have a more matte finish.
How do I get clean slices?
Use a sharp knife, wipe between cuts, and chill the tart for at least 30 minutes after glazing. A gentle sawing motion keeps the fruit arrangement intact.
Is there a gluten-free option?
Use a 1:1 gluten-free flour blend for the crust, and ensure your cornstarch and other ingredients are certified gluten-free.
In Conclusion
This fresh fruit tart is simple, colorful, and satisfying.
With a crisp buttery crust, silky vanilla cream, and sweet seasonal fruit, it hits all the right notes for a summer dessert. Make the parts ahead, assemble when you’re ready, and enjoy a gorgeous treat that tastes as good as it looks. Keep it classic, or try a variation to make it your own.
Either way, it’s a crowd-pleaser every time.
Beautiful Fresh Fruit Tart Recipe | Easy Summer Dessert with Fresh Fruit
Ingredients
- 1 1/2 cups (190 g) all-purpose flour
- ½ cup (65 g) powdered sugar
- ¼ tsp fine sea salt
- ½ cup (113 g) unsalted butter, cold and cubed
- 1 large egg yolk
- 1–2 tbsp ice water, as needed
- 1 tsp vanilla extract (optional)
- 2 cups (480 ml) whole milk
- ½ cup (100 g) granulated sugar
- 3 tbsp cornstarch
- ⅛ tsp fine sea salt
- 4 large egg yolks
- 2 tbsp unsalted butter
- 2 tsp pure vanilla extract (or 1/2 vanilla bean, seeds scraped)
- 4–5 cups mixed fresh fruit (e.g., strawberries, blueberries, raspberries, blackberries, kiwi, mango, peaches, nectarines)
- ¼ cup apricot jam or apple jelly (for glaze)
- 1–2 tsp water (to loosen glaze)
- Fresh mint leaves (optional, for garnish)
Instructions
- Make the crust dough: In a bowl, whisk the flour, powdered sugar, and salt. Cut in the cold butter with a pastry cutter or your fingertips until the mixture looks like coarse crumbs.Stir in the egg yolk, vanilla, and just enough ice water to bring the dough together without it getting sticky.
- Chill: Press the dough into a flat disk, wrap, and chill for 30–45 minutes. Chilled dough rolls cleaner and shrinks less in the pan.
- Roll and fit: On a lightly floured surface, roll the dough into a 12-inch circle for a 9-inch tart pan with a removable bottom. Ease it into the pan, pressing into the edges.Trim the top flush with the rim. Prick the base with a fork.
- Blind-bake: Freeze the lined pan for 10–15 minutes. Line with parchment and fill with pie weights or dried beans.Bake at 375°F (190°C) for 15 minutes. Remove weights and parchment, then bake 10–12 minutes more, until golden and crisp. Cool completely.
- Cook the pastry cream: In a saucepan, warm the milk until steaming.In a bowl, whisk sugar, cornstarch, salt, and egg yolks until smooth. Slowly whisk in the hot milk. Return mixture to the saucepan and cook over medium heat, whisking constantly, until thick and bubbling, 1–3 minutes.
- Finish the cream: Remove from heat.Whisk in butter and vanilla until silky. Press plastic wrap directly on the surface to prevent a skin. Cool to room temperature, then chill until cold.
- Prep the fruit: Wash and dry fruit gently.Slice larger fruits like strawberries, kiwi, peaches, and mango. Keep berries mostly whole for a tidy look.
- Fill and smooth: Stir the chilled pastry cream to loosen. Spread it evenly in the cooled crust, smoothing the top with an offset spatula.
- Arrange the fruit: Start from the outside and work inwards, creating circles or patterns.Alternate colors and shapes for a balanced, beautiful top.
- Glaze: Warm the apricot jam with 1–2 teaspoons of water until thin and glossy. Strain if needed. Lightly brush over the fruit to add shine and help preserve freshness.
- Chill briefly and serve: Refrigerate 30–60 minutes to set, then slice with a sharp knife.Wipe the blade between cuts for clean slices.


