
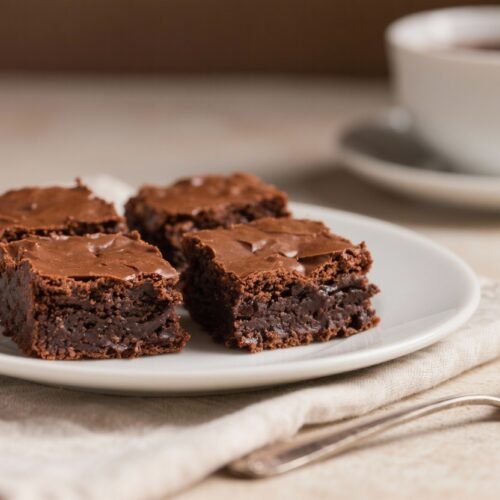
Classic Lunchroom Ladies Brownies Recipe – Fudgy, Nostalgic, and Easy
If you remember those thick, fudgy brownies from the school cafeteria, this recipe brings them right back to your kitchen. These brownies are dense, chocolatey, and topped with a simple icing that sets into a sweet, shiny layer. They’re easy to make with pantry staples and perfect for sharing.
No fancy techniques, no hard-to-find ingredients—just classic brownie goodness that tastes exactly like you remember.
What Makes This Special
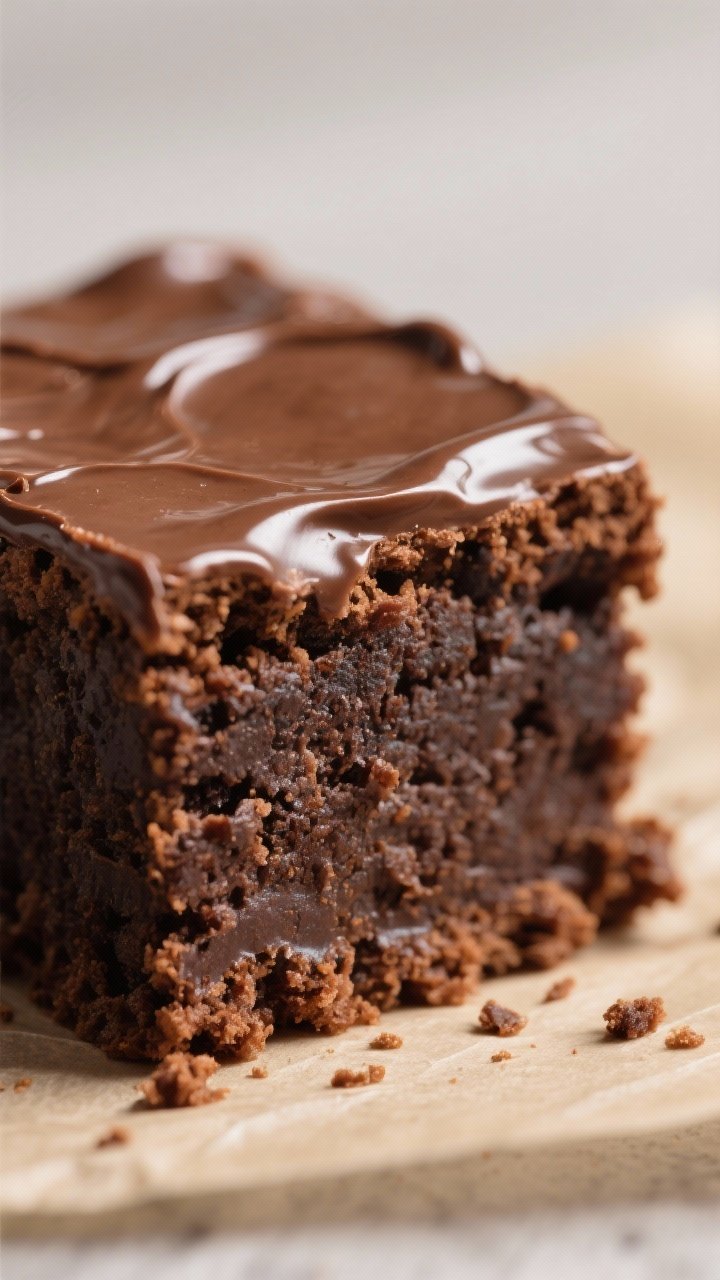
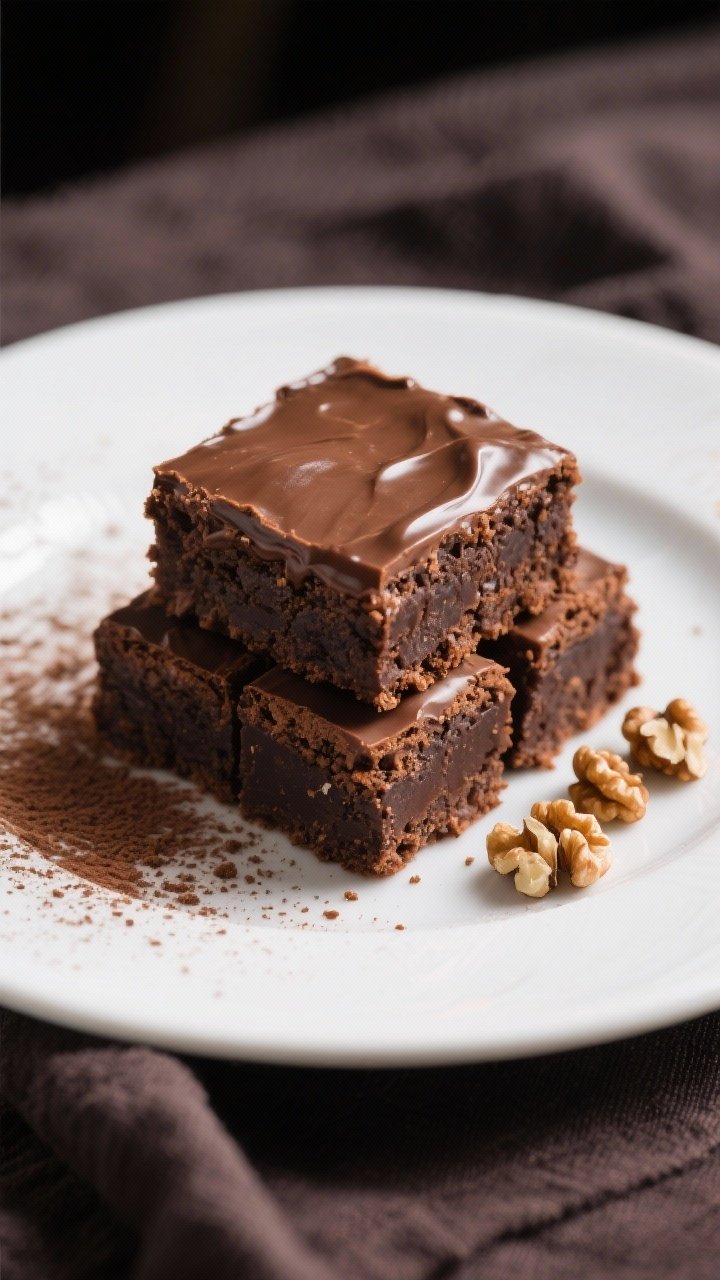
These brownies strike the perfect balance between cakey and fudgy, with a rich chocolate flavor and a tender crumb. The icing goes on while the brownies are still warm, so it melts slightly and creates that signature lunchroom-style top. They’re quick to prepare, ideal for potlucks, and scale well for a crowd.
Best of all, the recipe is forgiving, so even beginner bakers can pull it off.
Shopping List
- Butter: 1 cup (2 sticks), melted
- Granulated sugar: 2 cups
- Eggs: 4 large
- Vanilla extract: 2 teaspoons
- Unsweetened cocoa powder: 1/2 cup
- All-purpose flour: 1 1/2 cups
- Salt: 1/2 teaspoon
- Milk: 1/4 cup (for the icing)
- Powdered sugar: 3 cups (for the icing)
- Additional cocoa powder: 1/4 cup (for the icing)
- Optional mix-ins: 1 cup chopped walnuts or chocolate chips
- Nonstick spray or butter: for the pan
How to Make It
- Preheat and prep the pan. Heat the oven to 350°F (175°C). Grease a 9×13-inch baking pan and line with parchment, leaving a slight overhang for easy lifting.
- Melt the butter. Melt the butter on the stove or in the microwave until fully liquid but not sizzling. Let it cool for 2–3 minutes so it doesn’t scramble the eggs.
- Mix the wet ingredients. In a large bowl, whisk together melted butter, granulated sugar, eggs, and vanilla until smooth and glossy, about 1–2 minutes.
- Add the dry ingredients. Sift in cocoa powder, flour, and salt.
Stir gently with a spatula until just combined. Do not overmix.
- Fold in extras. If using nuts or chocolate chips, fold them in now. The batter will be thick—that’s perfect.
- Bake. Spread the batter evenly in the pan.
Bake for 20–25 minutes, until the center is set and a toothpick comes out with moist crumbs (not wet batter). Do not overbake.
- Make the icing. While the brownies bake, whisk together powdered sugar, cocoa powder, and milk until smooth and pourable. Add a splash more milk if needed.
The icing should be thick but spreadable.
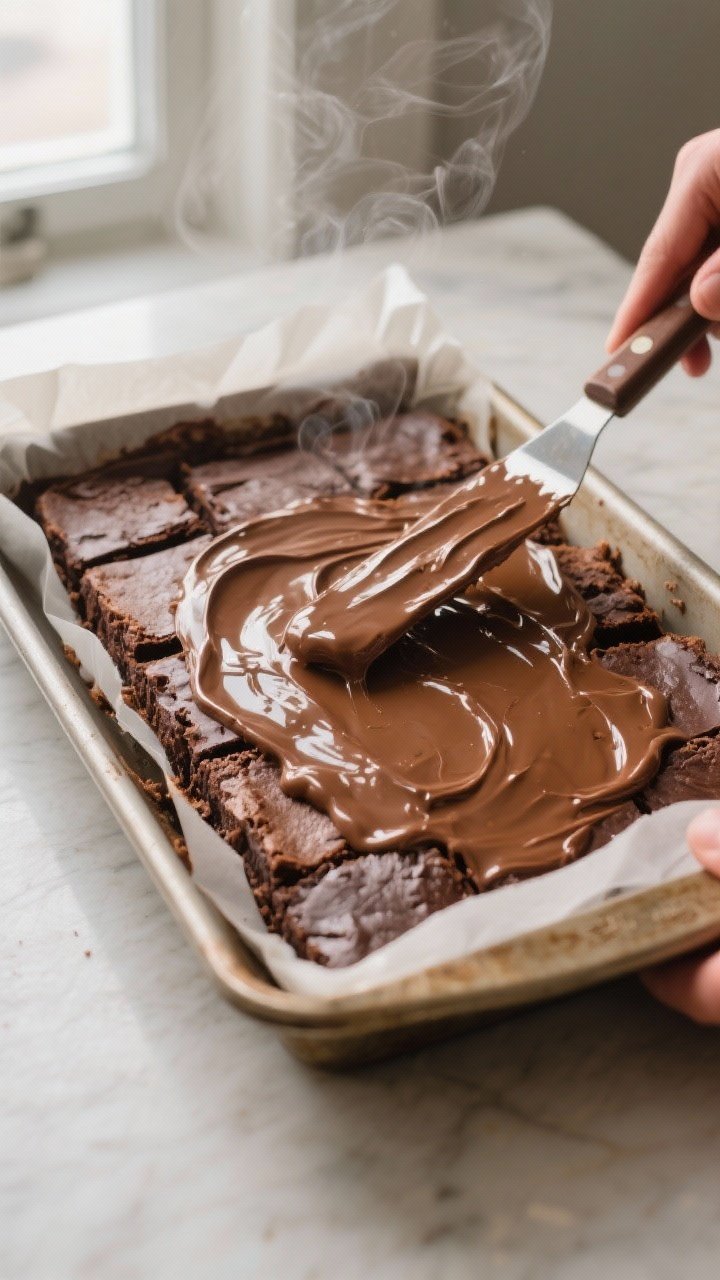
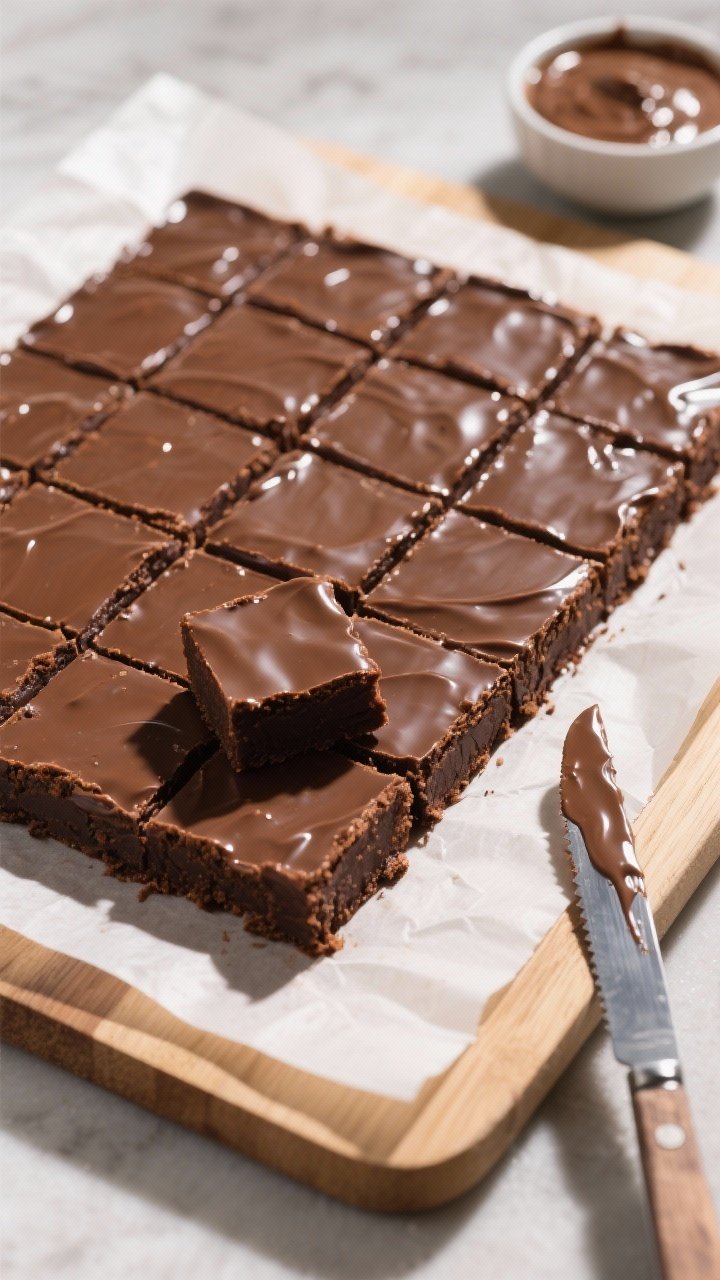
- Ice while warm. As soon as the brownies come out, pour the icing over the warm surface. Spread gently to the edges. The warmth helps the icing settle into that classic shiny layer.
- Cool and slice. Let the brownies cool completely in the pan for clean slices.
Use the parchment to lift out and cut into squares.
Storage Instructions
- Room temperature: Store in an airtight container for 3–4 days. The icing helps keep them moist.
- Refrigerator: Good for up to 1 week; let them come to room temp before serving for the best texture.
- Freezer: Wrap individual squares tightly, then place in a freezer bag for up to 2 months. Thaw at room temperature.
Benefits of This Recipe
- Simple ingredients: Everything is likely already in your pantry.
- No mixer required: A whisk and spatula are all you need.
- Crowd-pleaser: The 9×13 pan makes generous portions for sharing.
- Reliable texture: Fudgy center, tender edges, and a classic icing that sets.
- Flexible: Easily add nuts, chips, or a hint of espresso to customize.
What Not to Do
- Don’t overbake. Dry brownies happen fast.
Pull them when a toothpick shows moist crumbs.
- Don’t skip the warm icing step. The signature finish depends on icing the brownies while they’re still warm.
- Don’t overmix the batter. Stir just until the flour disappears to keep the texture tender.
- Don’t cut too soon. Let the icing set and the brownies cool for neat slices.
- Don’t use cold butter. Melted butter helps create that dense, fudgy crumb.
Variations You Can Try
- Nutty crunch: Fold in 1 cup chopped walnuts or pecans.
- Mocha twist: Add 1–2 teaspoons instant espresso powder to the batter for deeper chocolate flavor.
- Mint chocolate: Stir in 1/2 teaspoon peppermint extract to the icing and top with crushed peppermint candies.
- Peanut butter swirl: Dollop 1/3 cup warmed peanut butter over the batter and swirl before baking.
- Extra chocolate: Fold in 1 cup semisweet or dark chocolate chips.
- Glaze swap: Replace milk with brewed coffee in the icing for a richer finish.
FAQ
Can I use oil instead of butter?
Yes, you can substitute an equal amount of neutral oil, but butter gives a richer, more classic flavor. If using oil, choose canola or vegetable oil and keep the rest of the recipe the same.
How do I know when the brownies are done?
Look for set edges and a center that no longer jiggles. A toothpick inserted near the center should come out with moist crumbs, not wet batter.
Start checking at 20 minutes.
Can I make these gluten-free?
Use a 1:1 gluten-free all-purpose flour blend that contains xanthan gum. The texture will be slightly different but still delicious and fudgy.
What if my icing is too thick or too thin?
If it’s too thick, add milk a teaspoon at a time. If it’s too thin, whisk in a bit more powdered sugar.
Aim for a smooth, spreadable consistency that flows slowly off the spoon.
Do I need to refrigerate the brownies?
No, they’re fine at room temperature for a few days. If your kitchen is warm or you want them to last longer, refrigerate and bring to room temperature before serving.
Can I halve the recipe?
Yes. Bake in an 8×8-inch pan and start checking around 18–20 minutes.
The icing can be halved as well.
Why did my brownies turn out cakey?
They were likely overbaked or overmixed. Next time, mix just until combined and pull them from the oven when the toothpick shows moist crumbs.
Can I make them without the icing?
You can, but the icing is what gives these brownies that nostalgic lunchroom taste and look. If skipping, consider dusting with powdered sugar once cooled.
In Conclusion
This Classic Lunchroom Ladies Brownies Recipe checks all the boxes—rich, fudgy, and topped with that shiny, sweet icing.
It’s simple to make, great for gatherings, and brings back a familiar kind of comfort. Keep these ingredients on hand, and you’ll be ready anytime a chocolate craving hits or a crowd needs feeding. One pan, big flavor, and guaranteed smiles.
Classic Lunchroom Ladies Brownies Recipe - Fudgy, Nostalgic, and Easy
Ingredients
- Butter: 1 cup (2 sticks), melted
- Granulated sugar: 2 cups
- Eggs: 4 large
- Vanilla extract: 2 teaspoons
- Unsweetened cocoa powder: 1/2 cup
- All-purpose flour: 1 1/2 cups
- Salt: 1/2 teaspoon
- Milk: 1/4 cup (for the icing)
- Powdered sugar: 3 cups (for the icing)
- Additional cocoa powder: 1/4 cup (for the icing)
- Optional mix-ins: 1 cup chopped walnuts or chocolate chips
- Nonstick spray or butter: for the pan
Instructions
- Preheat and prep the pan. Heat the oven to 350°F (175°C). Grease a 9x13-inch baking pan and line with parchment, leaving a slight overhang for easy lifting.
- Melt the butter. Melt the butter on the stove or in the microwave until fully liquid but not sizzling. Let it cool for 2–3 minutes so it doesn’t scramble the eggs.
- Mix the wet ingredients. In a large bowl, whisk together melted butter, granulated sugar, eggs, and vanilla until smooth and glossy, about 1–2 minutes.
- Add the dry ingredients. Sift in cocoa powder, flour, and salt.Stir gently with a spatula until just combined. Do not overmix.
- Fold in extras. If using nuts or chocolate chips, fold them in now. The batter will be thick—that’s perfect.
- Bake. Spread the batter evenly in the pan.Bake for 20–25 minutes, until the center is set and a toothpick comes out with moist crumbs (not wet batter). Do not overbake.
- Make the icing. While the brownies bake, whisk together powdered sugar, cocoa powder, and milk until smooth and pourable. Add a splash more milk if needed.The icing should be thick but spreadable.
- Ice while warm. As soon as the brownies come out, pour the icing over the warm surface. Spread gently to the edges. The warmth helps the icing settle into that classic shiny layer.
- Cool and slice. Let the brownies cool completely in the pan for clean slices.Use the parchment to lift out and cut into squares.


