Rich Chocolate Tart Shell Recipe | Homemade Crisp Cocoa Tart Crust
You know that moment when a silky chocolate filling deserves a crust that can keep up? This rich chocolate tart shell does exactly that. It bakes up crisp, buttery, and deeply cocoa-forward, with edges that slice clean and a texture that snaps instead of crumbles. It’s sturdy enough for creamy fillings, yet tender when you bite in—basically the dream base for any chocolate tart.
I’ve tested this cocoa tart crust more times than I’ll admit, and it never fails. You can make the dough in a few minutes, chill it, roll it easily, and blind-bake it until perfectly set. The flavor leans dark and sophisticated, not overly sweet, so your fillings shine. If you want a dessert that tastes like a pastry shop treat without fussy steps, this is your new go-to.
Why This Chocolate Tart Shell Works

This dough delivers both flavor and structure with simple pantry ingredients and friendly technique. Here’s why you’ll love it:
- Deep chocolate taste: Cocoa powder brings bold flavor without making the dough heavy.
- Crisp, clean slices: A touch of sugar and the right fat ratio help the crust set sturdy and cut neatly.
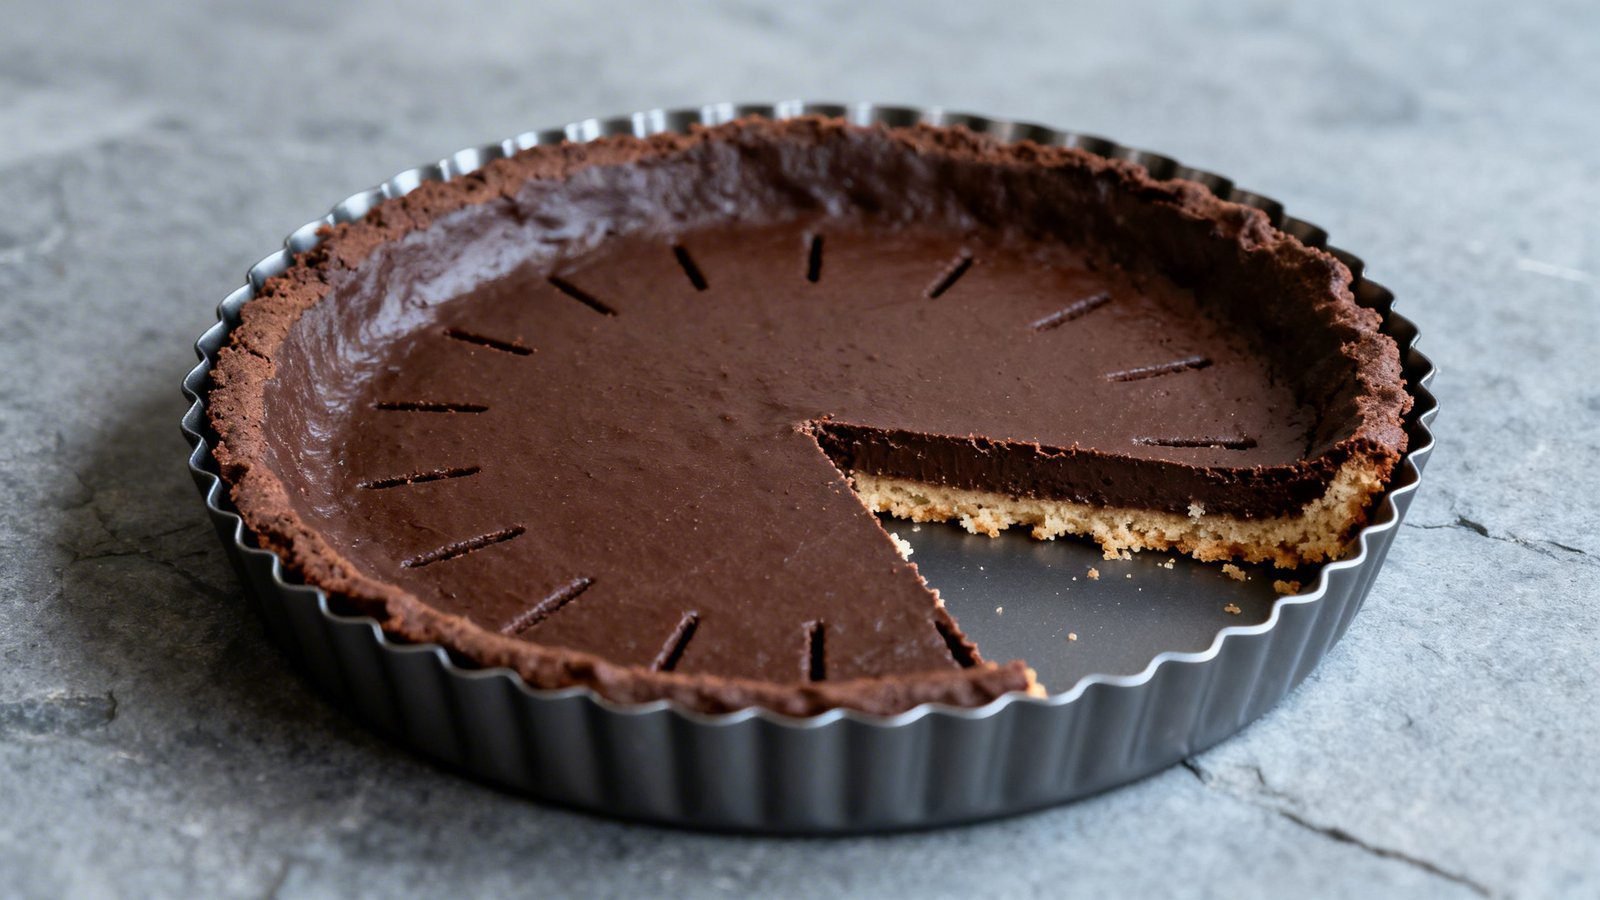
- No soggy bottoms: Blind-baking locks in texture so creamy fillings stay tidy.
- Make-ahead friendly: The dough chills and freezes beautifully, so you can prep ahead.
- Beginner-friendly method: If you can stir and roll, you can nail this shell.
Ingredients
- All-purpose flour – Forms the structure and keeps the crust tender when balanced with fat.
- Unsweetened cocoa powder (Dutch-process preferred) – Adds rich, smooth chocolate flavor and a deep color.
- Powdered sugar – Sweetens gently and blends without grit for a fine, shortbread-like crumb.
- Kosher salt – Sharpens cocoa flavor and balances sweetness.
- Cold unsalted butter – Chilled cubes create flakiness and crisp edges.
- Large egg yolk – Adds richness and helps the dough bind.
- Vanilla extract – Rounds out the chocolate notes.
- Ice-cold water or milk – Just a splash to bring the dough together without making it sticky.
- Optional espresso powder – A small pinch intensifies the cocoa without tasting like coffee.
- Heavy cream (optional brush) – For sealing the crust after blind-bake if using ultra-wet fillings.
How to Make a Rich Chocolate Tart Crust
Tools You’ll Need
- 9-inch tart pan with removable bottom
- Mixing bowls and whisk
- Pastry blender or your fingertips
- Rolling pin
- Parchment paper and pie weights (or dried beans/rice)
Step-by-Step Instructions
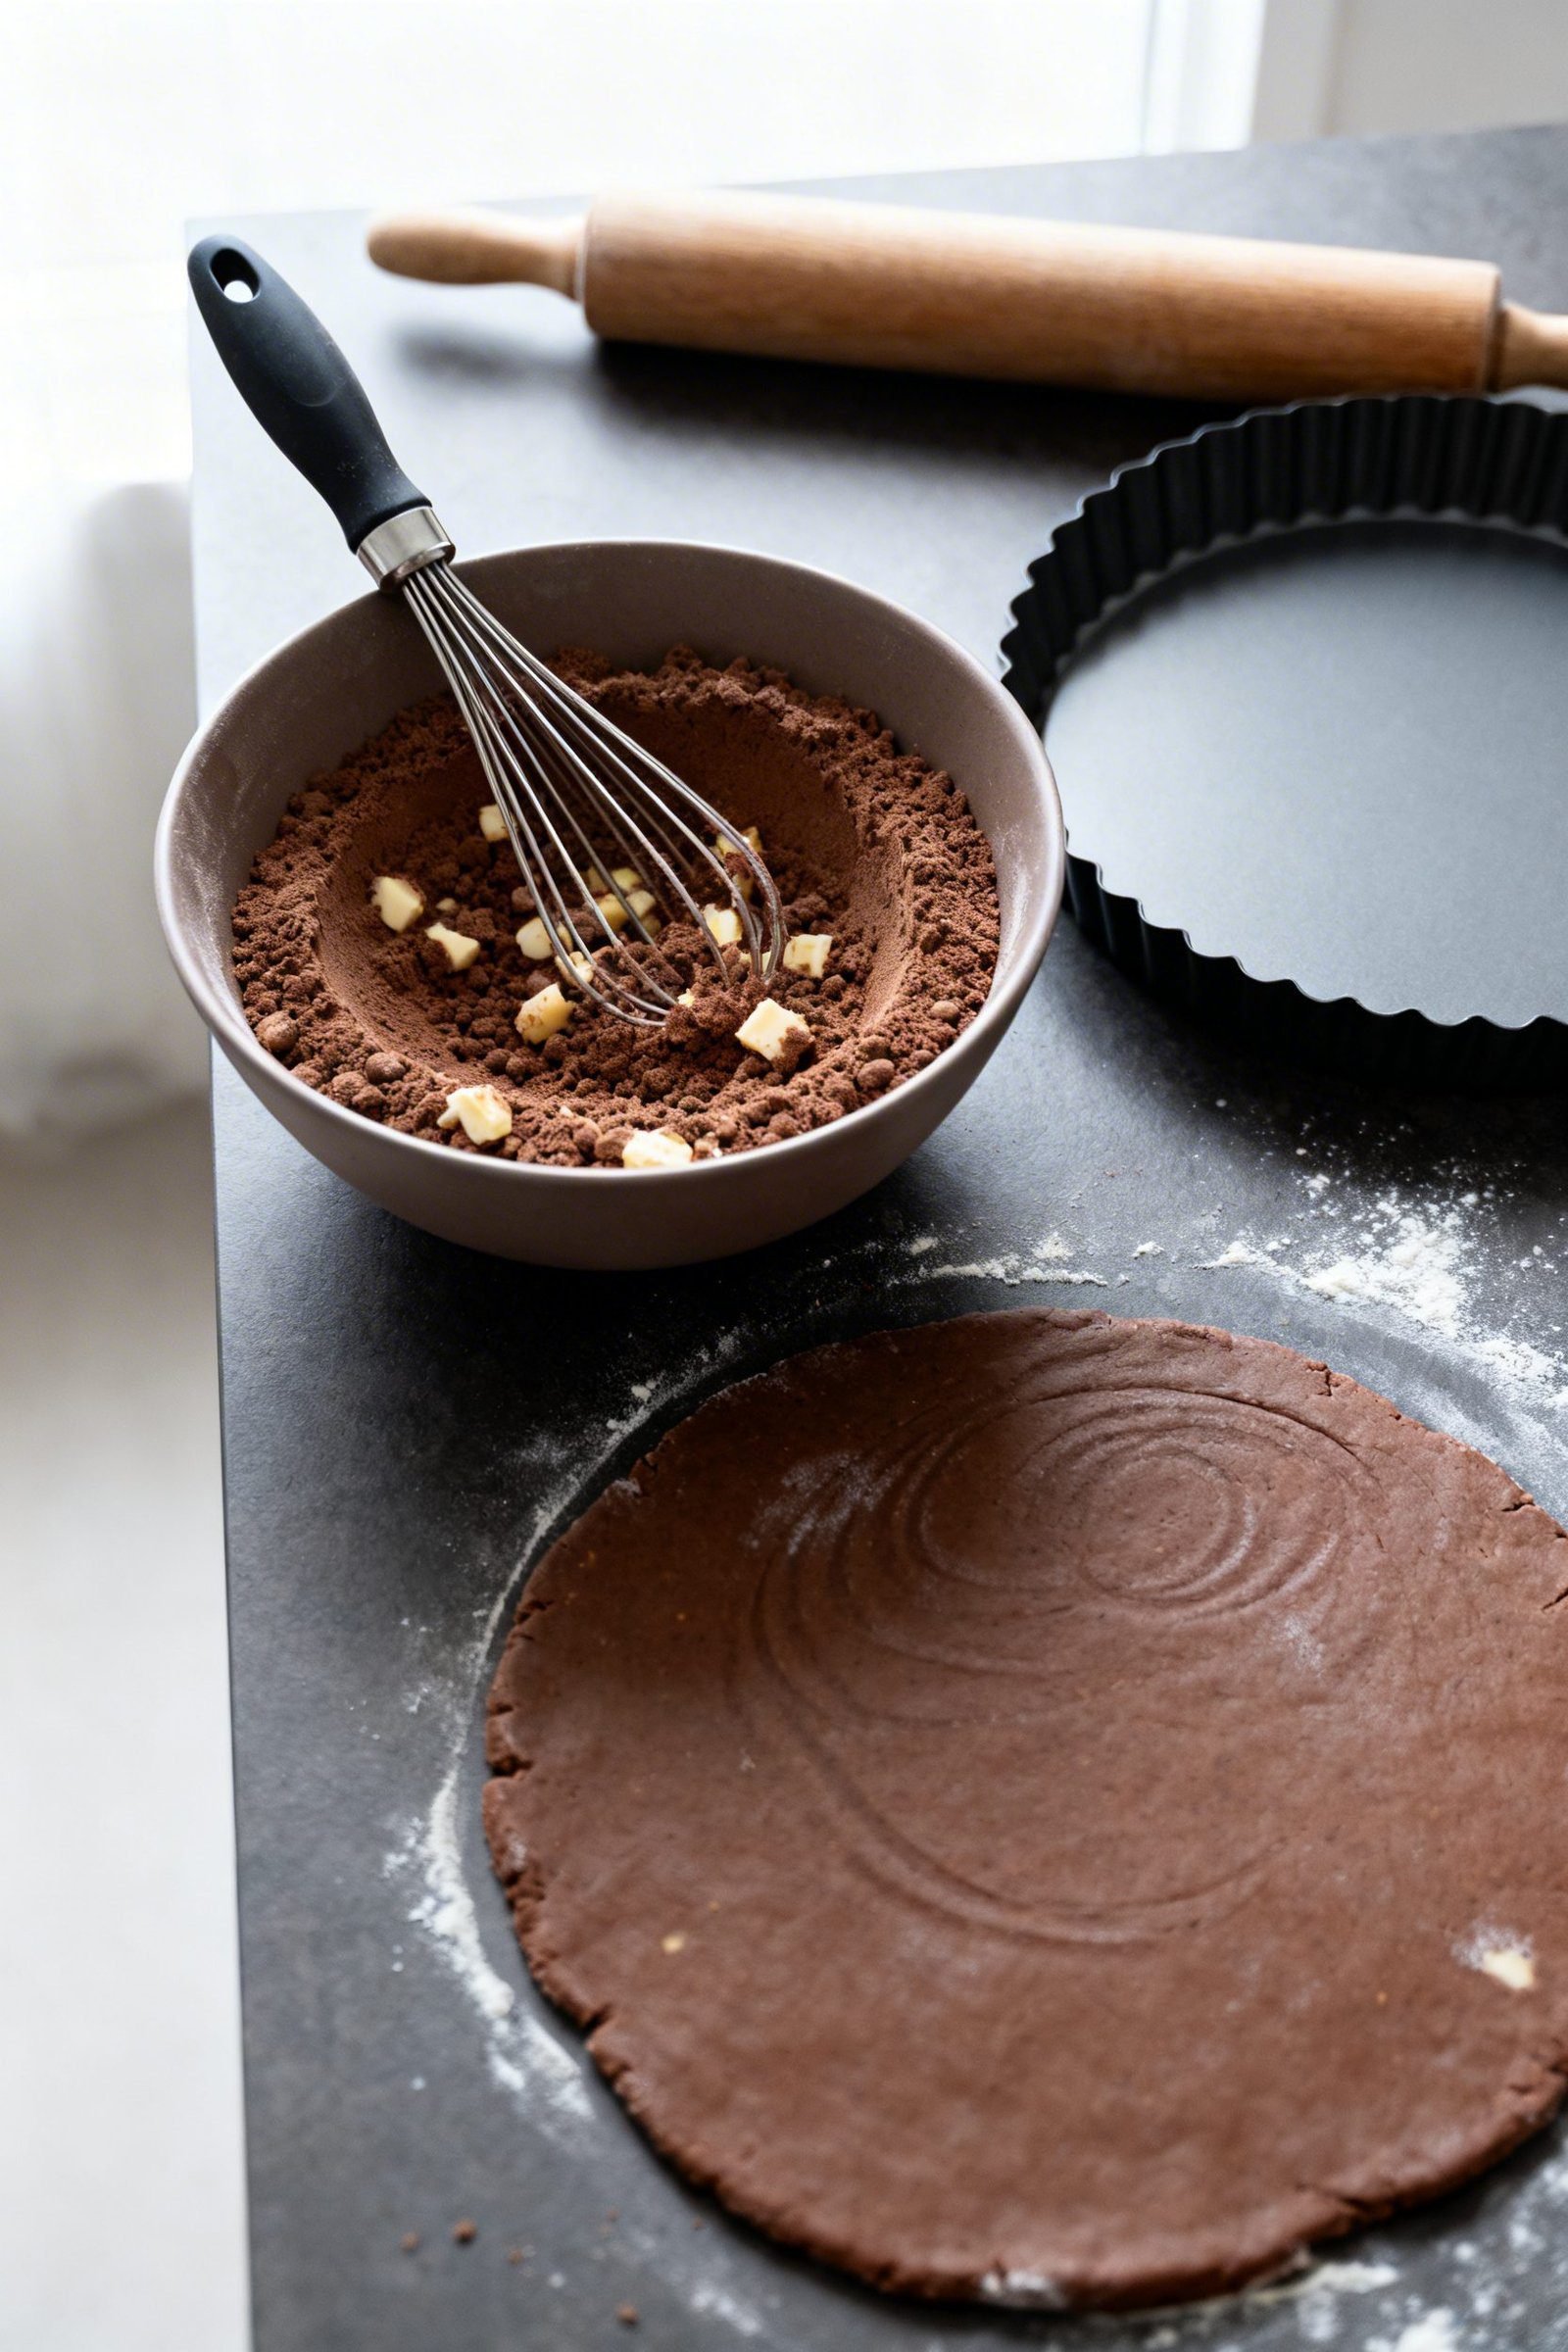
- Whisk the dry ingredients: In a medium bowl, whisk 1 1/4 cups all-purpose flour, 1/4 cup Dutch-process cocoa, 1/3 cup powdered sugar, 1/4 teaspoon kosher salt, and a pinch of espresso powder if using.
- Cut in the butter: Add 1/2 cup cold unsalted butter (cubed). Use a pastry blender or your fingertips to work it in until pea-sized bits remain. Keep some visible specks for crispness.
- Add yolk and vanilla: Stir in 1 egg yolk and 1 teaspoon vanilla. Drizzle 1–2 teaspoons ice-cold water or milk, mixing just until the dough holds together when pinched. It should feel slightly dry but cohesive.
- Press and chill: Turn the dough onto a sheet of plastic wrap. Press into a flat disc without over-kneading. Wrap tightly and chill for 45–60 minutes, or up to 2 days.
- Roll it out: On a lightly floured surface (or between two sheets of parchment), roll to a 11–12-inch round, about 1/8 inch thick. Dust lightly with cocoa or flour to prevent sticking.
- Fit the pan: Gently ease the dough into a 9-inch tart pan. Lift and press into the corners instead of stretching. Trim excess with a knife and patch any tears with scraps.
- Dock and chill again: Prick the base with a fork. Chill the lined pan 20–30 minutes to minimize shrinkage.
- Blind-bake: Heat the oven to 375°F (190°C). Line the shell with parchment and fill with pie weights. Bake 15 minutes until the edges look set.
- Remove weights and finish: Carefully lift out the weights and parchment. Bake 8–10 more minutes until the bottom looks dry and slightly firm. For a fully baked shell, bake an additional 2–4 minutes, watching closely.
- Optional seal: Brush the hot crust lightly with a teaspoon of heavy cream or melted chocolate to seal. Let cool completely before filling.
Pro Tips for Success
- Keep everything cold: Cold butter and a chilled pan help the crust hold its shape.
- Don’t overwork: Mix just until combined for a crisp, sandy snap.
- Roll evenly: Aim for uniform thickness for even baking and clean slices.
- Bake fully: Cocoa crusts look darker—check texture, not just color. The base should feel dry, not tacky.
How to Store Your Chocolate Tart Shell
- At room temperature: Store a fully baked, unfilled shell tightly wrapped for up to 2 days.
- Refrigerator: Keep an unfilled, baked crust in an airtight container up to 5 days. Re-crisp in a 325°F (165°C) oven for 5–7 minutes.
- Freezer (unbaked): Freeze the raw, shaped shell (in the pan) well wrapped for up to 2 months. Bake from frozen, adding 3–5 minutes.
- Freezer (baked): Freeze the cooled shell wrapped in two layers up to 1 month. Thaw at room temp and refresh in the oven for 5 minutes.
Why Make This Cocoa Tart Crust
- Better flavor than store-bought: Real butter and Dutch cocoa taste luxurious.
- Texture that holds up: It stays crisp under custards, ganache, and fruit.
- Customizable sweetness: Adjust sugar for sweeter fillings or keep it subtle for dark chocolate lovers.
- Professional look, simple steps: Scalloped edges and a glossy finish make it bakery-beautiful.
- Make-ahead convenience: Bake in advance, then fill right before serving.
What to Avoid
- Warm butter in the dough: Soft butter smears and leads to shrinkage and tough texture.
- Over-hydrating: Too much liquid turns the dough sticky and dense. Add water by teaspoons.
- Stretching the dough: Press it into the corners instead. Stretching causes slumping.
- Skipping the chill: The second chill prevents bubbling and sliding.
- Underbaking: Cocoa hides doneness. Touch the base—if it feels damp, give it a few more minutes.
Variations to Try
- Hazelnut twist: Swap 1/4 cup of flour for finely ground toasted hazelnuts and add a splash of Frangelico to the filling later.
- Almond cocoa crust: Replace 1/3 cup flour with almond flour for extra tenderness and nutty warmth.
- Chocolate orange: Add 1 teaspoon orange zest and a few drops of orange extract for a bright, citrusy note.
- Salted cocoa crunch: Stir 1 tablespoon finely crushed cocoa nibs into the dough and finish the rim with flaky sea salt.
- Gluten-free version: Use a 1:1 gluten-free flour blend and add 1/4 teaspoon xanthan gum if the blend lacks it.
- Extra dark: Increase cocoa to 1/3 cup and reduce flour by the same amount for intense chocolate flavor.
FAQ
Can I make the dough in a food processor?
Yes. Pulse the dry ingredients, add cold butter, and pulse to pea-sized bits. Add yolk and vanilla, then pulse with 1–2 teaspoons cold water until the dough clumps. Stop before it forms a ball to avoid overworking.
What cocoa should I use?
Use Dutch-process for smooth, rich flavor and darker color. Natural cocoa works, but the taste leans sharper and the color looks lighter.
How do I prevent cracks?
Roll the dough evenly, patch any thin spots with scraps, and chill before baking. If a crack appears after baking, brush a thin line of melted chocolate inside as an edible glue.
Do I need pie weights?
They help the sides stay tall and neat. If you don’t have weights, use dried beans or rice reserved for baking projects.
How do I keep the crust crisp with creamy fillings?
Fully blind-bake, cool completely, and brush a whisper-thin layer of melted chocolate inside. Let it set before filling.
Can I use this for mini tarts?
Absolutely. Cut circles, press into mini tart pans, and reduce the blind-bake time by a few minutes. Watch the edges closely.
Conclusion
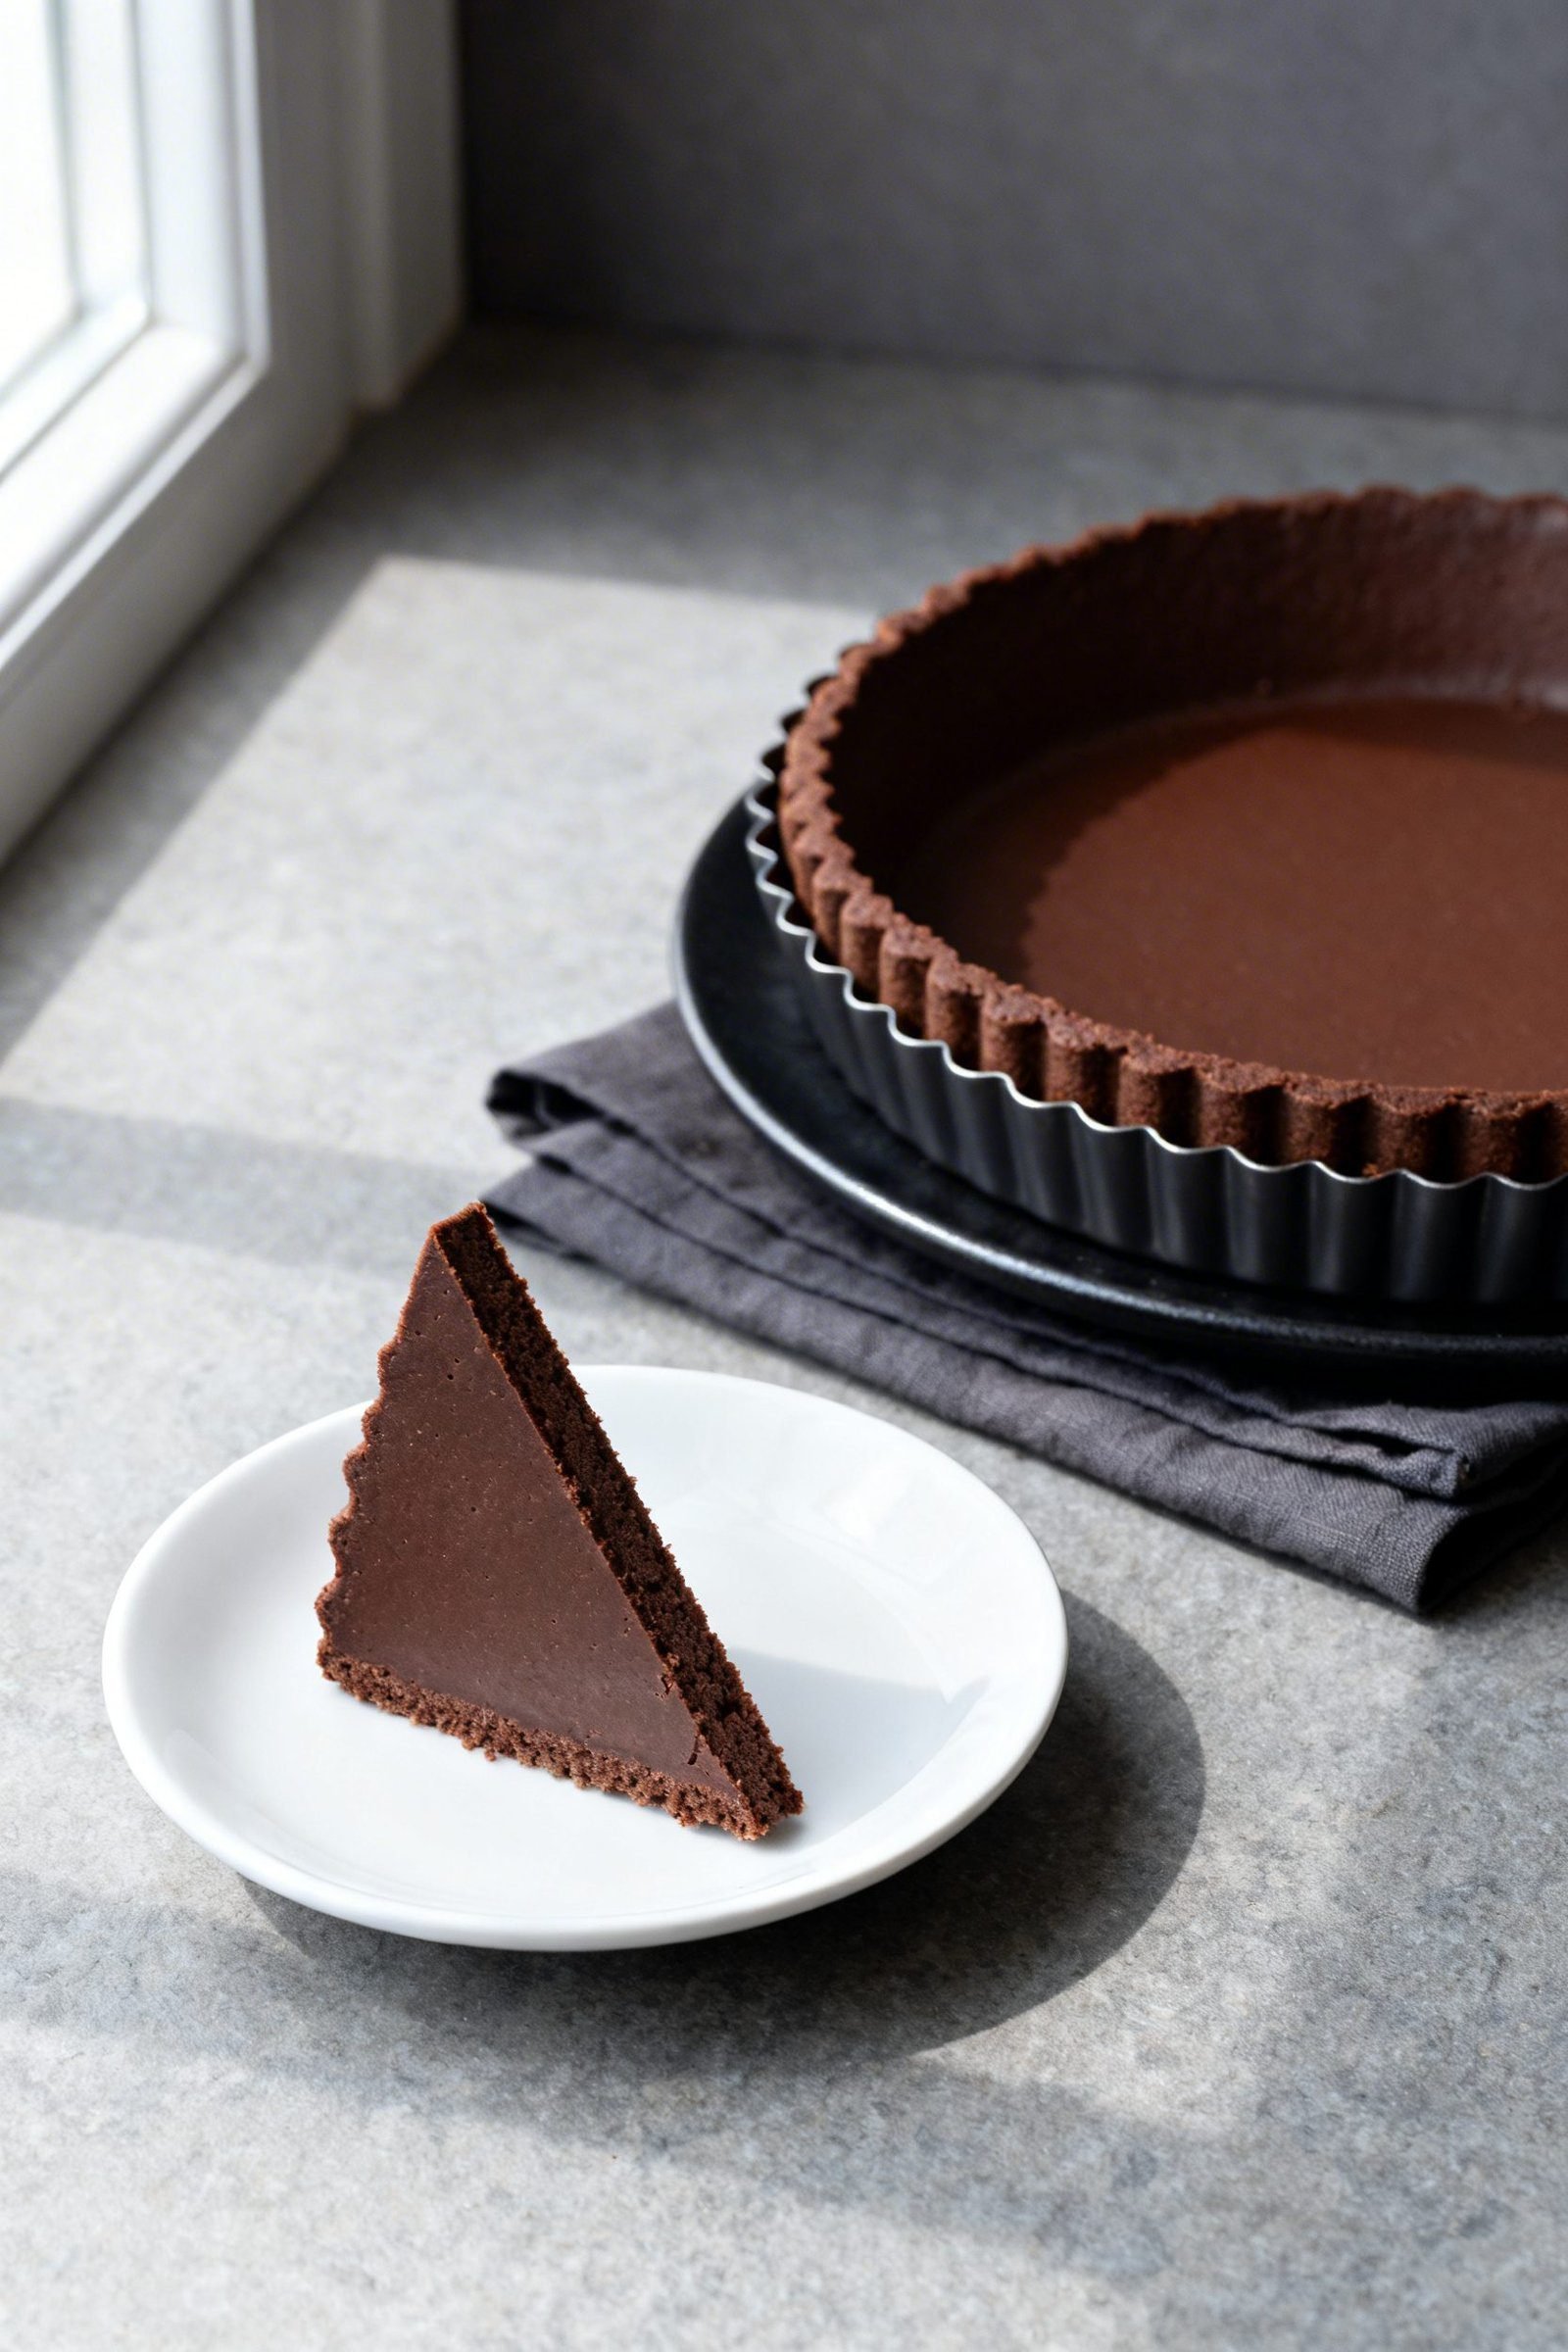
This rich chocolate tart shell brings big cocoa flavor, a shattering crisp bite, and a polished look with steps you can trust. Make the dough ahead, blind-bake it right, and fill it with your favorite ganache, mousse, or fresh berries and cream. When a dessert needs a crust that impresses before the first bite, this cocoa tart base delivers every time.
Rich Chocolate Tart Shell
A crisp, buttery, deeply cocoa-forward tart crust that blind-bakes to a sturdy, clean-slicing shell for creamy fillings.
Ingredients
- 1 ¼ cups all-purpose flour
- ¼ cup Dutch-process unsweetened cocoa powder
- ⅓ cup powdered sugar
- ¼ teaspoon kosher salt
- Pinch espresso powder (optional)
- ½ cup cold unsalted butter, cubed
- 1 large egg yolk
- 1 teaspoon vanilla extract
- 1–2 teaspoons ice-cold water or milk
- 1 teaspoon heavy cream or melted chocolate, for sealing (optional)
Instructions
- Whisk flour, cocoa, powdered sugar, salt, and optional espresso powder in a medium bowl.
- Cut in cold cubed butter with a pastry blender or fingertips until pea-sized bits remain.
- Stir in egg yolk and vanilla; drizzle in 1–2 teaspoons ice-cold water or milk until the dough holds when pinched.
- Press dough into a flat disc, wrap, and chill 45–60 minutes (up to 2 days).
- Roll to an 11–12-inch round about ⅛ inch thick on a lightly floured or parchment surface.
- Fit into a 9-inch tart pan, pressing into corners without stretching; trim and patch as needed.
- Dock the base with a fork and chill 20–30 minutes.
- Preheat oven to 375°F (190°C). Line shell with parchment and fill with pie weights; bake 15 minutes until edges set.
- Remove weights and parchment; bake 8–10 minutes more until bottom is dry and slightly firm. For a fully baked shell, bake an additional 2–4 minutes.
- Optionally brush the hot crust with a little heavy cream or melted chocolate to seal; cool completely before filling.