
5-Ingredient Dutch Oven Bread | Easy Homemade Crusty Artisan Loaf
You can bake bakery-style bread at home with five everyday ingredients and a trusty Dutch oven. This crusty artisan loaf boasts a shattering crust, an airy crumb, and rich flavor—no stand mixer or fancy technique required. If you’ve ever wanted that golden, rustic look with minimal effort, this is your new go-to.
I’ll walk you through a simple process that fits your schedule, whether you want a same-day loaf or an overnight rise for deeper flavor. You’ll get clear steps, pro tips, and easy swaps so your bread turns out beautifully every time.
Why This 5-Ingredient Dutch Oven Bread Always Delivers
This method wins because it uses time and steam to do the heavy lifting. A hot Dutch oven traps moisture from the dough, creating steam that helps the loaf spring up and form that crackly crust—right in your home oven.
- Short ingredient list, big flavor: Flour, water, yeast, salt, and a touch of sugar or honey develop deep flavor with a slow rise.
- Forgiving dough: High-hydration dough builds an open crumb without kneading. A few folds replace intensive mixing.
- Steam and heat control: A preheated Dutch oven mimics a professional bakery deck with consistent heat and steam for dramatic oven spring.
- Flexible timing: Do a same-day rise or refrigerate overnight to fit your day and boost flavor.
Ingredients
- 3 cups (360 g) bread flour (or all-purpose; bread flour yields a chewier crumb)
- 1 1/2 cups (360 g) warm water (about 100–105°F; warm to the touch)
- 2 teaspoons (8 g) fine sea salt
- 1 teaspoon (3 g) instant yeast (or active dry; see notes below)
- 1 teaspoon sugar or honey (feeds the yeast and aids browning)
Ingredient Notes
- Flour: Bread flour makes a sturdier crust and open crumb. All-purpose works well if that’s what you have.
- Yeast: Use instant yeast directly. If using active dry, dissolve it in the warm water with the sugar first, wait 5–10 minutes until foamy, then mix.
- Water: Aim for warm, not hot. Too hot can kill yeast; too cool slows fermentation.
- Optional add-ins: 1–2 teaspoons olive oil for a slightly softer crust; 1 teaspoon vinegar for subtle tang.
How to Make This Easy Dutch Oven Artisan Loaf
Step-by-Step Instructions
- Mix the dough: In a large bowl, whisk flour, salt, and yeast. Stir sugar into warm water. Pour water into the flour mixture and stir with a spatula until a shaggy, sticky dough forms. Scrape down the sides. The dough should feel tacky and wet.
- Rest and first rise: Cover the bowl with plastic wrap or a damp towel. Let sit at room temperature for 1–2 hours until puffy and noticeably larger. Cooler kitchens may take up to 3 hours.
- Do a few folds: With damp hands, lift one edge of the dough, stretch it up, and fold it over the center. Rotate the bowl 90 degrees and repeat 3–4 times total. This strengthens gluten without kneading.
- Second rise or overnight option: Cover and let rise another 45–60 minutes at room temp. For deeper flavor and easier handling, refrigerate covered for 8–18 hours. Cold dough scores cleaner and bakes taller.
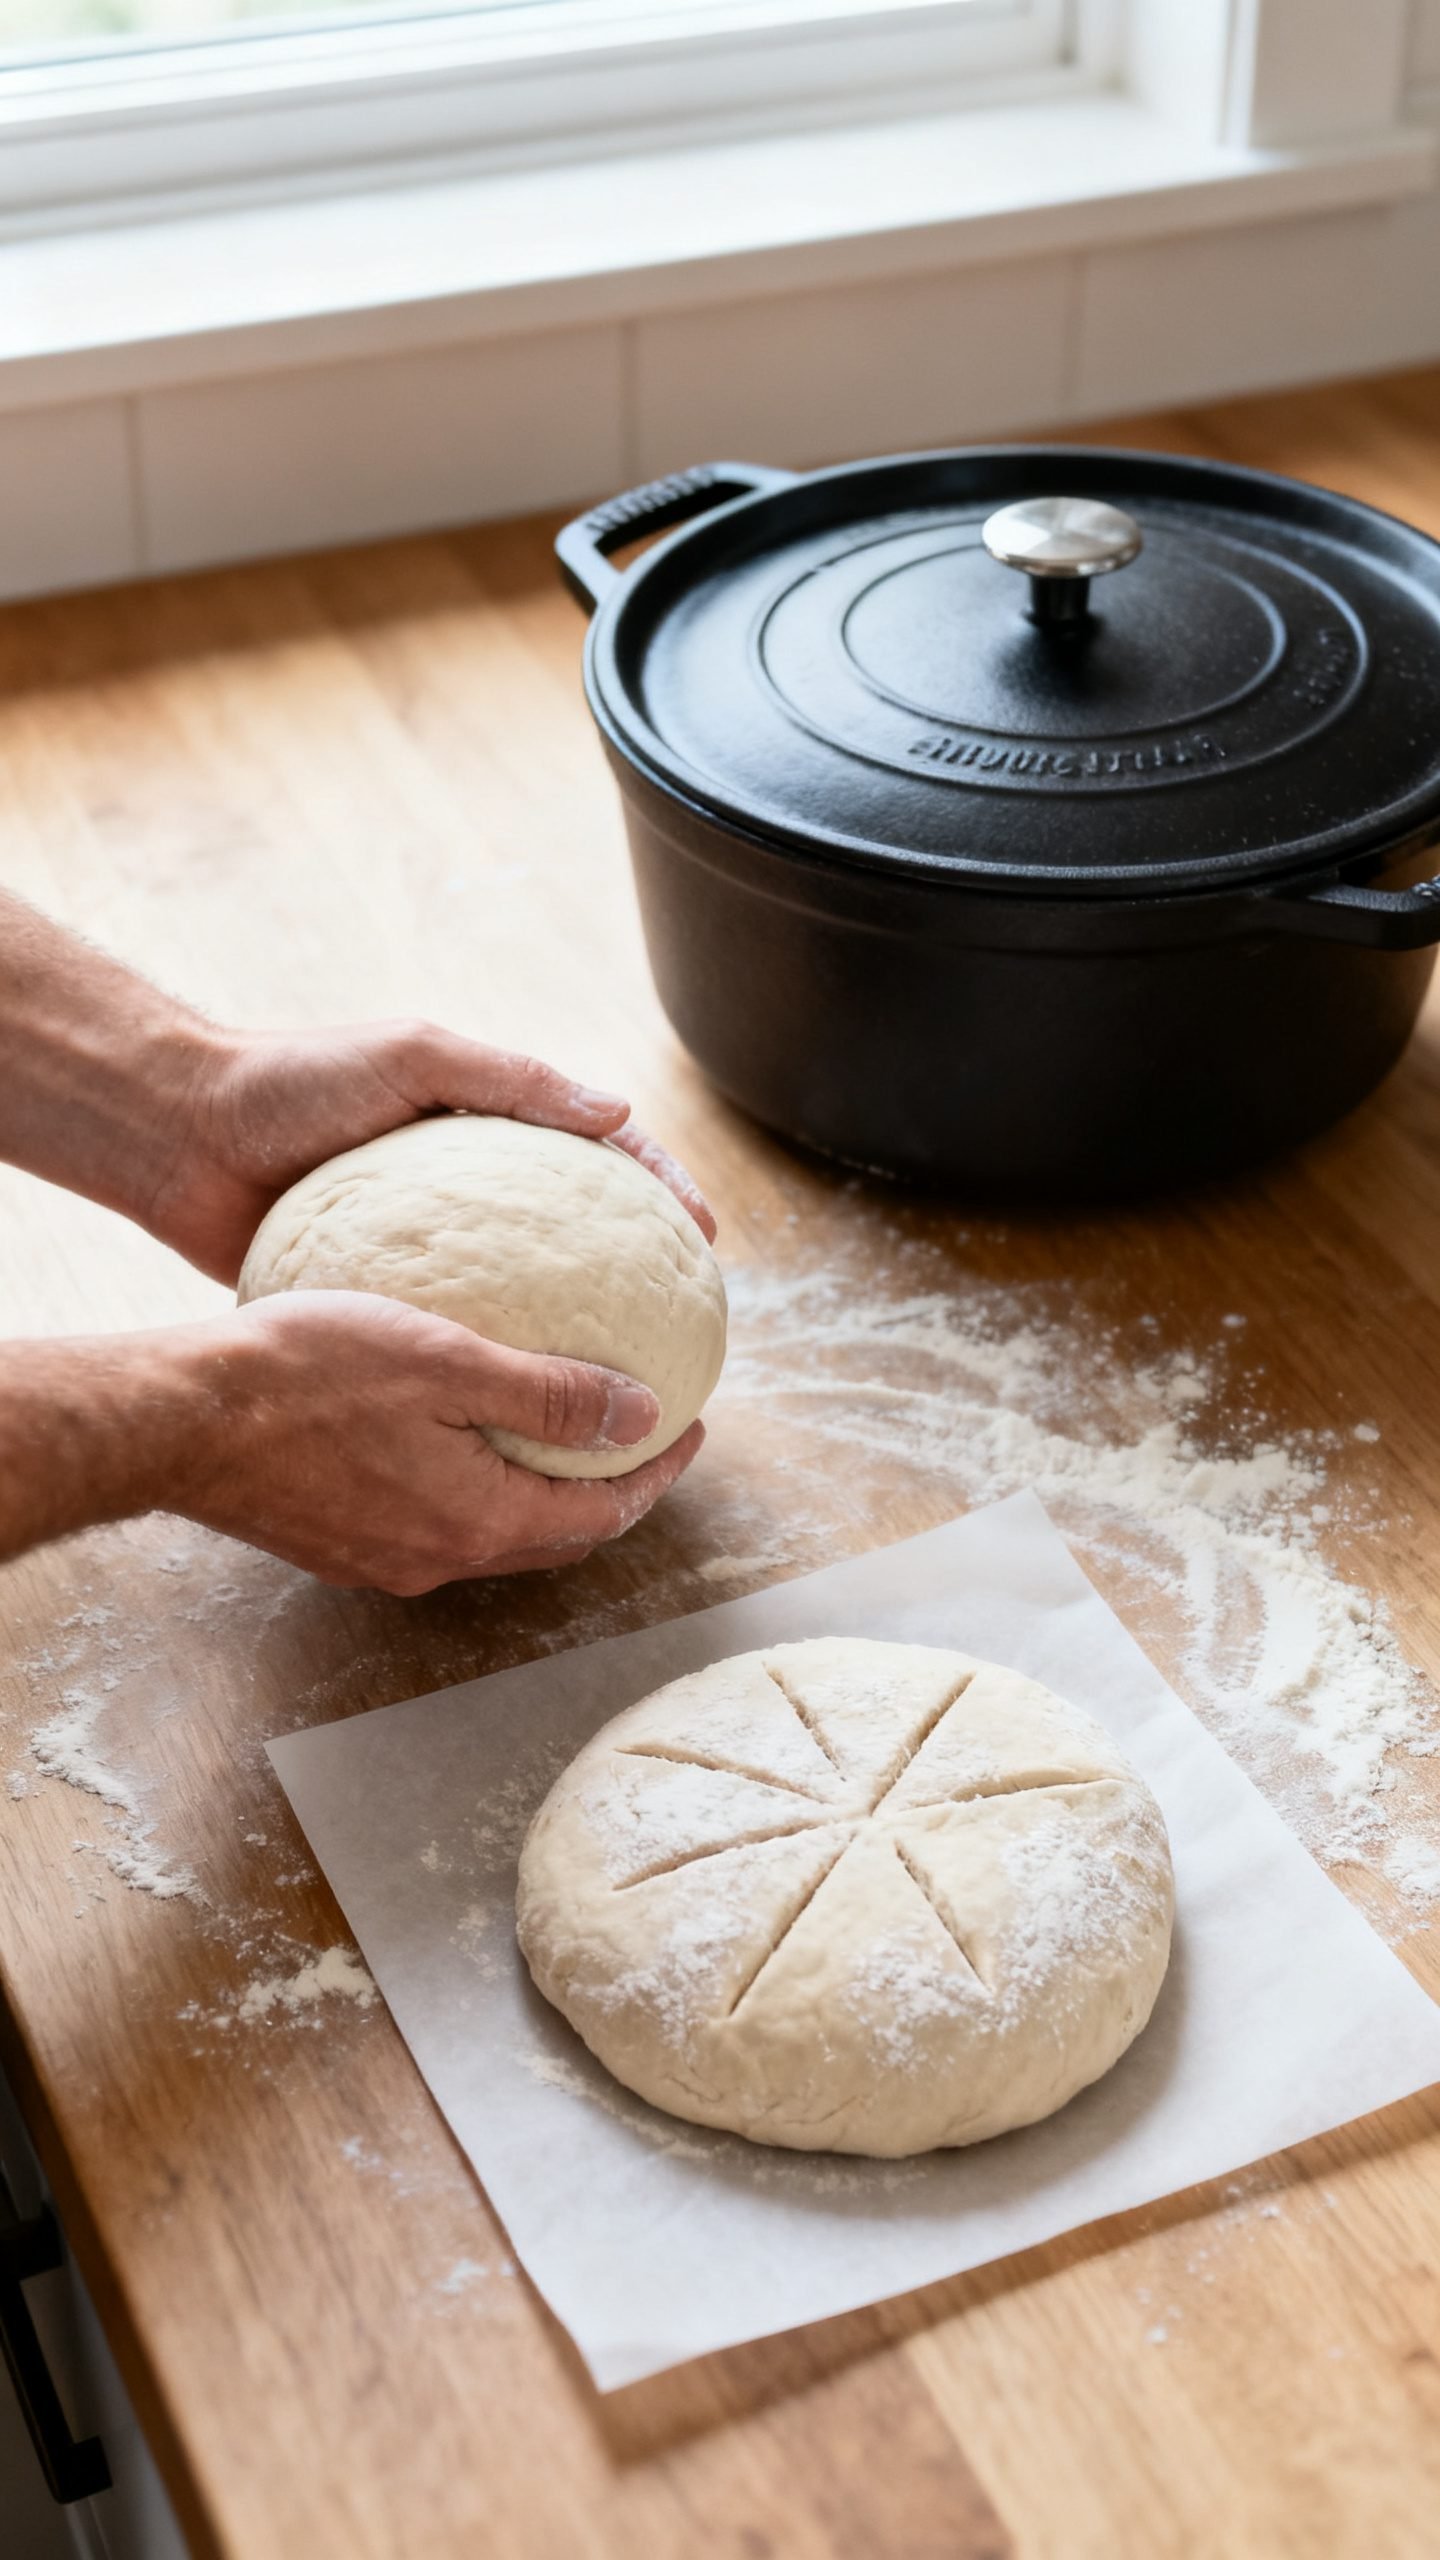
- Preheat the Dutch oven: Place a 4–6 quart Dutch oven with its lid in the oven. Preheat to 450°F (232°C) for at least 30 minutes. Hot pot = great oven spring.
- Shape the loaf: Turn dough onto a lightly floured surface. Dust your hands and a bench scraper. Gently stretch dough into a rough rectangle. Fold the sides toward the center, then roll it into a tight ball, tucking edges underneath. Rest 10–15 minutes seam-side down.
- Final proof: Transfer the dough seam-side down onto a piece of parchment. Dust the top with flour. Cover lightly and let puff for 30–45 minutes while the pot finishes heating. The dough should look slightly jiggly when shaken.
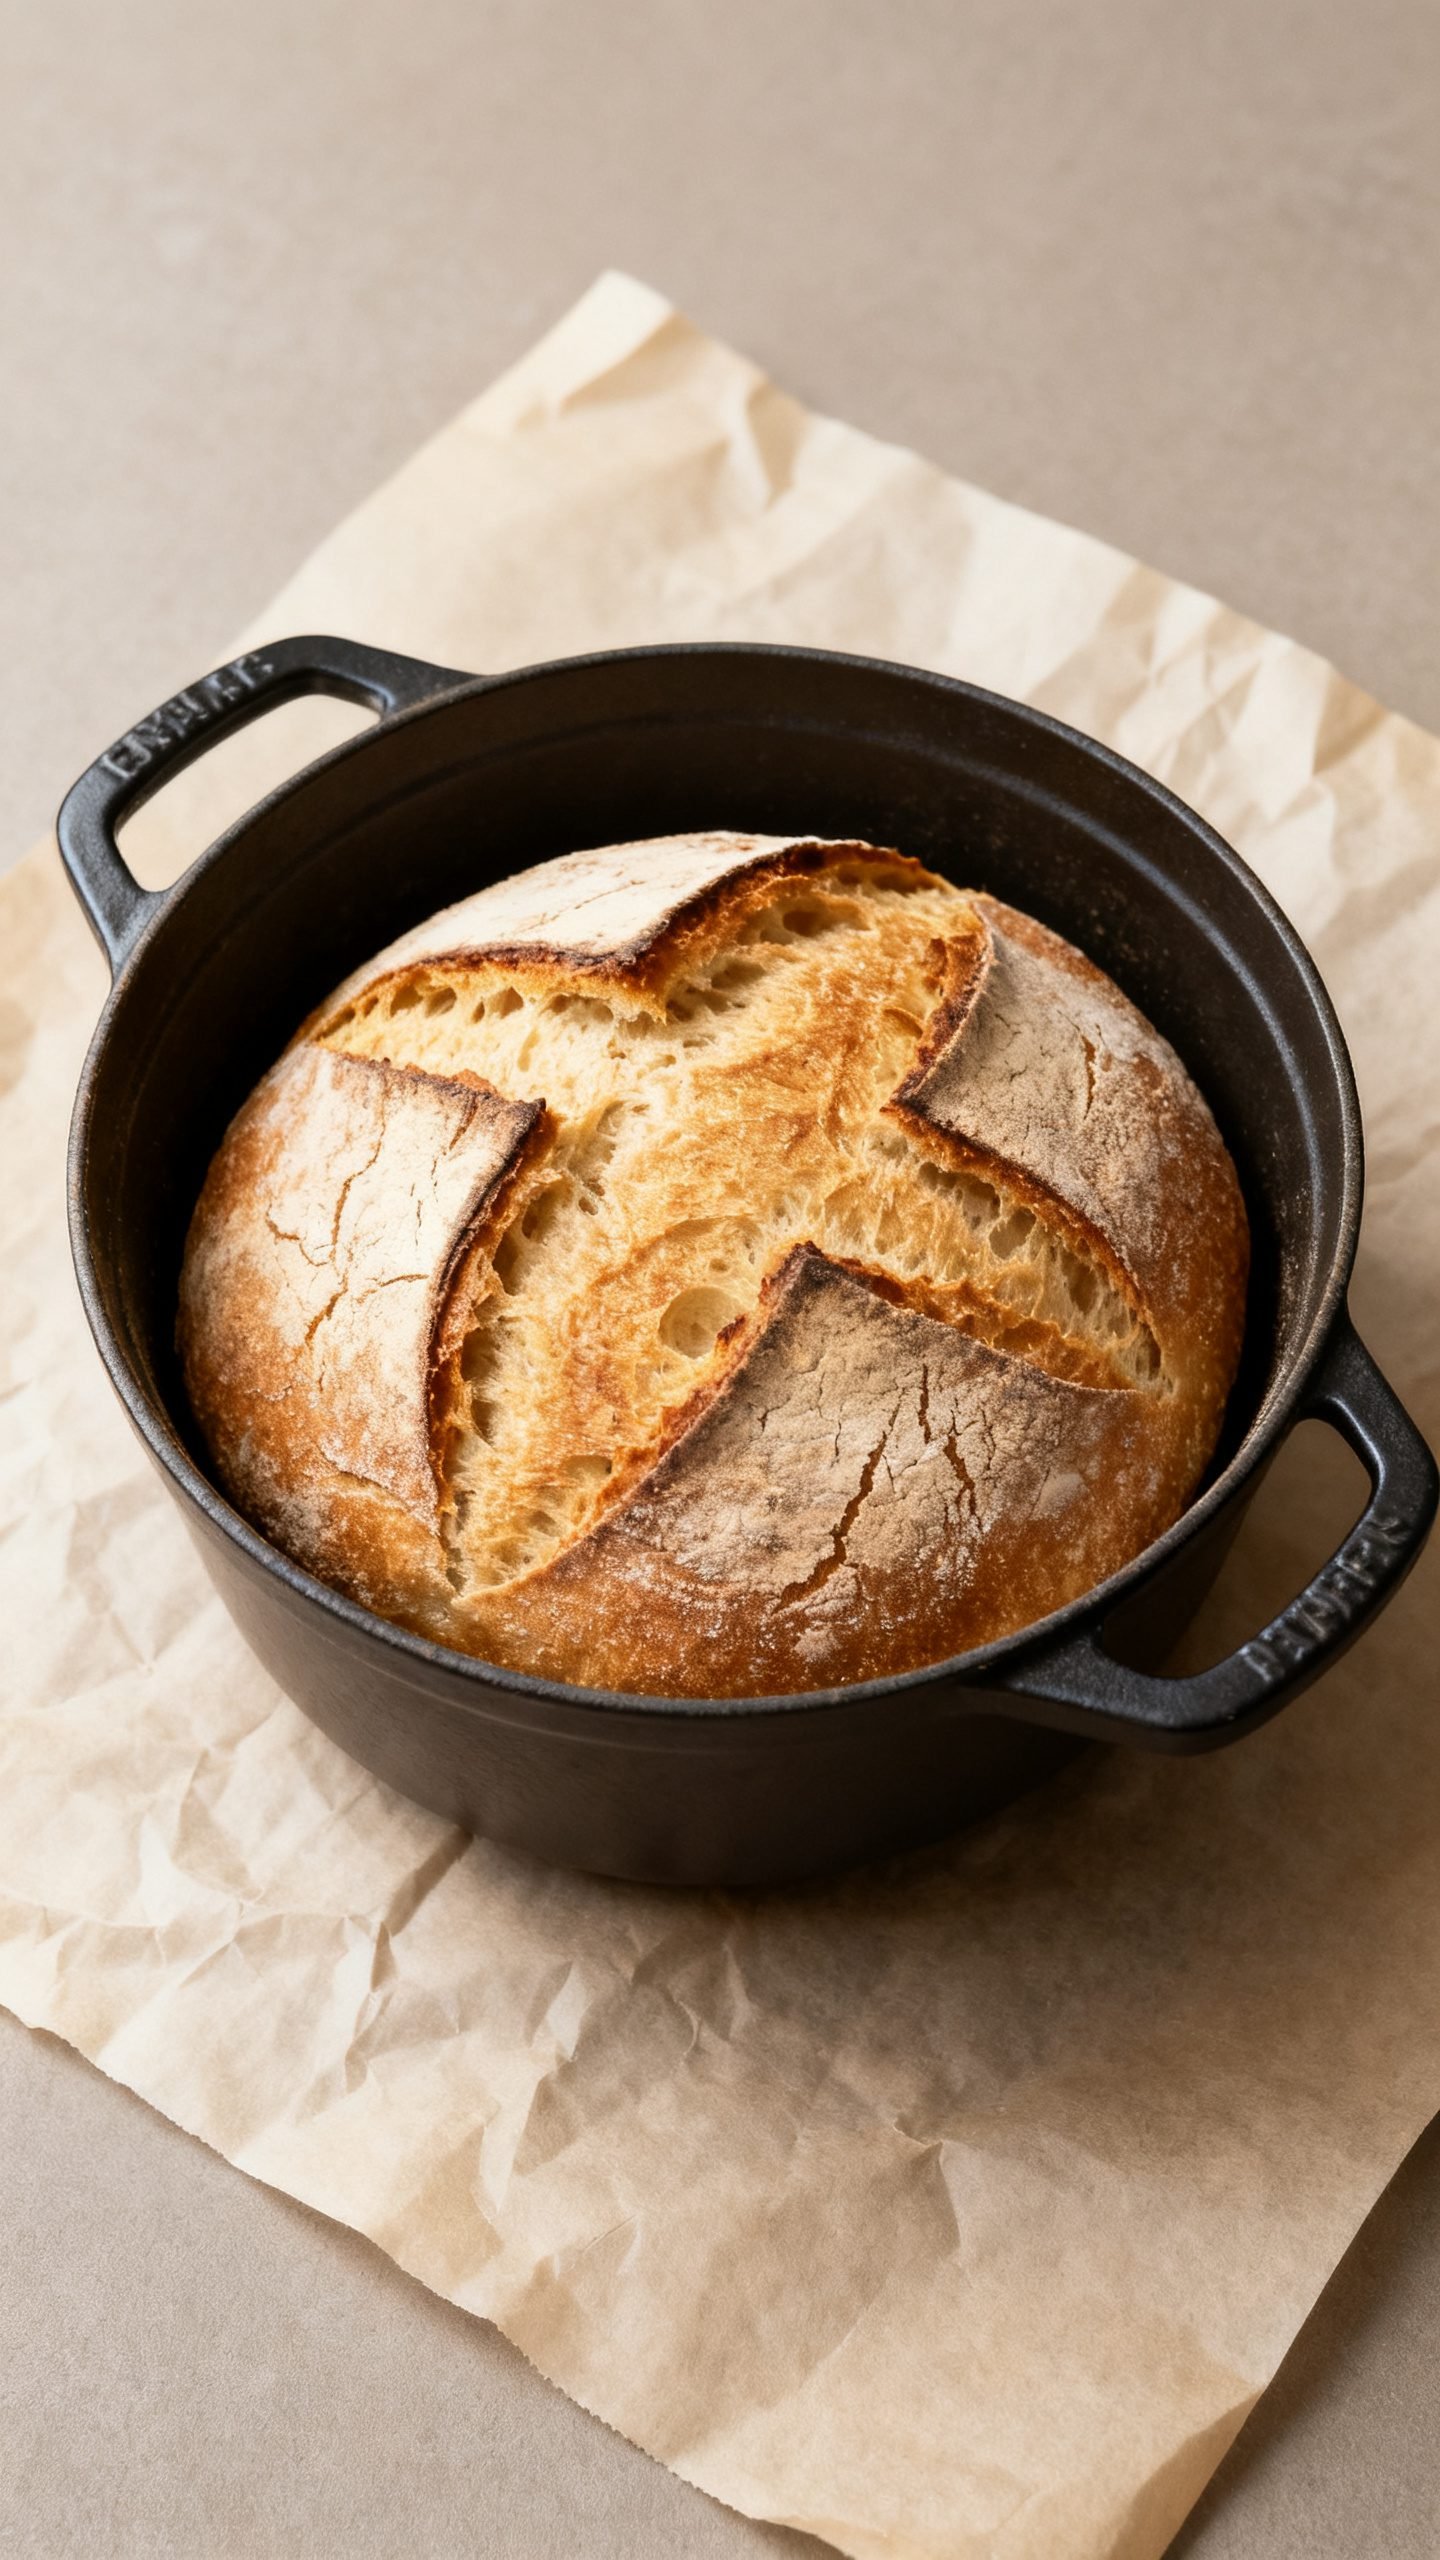
- Score the dough: Use a sharp knife or lame to cut a 1/2-inch deep slash across the top. This directs expansion and prevents blowouts.
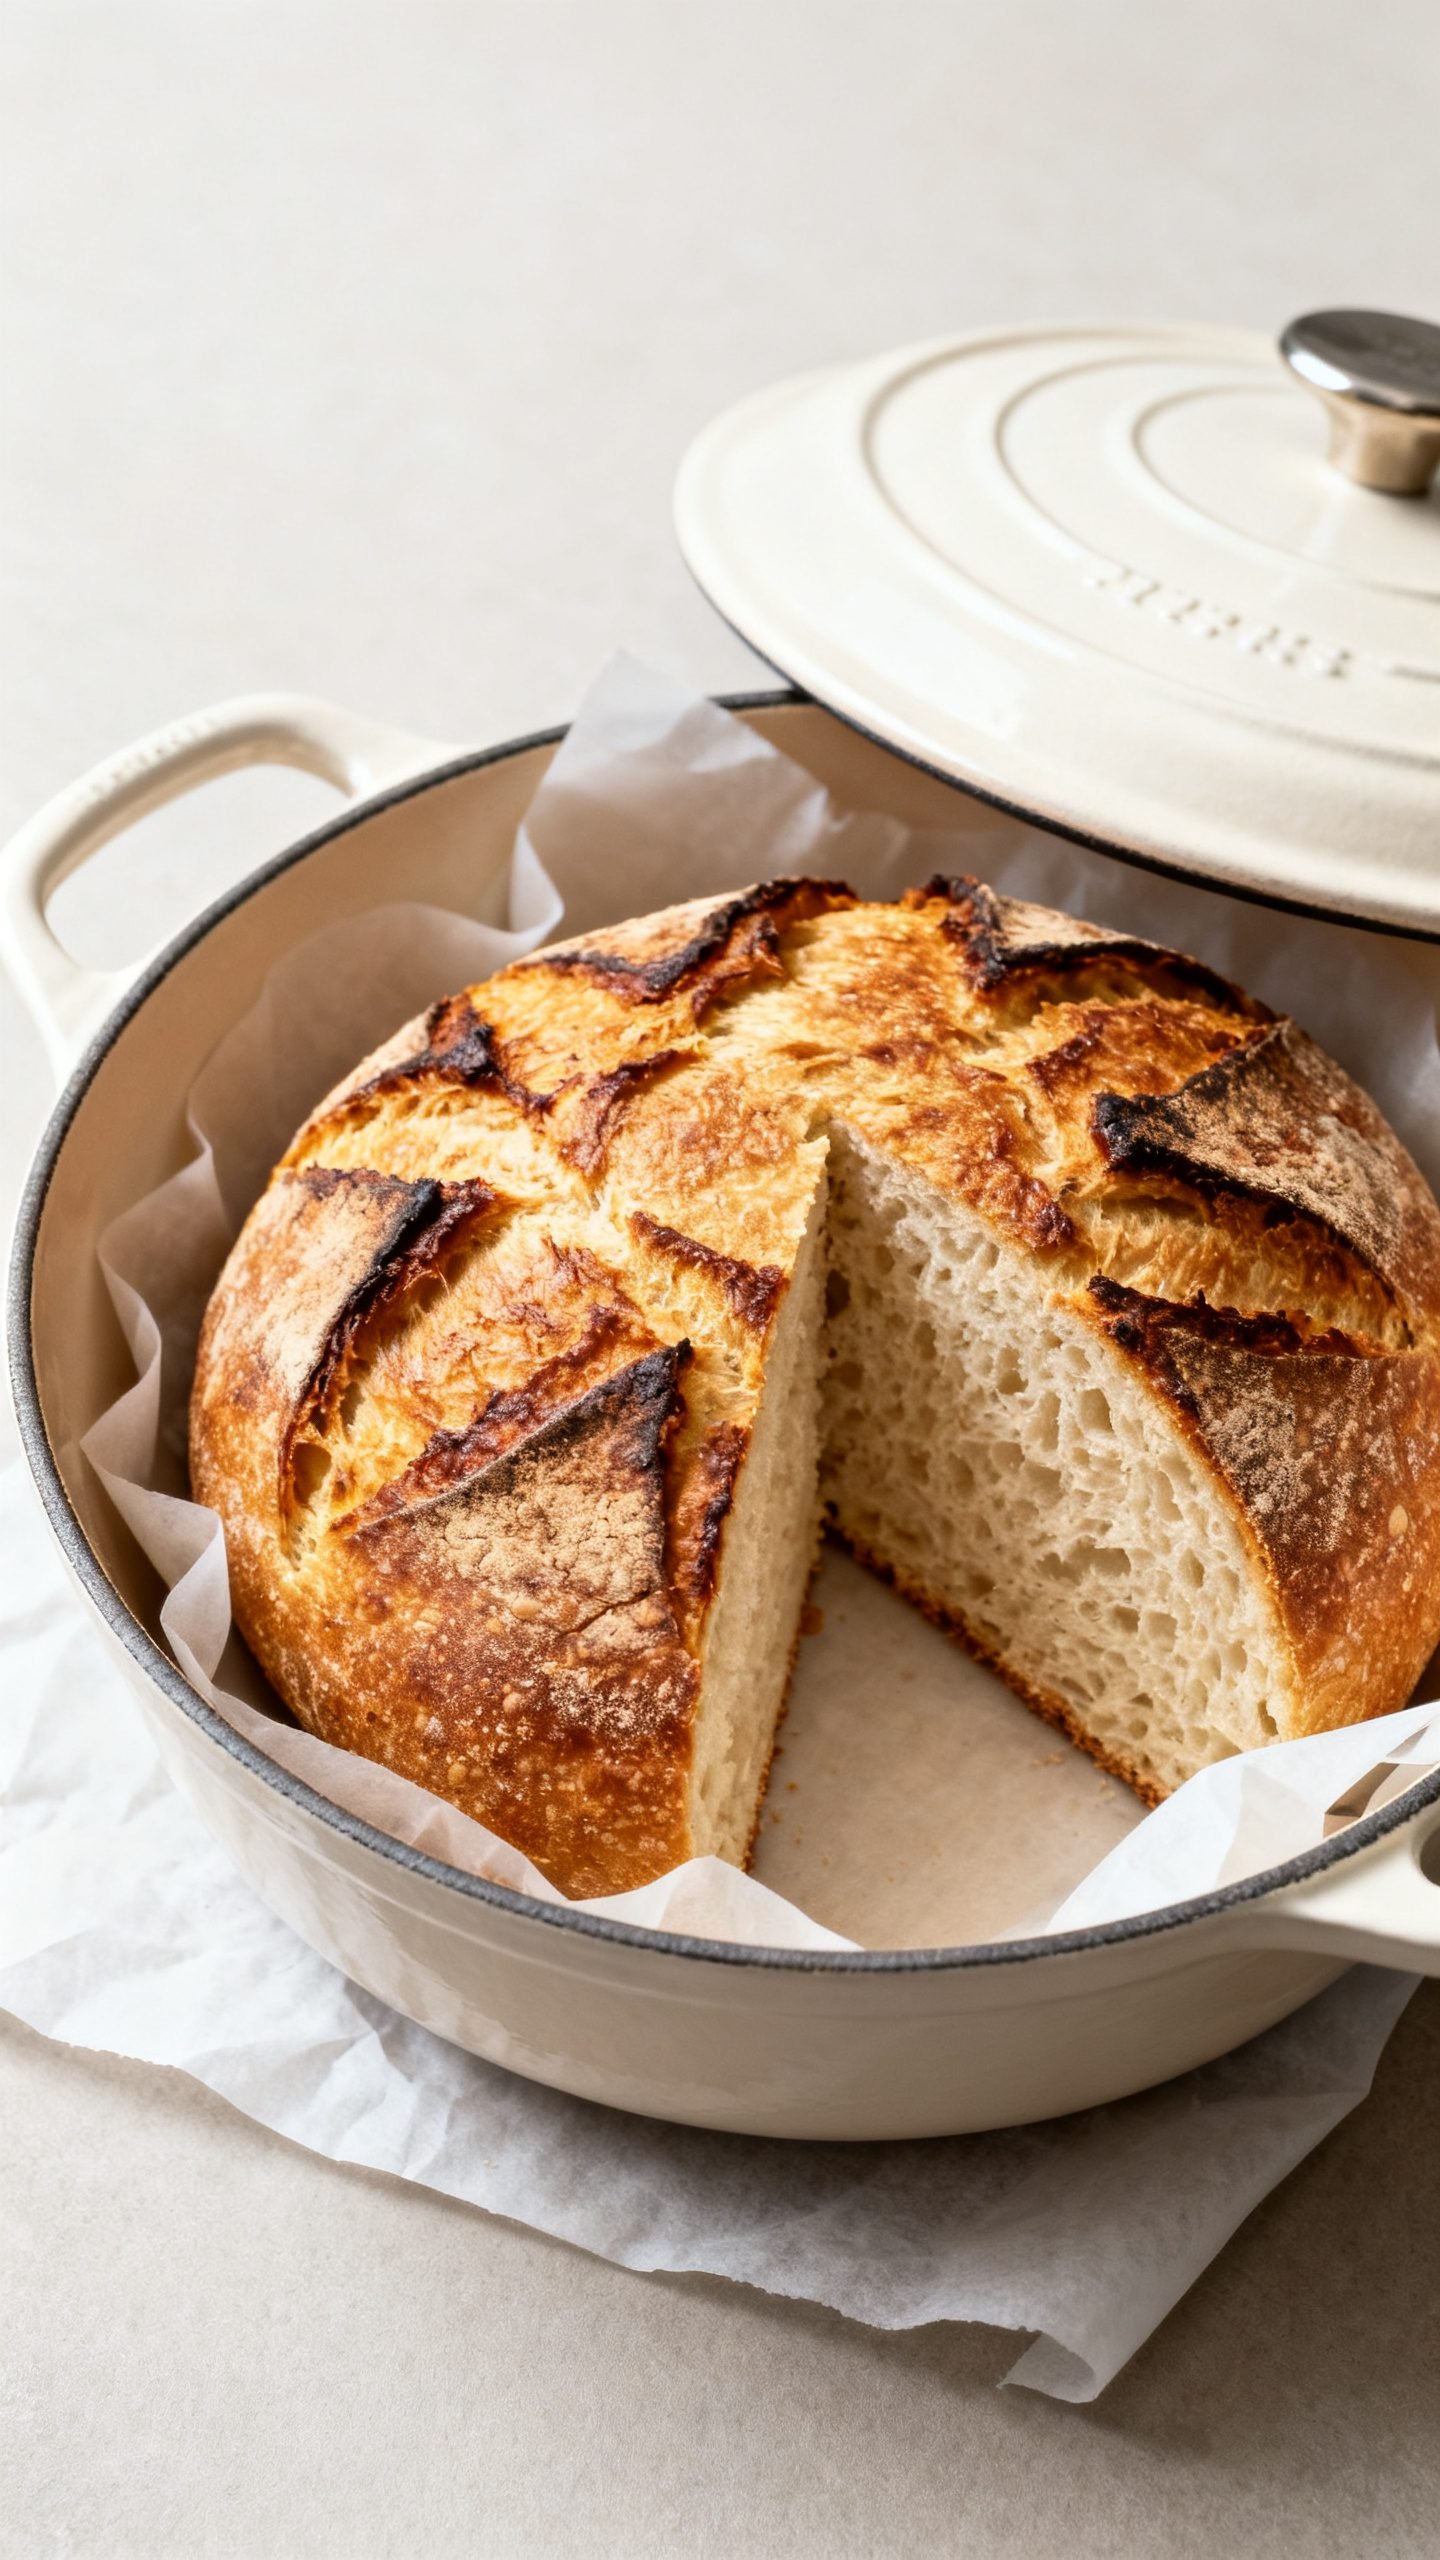
- Bake covered: Carefully lower the parchment and dough into the hot Dutch oven. Cover and bake for 30 minutes.
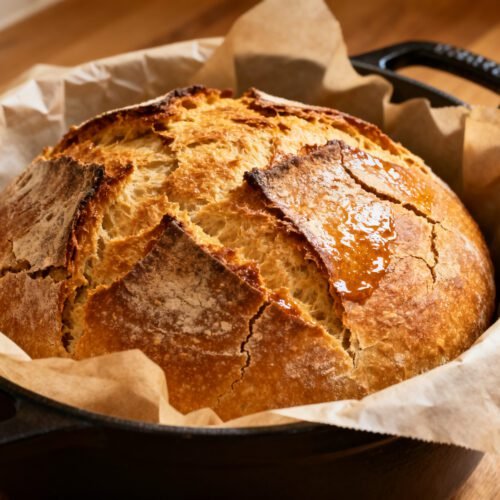
- Finish uncovered: Remove the lid and bake another 12–18 minutes until deep golden brown with blistered crust. Internal temperature should reach 205–210°F (96–99°C).
- Cool completely: Lift the loaf out by the parchment and place on a rack. Cool at least 1 hour before slicing so the crumb sets.
Helpful Tips for Success
- Use a scale: Weighing flour and water improves consistency.
- Hydration matters: If dough feels dry, add 1–2 teaspoons water. If too wet to handle, dust with flour during shaping.
- Don’t rush cooling: Cutting too soon compresses the crumb and releases steam that keeps the center gummy.
- Score with confidence: A bold, single slash encourages an attractive ear and open crumb.
How to Store Your Crusty Dutch Oven Bread
- Room temperature: Keep the cooled loaf cut-side down on a wooden board, loosely covered with a clean towel, for up to 2 days. This preserves the crust.
- Paper, not plastic: Store in a paper bag or a bread box to avoid sogginess. Plastic softens the crust.
- Freeze for later: Slice, wrap tightly in foil or plastic, and place in a freezer bag. Freeze for up to 2 months. Toast slices straight from frozen.
- Revive the crust: Heat the loaf at 350°F for 8–10 minutes to re-crisp day-old bread.
Benefits of Baking This Simple Artisan Loaf
- Reliable results: The Dutch oven controls heat and steam, so your loaf rises tall with a bronzed crust every time.
- Budget-friendly: Five basic ingredients make a bakery-quality loaf for a fraction of the price.
- Flexible schedule: Same-day or overnight fermentation both work beautifully.
- Customizable foundation: This base recipe welcomes herbs, seeds, and mix-ins without complicating the method.
- Skill-building: You’ll learn core bread techniques—hydration, folding, scoring—that carry over to other bakes.
What to Avoid for Best Results
- Don’t skip preheating the pot: A cold Dutch oven limits oven spring and crust development.
- Avoid too hot water: Water hotter than 110°F can kill yeast and stall fermentation.
- Don’t add too much flour while shaping: Excess flour tightens the dough and inhibits rise.
- Don’t overproof: If the dough doubles and then collapses, it may bake flat. Aim for puffy and jiggly, not saggy.
- Don’t slice early: Let the loaf cool so the crumb sets and moisture redistributes.
Variations You Can Try
- Seeded crust: Brush the shaped dough lightly with water and roll in sesame, poppy, or sunflower seeds before the final proof.
- Garlic and herb: Mix 1–2 teaspoons dried rosemary or thyme and 1 teaspoon garlic powder into the flour.
- Olive and rosemary: Fold 1/2 cup chopped, well-drained olives and 1 tablespoon chopped fresh rosemary into the dough after the first rise.
- Whole wheat blend: Swap 1 cup bread flour for whole wheat. Add 1–2 teaspoons extra water if the dough feels stiff.
- Everything seasoning: Sprinkle 1–2 tablespoons everything bagel seasoning over the top after scoring.
- Parmesan crust: Dust the dough with grated Parmesan before baking uncovered for a savory, lacy finish.
FAQ
Can I make this without a Dutch oven?
Yes. Preheat a baking stone or sheet at 475°F. Place a metal pan on the lower rack. Transfer the dough onto the hot stone, pour 1 cup hot water into the pan to create steam, and bake. The crust won’t be quite as bold, but it still turns out great.
Can I use sourdough starter instead of yeast?
Absolutely. Use 100 g active starter, reduce water to about 325 g, and extend fermentation until doubled and puffy. Timings vary based on starter strength and room temp.
Why is my crust too hard?
Overbaking or low hydration can cause an overly hard crust. Check internal temp at 205–210°F and store at room temp in a paper bag. Reheat briefly to refresh.
My loaf didn’t rise much. What happened?
Likely underproofing, old yeast, or a cold oven/pot. Check yeast freshness, preheat longer, and give the dough more time to puff before baking.
Can I add butter or oil?
Yes, add 1–2 teaspoons to the dough for a slightly softer crumb and crust. Keep hydration balanced by adding a touch more flour if the dough feels overly slack.
How do I get bigger holes in the crumb?
Use higher hydration, avoid excessive flour during shaping, and handle the dough gently to preserve gas. A longer cold fermentation also helps.
What size Dutch oven works best?
A 4–6 quart round Dutch oven fits a standard 1 1/2–2 pound loaf and encourages height without spreading.
Conclusion
This 5-ingredient Dutch oven bread brings bakery magic to your kitchen with minimal effort. You mix a simple dough, let time build flavor, and let the hot pot deliver that crackly crust and soft, open crumb. Whether you bake it today or let it chill overnight, you’ll slice into a beautiful artisan loaf you can serve with soup, swipe with butter, or turn into the best toast of your week.
Once you try it, you’ll keep flour on hand and your Dutch oven ready. Fresh bread, on demand—no bakery run required.
5-Ingredient Dutch Oven Bread | Easy Homemade Crusty Artisan Loaf
Ingredients
Ingredients
- 3 cups (360 g) bread flour or all-purpose flour
- 1 1/2 cups (360 g) warm water (about 100–105°F)
- 2 teaspoons (8 g) fine sea salt
- 1 teaspoon (3 g) instant yeast or active dry yeast
- 1 teaspoon sugar or honey
Instructions
Instructions
- Whisk the flour, salt, and yeast together in a large bowl.
- Stir the sugar or honey into the warm water, then pour it into the flour mixture and mix until a shaggy, sticky dough forms.
- Cover the bowl and let rise at room temperature until puffy and larger, about 1–2 hours.
- With damp hands, perform 3–4 stretch-and-folds around the dough to strengthen it.
- Cover and let rise another 45–60 minutes at room temperature, or refrigerate covered for 8–18 hours for deeper flavor.
- Place a 4–6 quart Dutch oven with its lid in the oven and preheat to 450°F for at least 30 minutes.
- Turn the dough onto a lightly floured surface, gently shape into a tight ball, and rest seam-side down for 10–15 minutes.
- Transfer the dough seam-side down onto a piece of parchment, dust the top with flour, cover lightly, and proof 30–45 minutes until slightly jiggly.
- Score a 1/2-inch deep slash across the top to direct expansion.
- Carefully lower the parchment with the dough into the hot Dutch oven, cover, and bake for 30 minutes.
- Remove the lid and bake uncovered for 12–18 minutes more until deep golden brown and an internal temperature of 205–210°F.
- Lift the loaf out to a rack and cool completely for at least 1 hour before slicing.


